Plan B is a standalone printer. It requires no computer to function. The main input is done with the interface. The interface consists of a 20×4 character LCD display and a keyboard with 8 buttons and a rotary button.
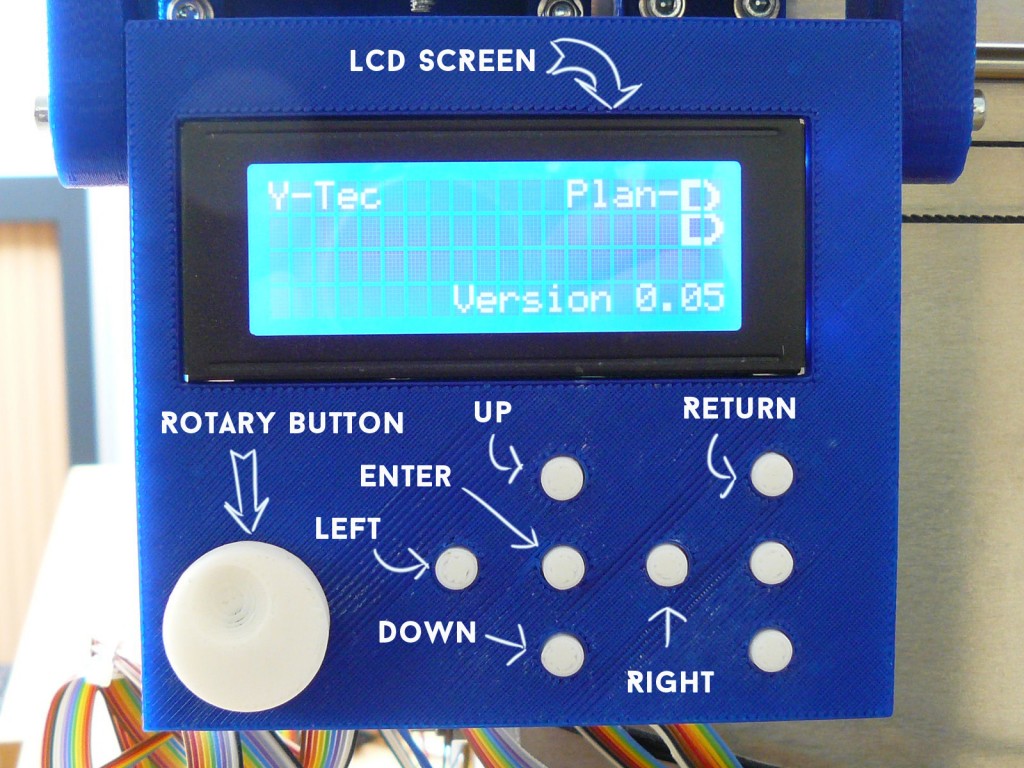
To navigate the menu, 6 buttons are used. These buttons are: left, right, up, down, enter and return. Also the rotary button can be used for up and down movements in the menu and to input values in some of the other menus.
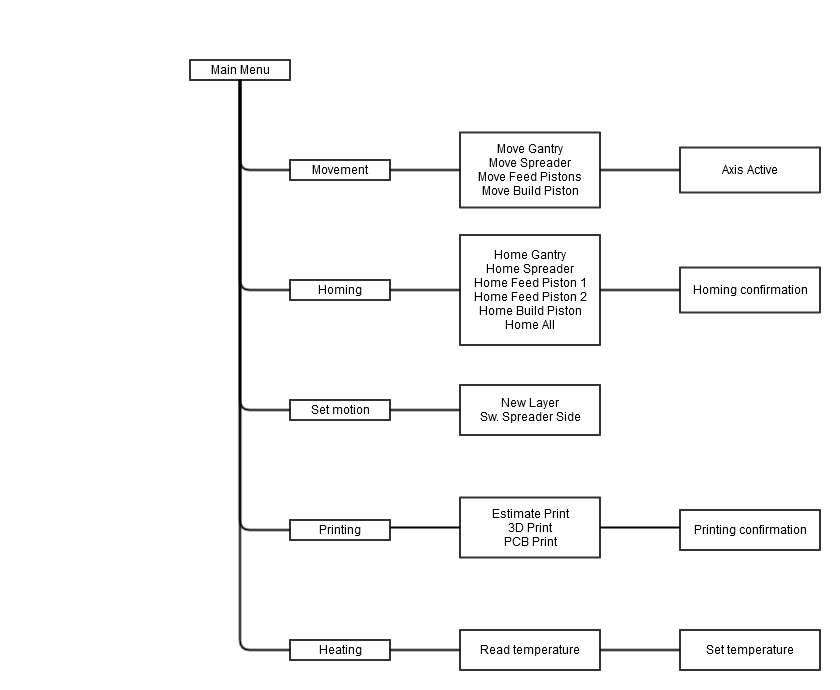
The menu consists of the following submenus:
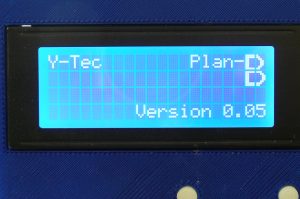
Opening screen: Shows the current version number and for what printer it is being used. Press any key to continue.
[ezcol_1half]
[ezcol_1half_end]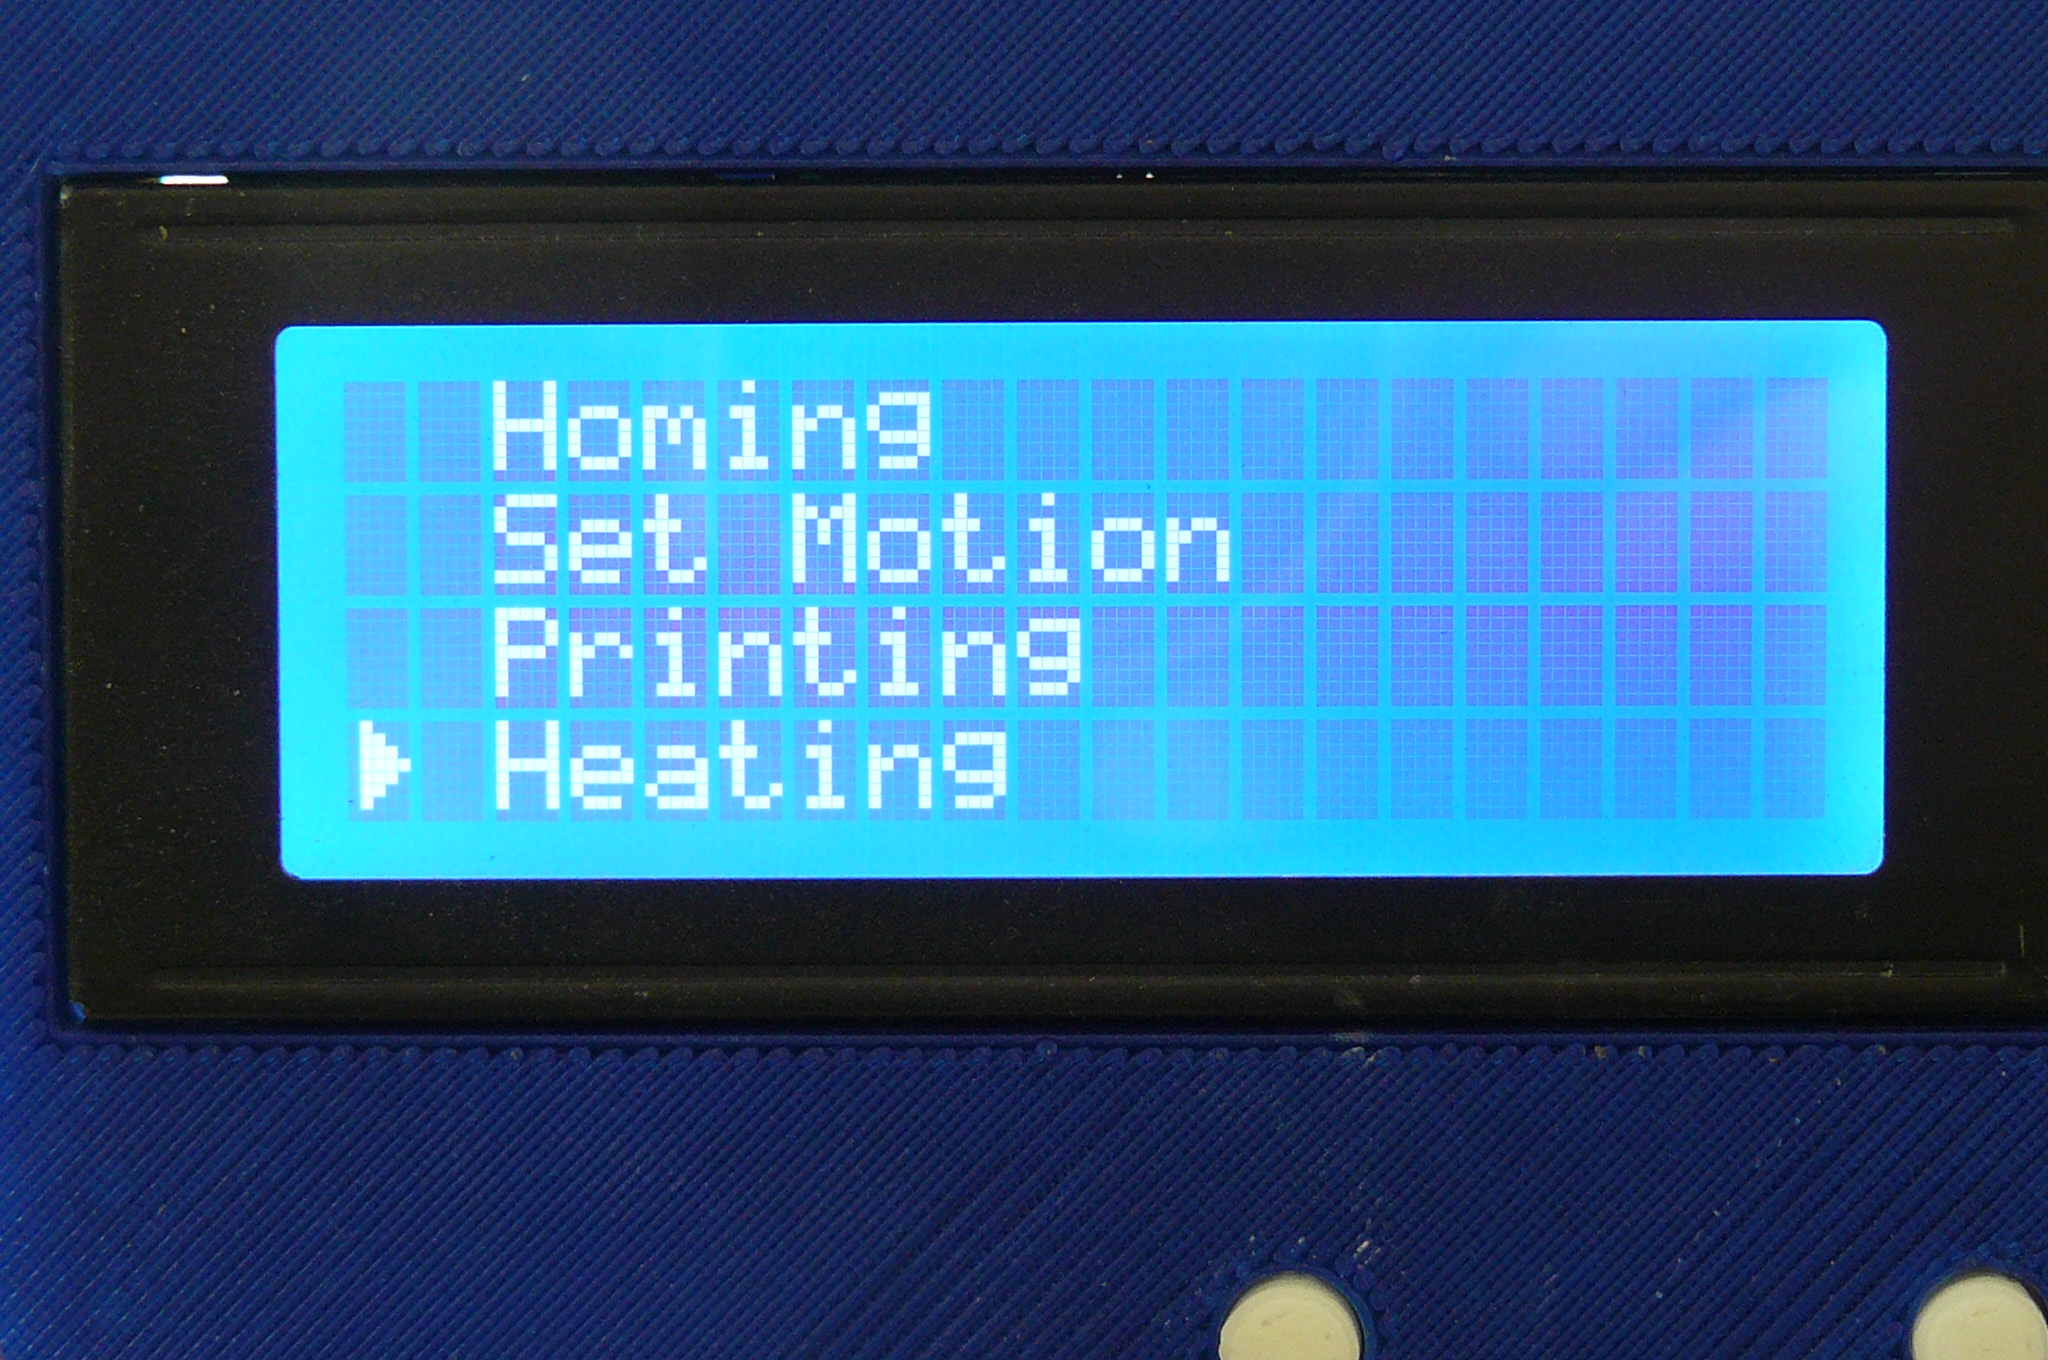 [/ezcol_1half_end]
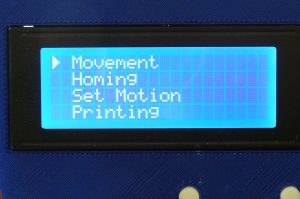
Main menu: Shows all of the submenu branches: movement, Homing, Set Motion, Printing and Heating. Use to rotary button or up and down to navigate and enter of right to go to the submenu.
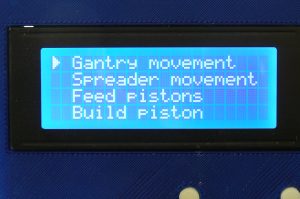
Movement: Shows all manually controllable axes: Gantry (X and Y), Spreader, Feed Pistons (F1 and F2) and Build Piston. Use to rotary button or up and down to navigate, enter of right to go to the submenu and left or return to go back to the main menu.

Gantry movement active: Gantry motors (X and Y) are powered. Axes can be controlled with up, down, left and right. Go back to the movement menu with the return button.
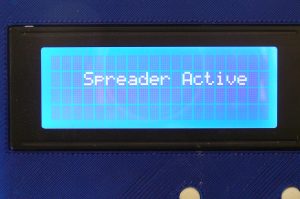
Spreader movement active: spreader motor (S) is powered. Axis can be controlled with the left and right button. Go back to the movement menu with the return button.
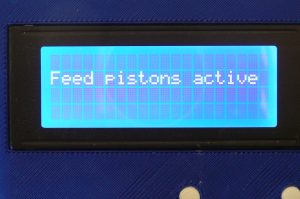
Feed piston movement active: Feed piston motors (F1 and F2) are powered. Axes can be controlled with up, down, left and right. Go back to the movement menu with the return button.
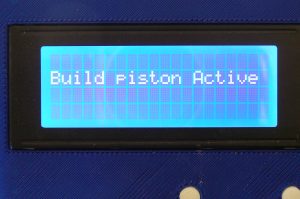
Build piston movement active: Build piston motor (B) is powered. Axis can be controlled with the up and down button. Go back to the movement menu with the return button.
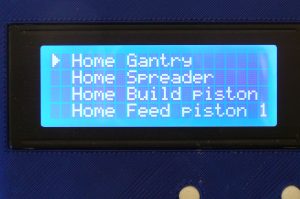
Homing menu: Shows all combination of axes that can be homed. These axes are: Gantry (X and Y), Spreader, Build piston, Feed piston 1, Feed piston 2, and All. Please not that Feed 1, Feed 2 and Build do not have to be connected for Plan B to function. Homing these without the endstops or flags installed will cause problems in the printer. Use to rotary button or up and down to navigate, enter of right to go to the submenu and left or return to go back to the main menu.

Homing confirmation menu: When an axis is selected, the printer asks for confirmation. Press up to home the selected axis and return, down or left to go back to the homing menu.
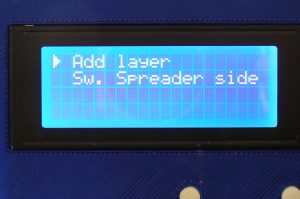
Set motions menu: Shows possible movements that the printer can make on its own. Please not that for set motions to work, the gantry and spreader need to be homed. The set motions are: Add layer and Switch spreader side (not active yet). Use to rotary button or up and down to navigate, enter of right to go to the submenu and left or return to go back to the main menu.
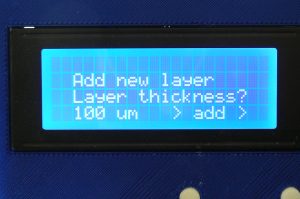
Add layer menu: Allows the user to add a layer of powder to the buildbox. The value shown (default 100µm or 0.1mm) is the layer that will be added. Use the rotary button or up and down to adjust the value, left or return to return to the set motions menu and right to confirm adding the layer.
Switch spreader side menu (not active): Switch spreader side is a function used to switch the side of the spreader, like the add layer function does, without moving the pistons. The function has not been implemented yet.
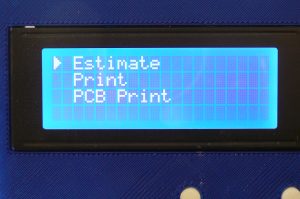
Printing menu: Shows all the possible printing related actions: Estimate, (3D) print and PCB (2D) print. Use to rotary button or up and down to navigate, enter of right to go to the submenu and left or return to go back to the main menu.
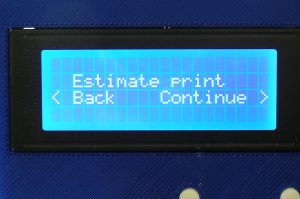
Estimate print: Checks the number of layers to be printed and roughly estimates the printing time. The function is also called before printing starts. Use return or left to return to the printing menu and right to continue with estimating the print.

(3D) print: Final menu before 3D printing. Checks and estimates the file and then starts printing. Please note the printer must be filled and prepared before starting with the print. This function prints the entire file. Use return or left to return to the printing menu and right to continue with 3D printing.
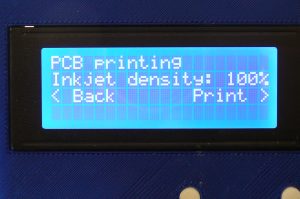
PCB (2D) print: Final menu before PCB (2D) printing. Checks and estimates the file and then starts printing. This function prints only the first layer of the file. Use return or left to return to the printing menu and right to continue with 3D printing.
Temperature menu: Shows the set and current temperature of the buildbox. Use enter to go to set temperature menu and return or left to go back to the main menu.

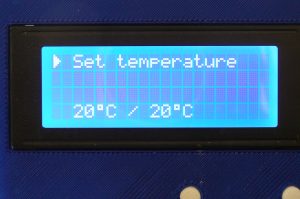
Set temperature menu: used to set the temperature of the buildbox. Use the rotary button or up and down to adjust the value, left or return to return to the temperature menu and right to confirm the temperature
A complete Menu Tree of Plan B