For the guide to assembling the PCB, click here
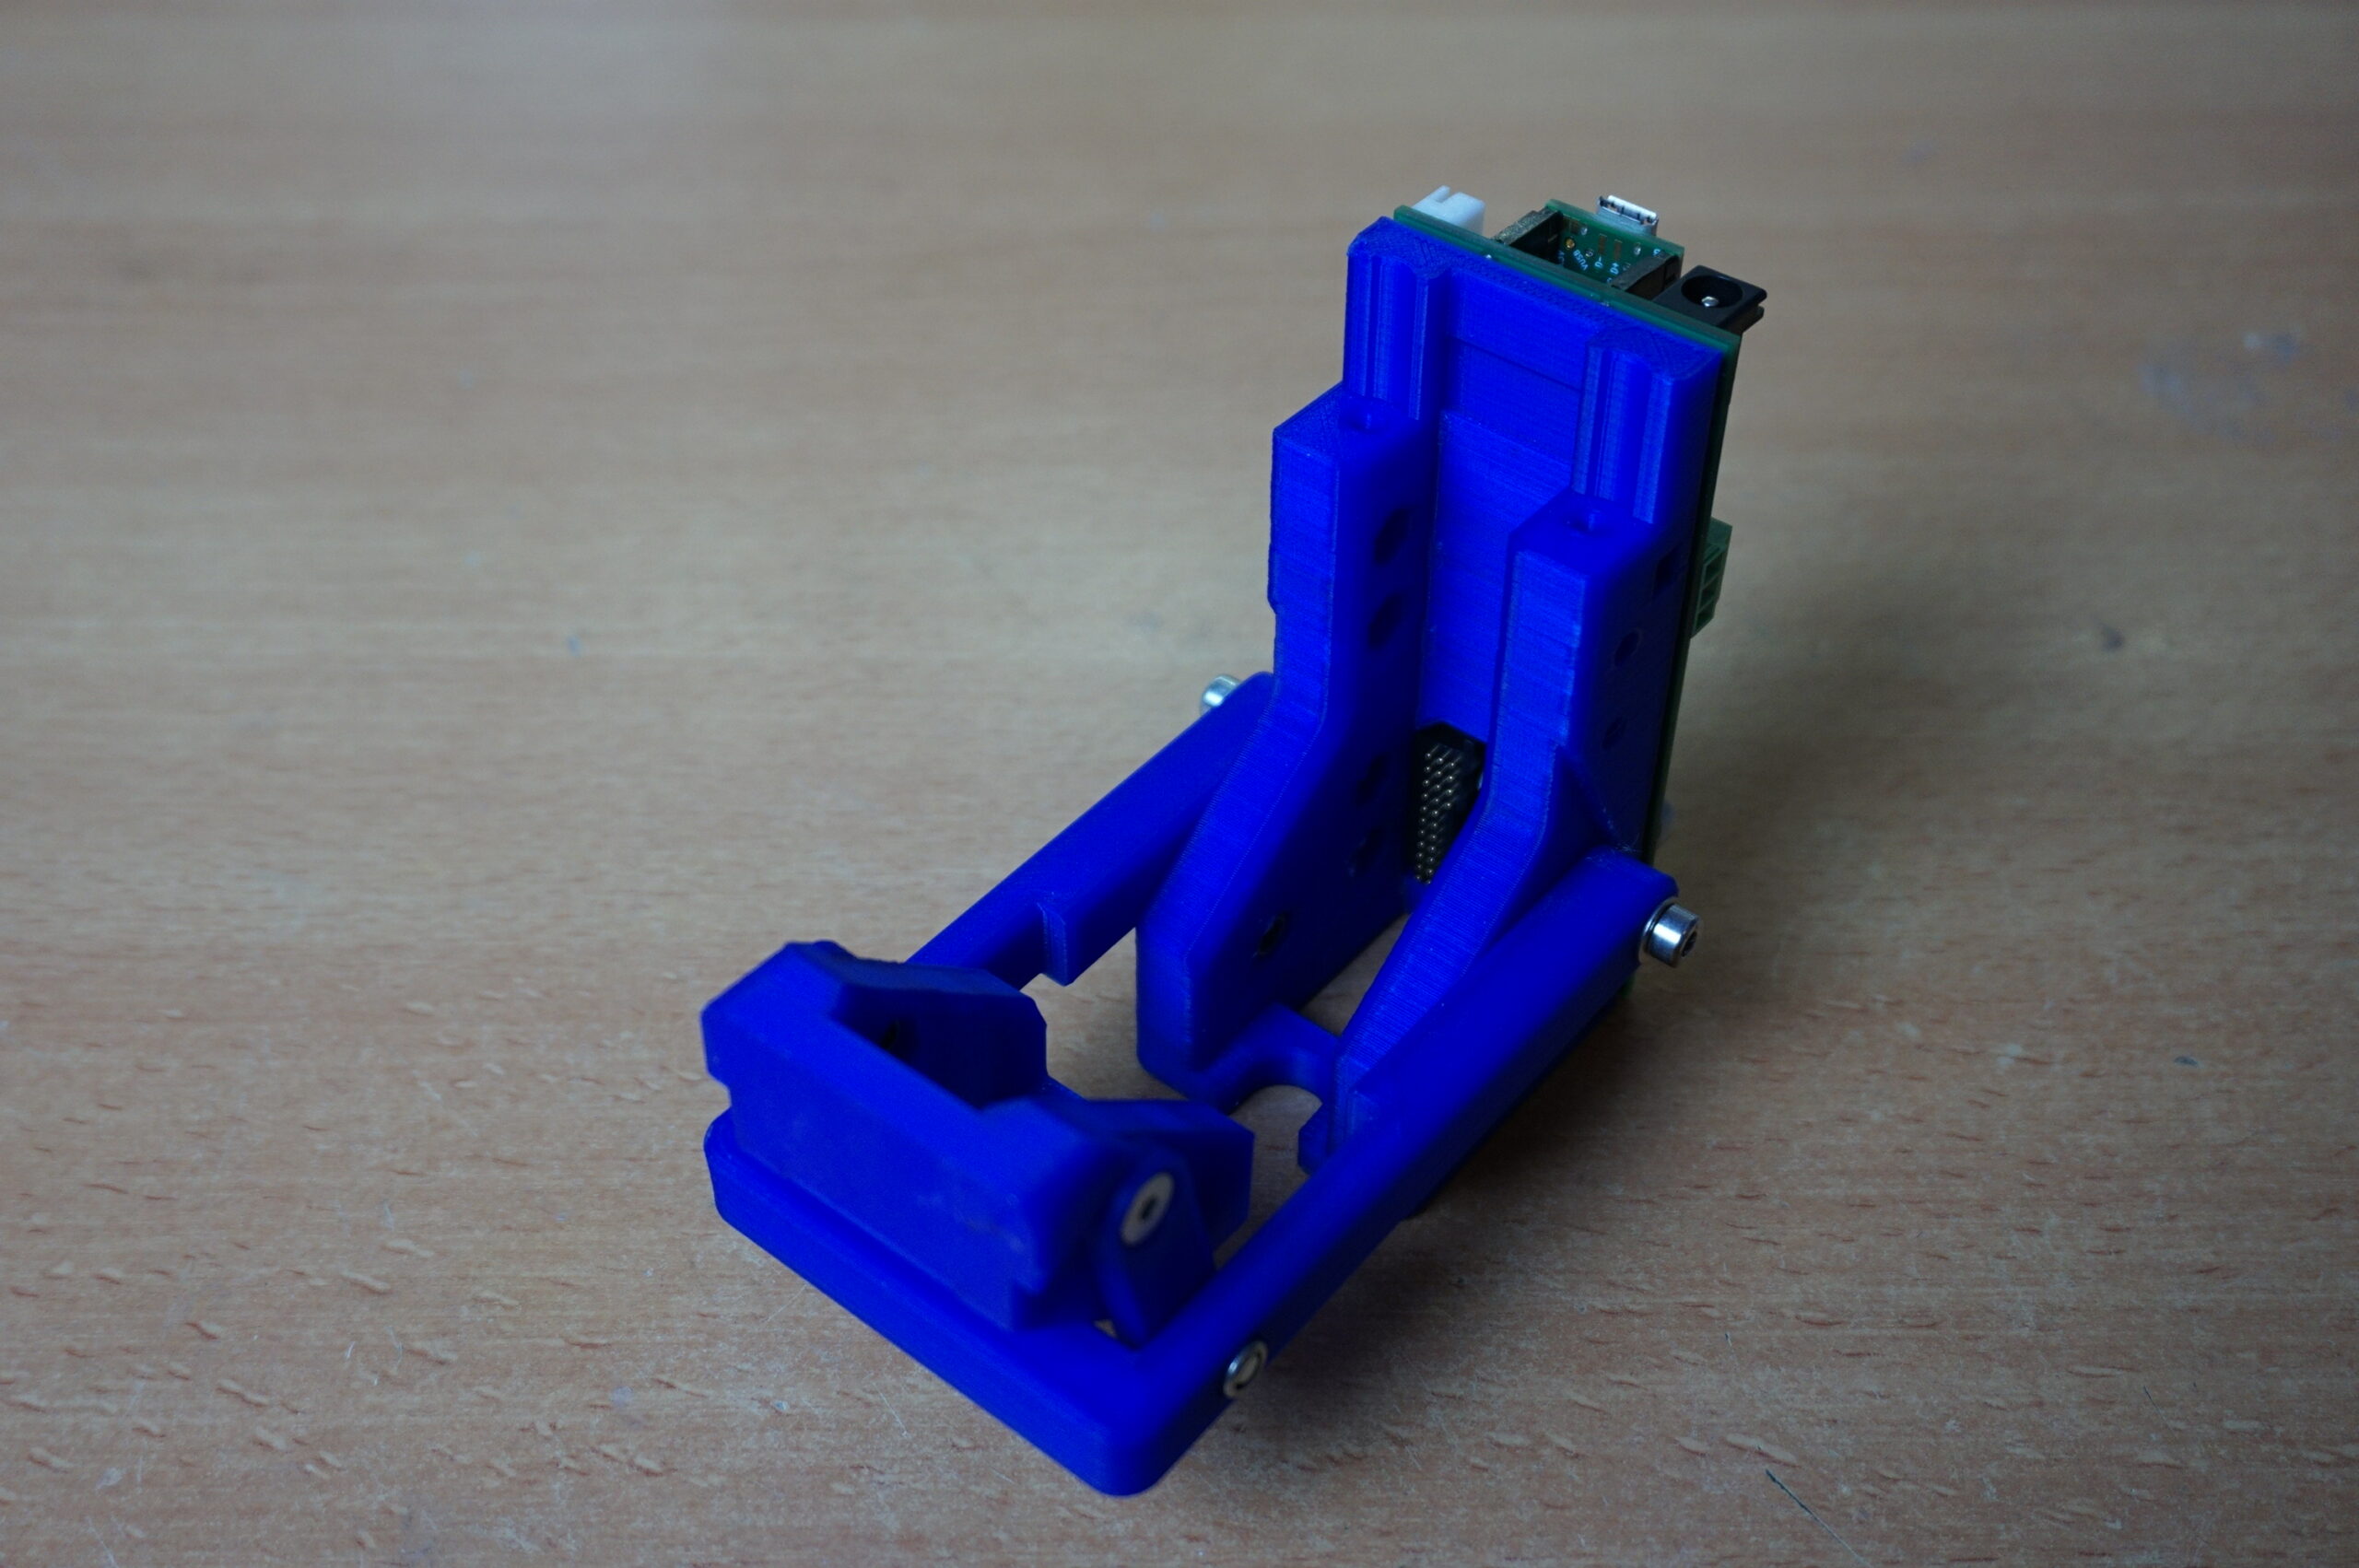
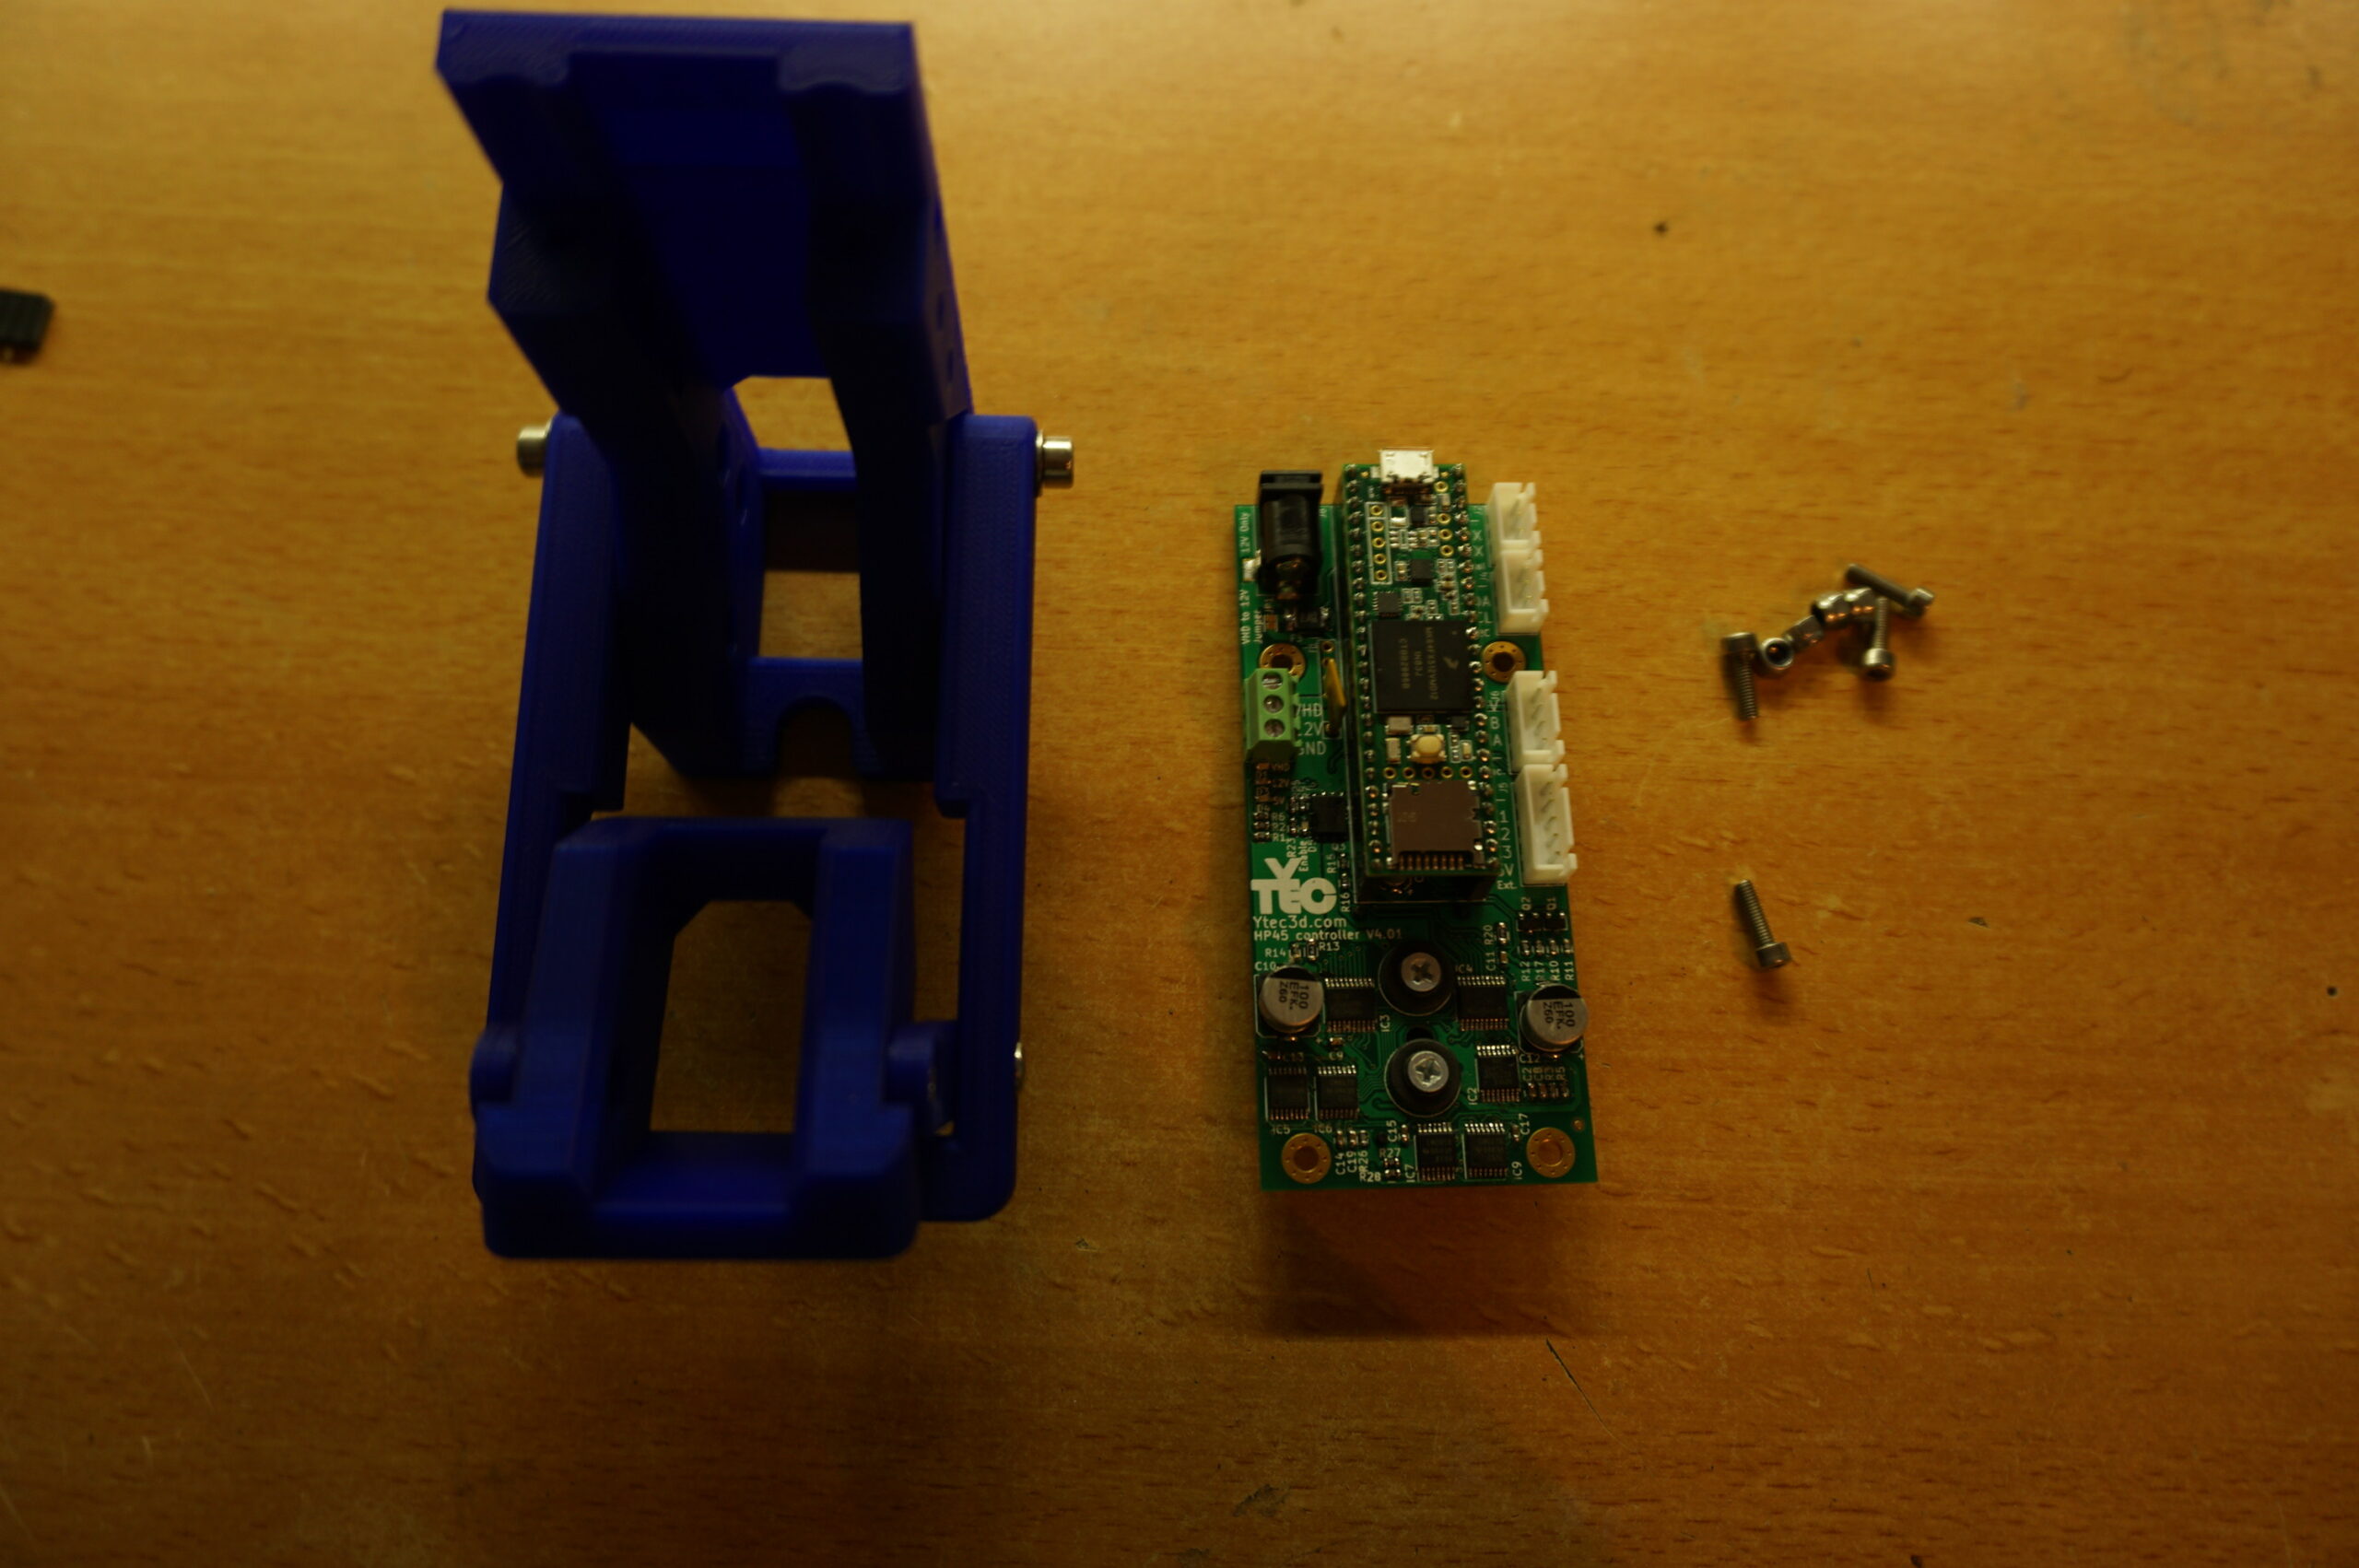
The carriage for the HP45 controller is 3D printed. The files are supportless and should be simple to print. The carriage holds the HP45 and the assembled PCB and aligns the connector with the HP45. The assembly allows for simple loading and unloading of an HP45 printhead. Simple hardware is used to assemble the carriage.
Bill of materials
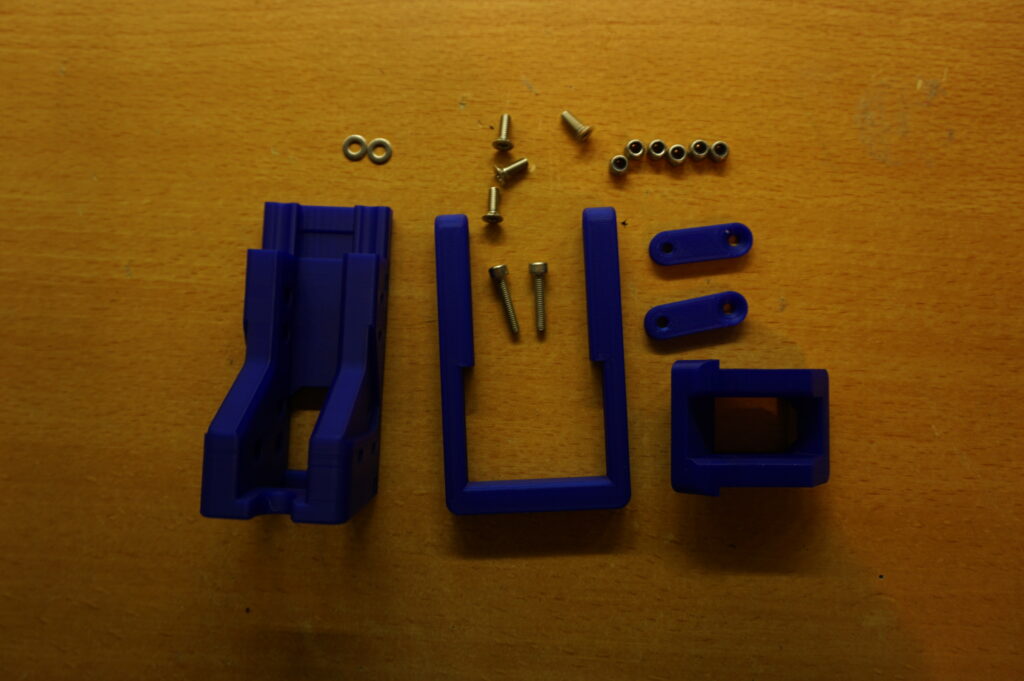
For one HP45 V4 controller carriage you need the following parts:
| Part name | Description | Qty. | Source/supplier |
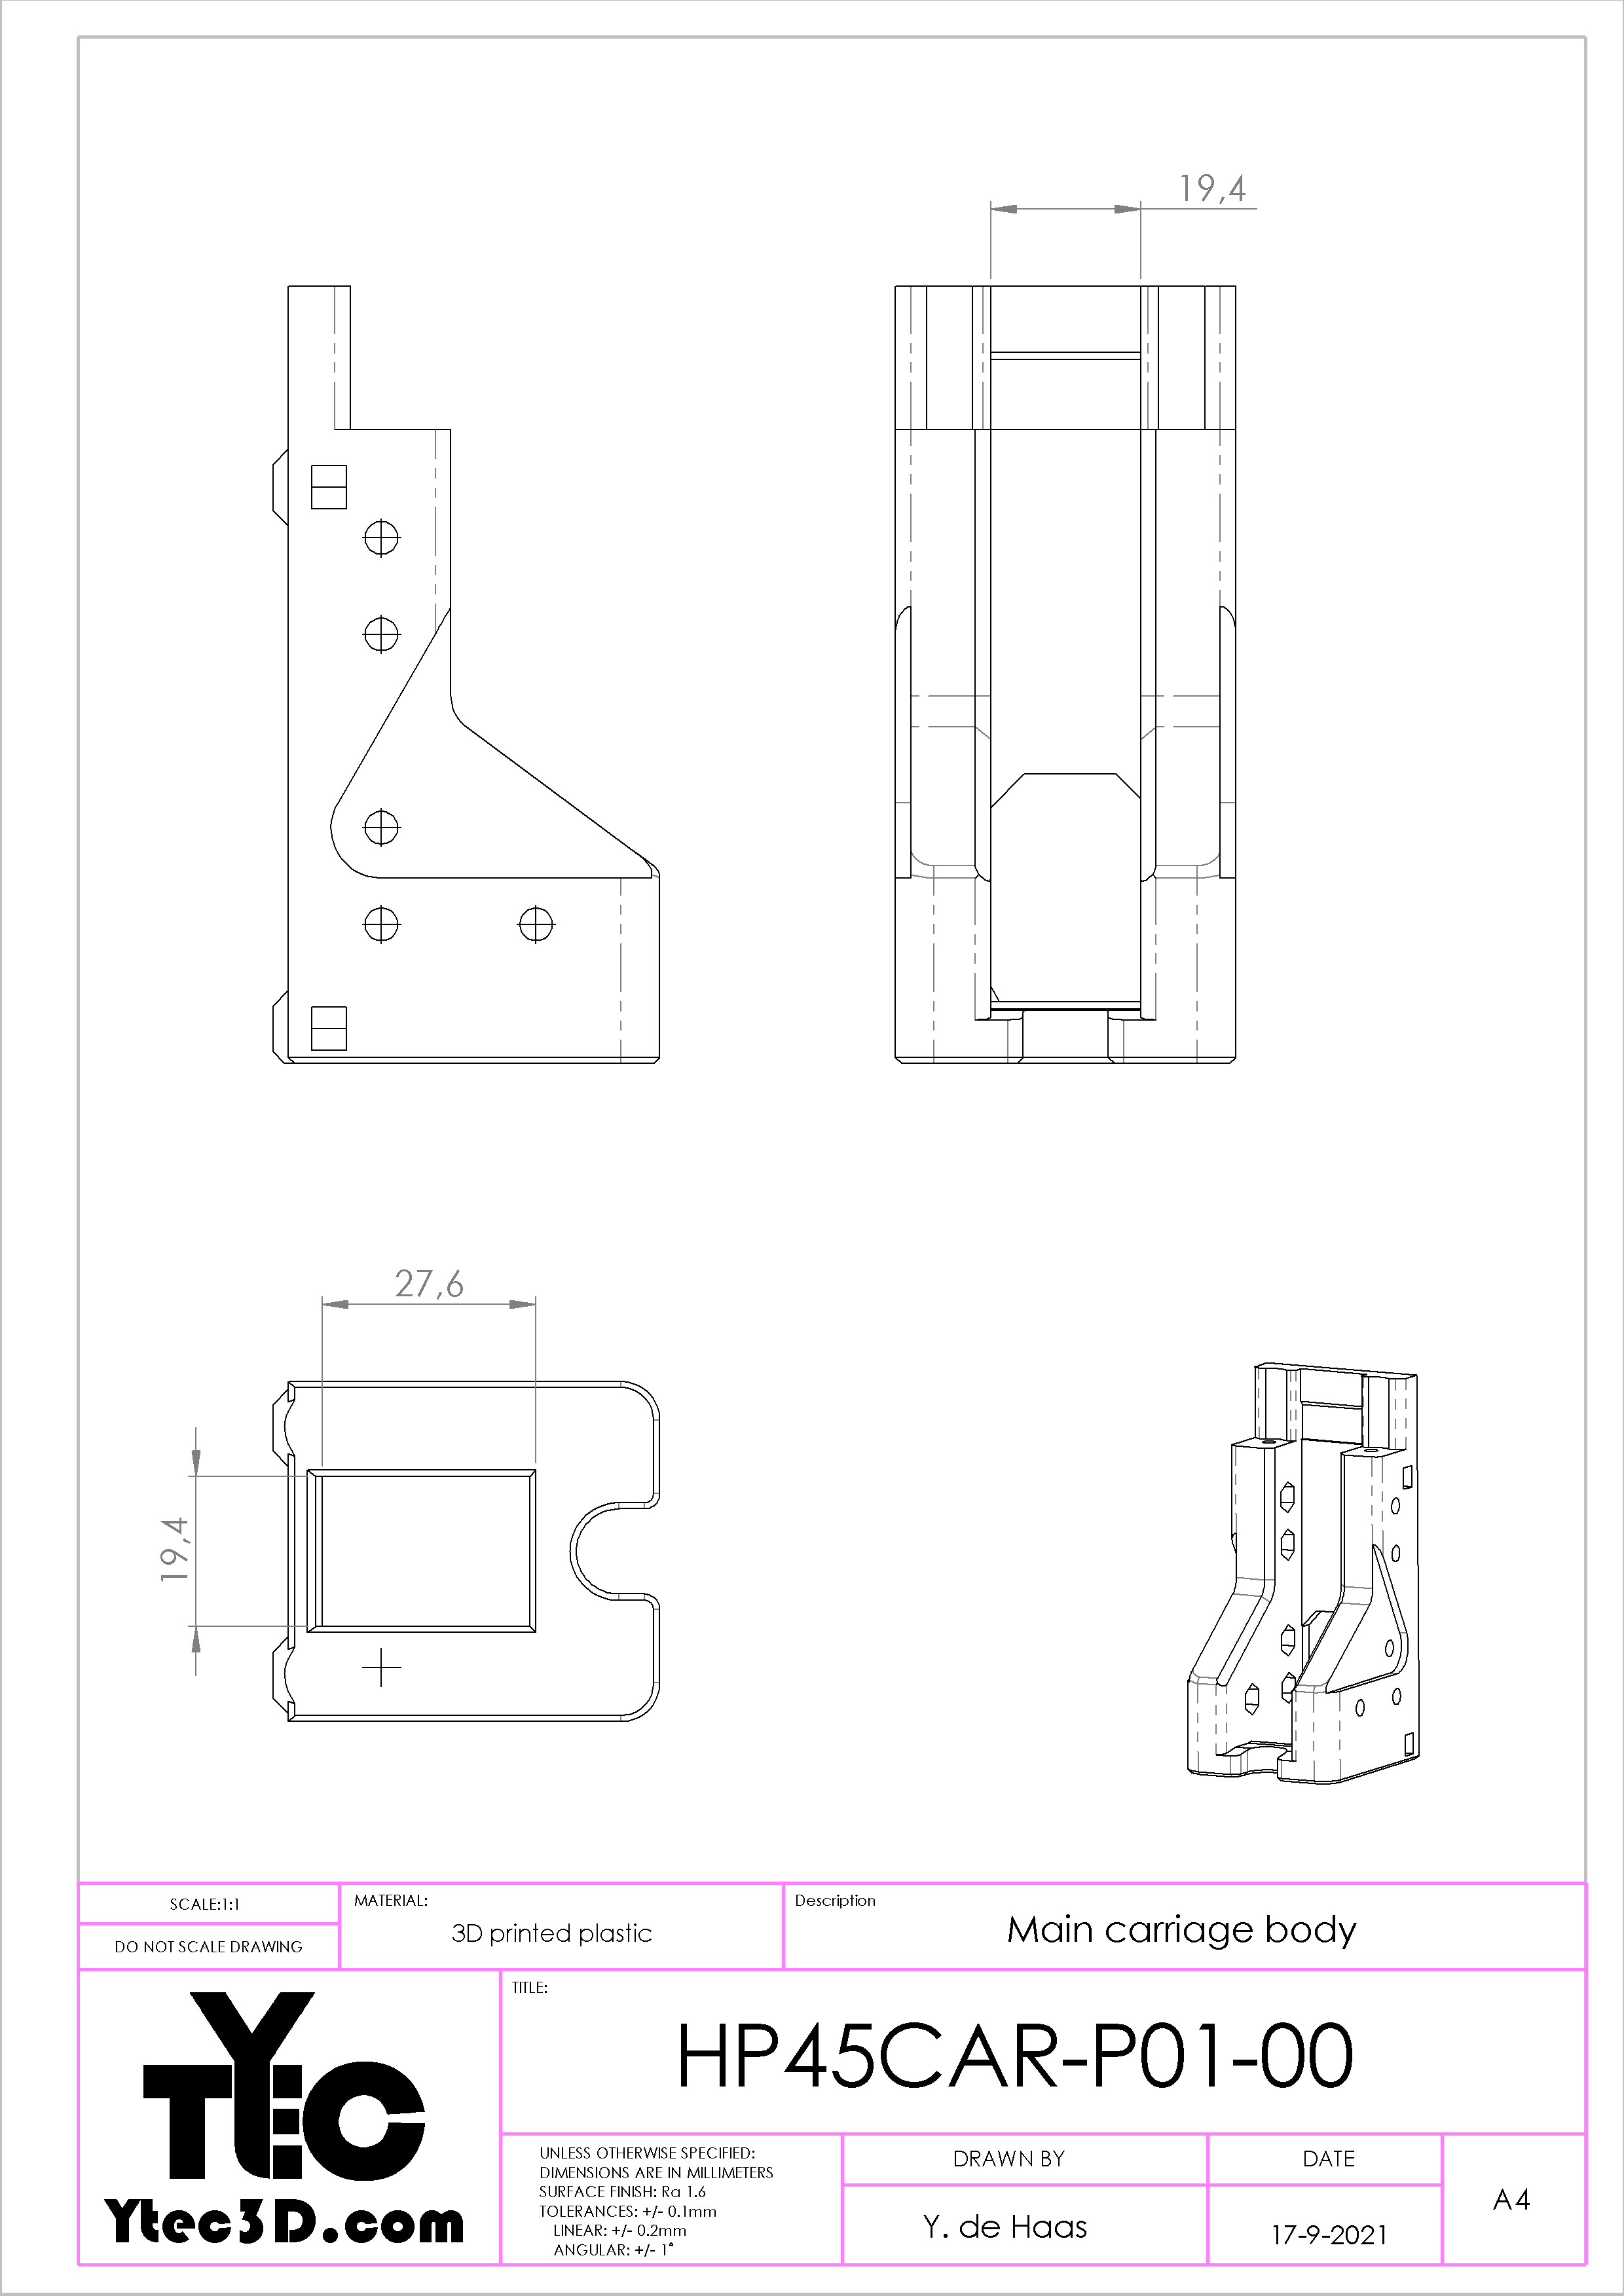
| HP45CAR-P01-00 | Main carriage body | 1 | 3D printed |
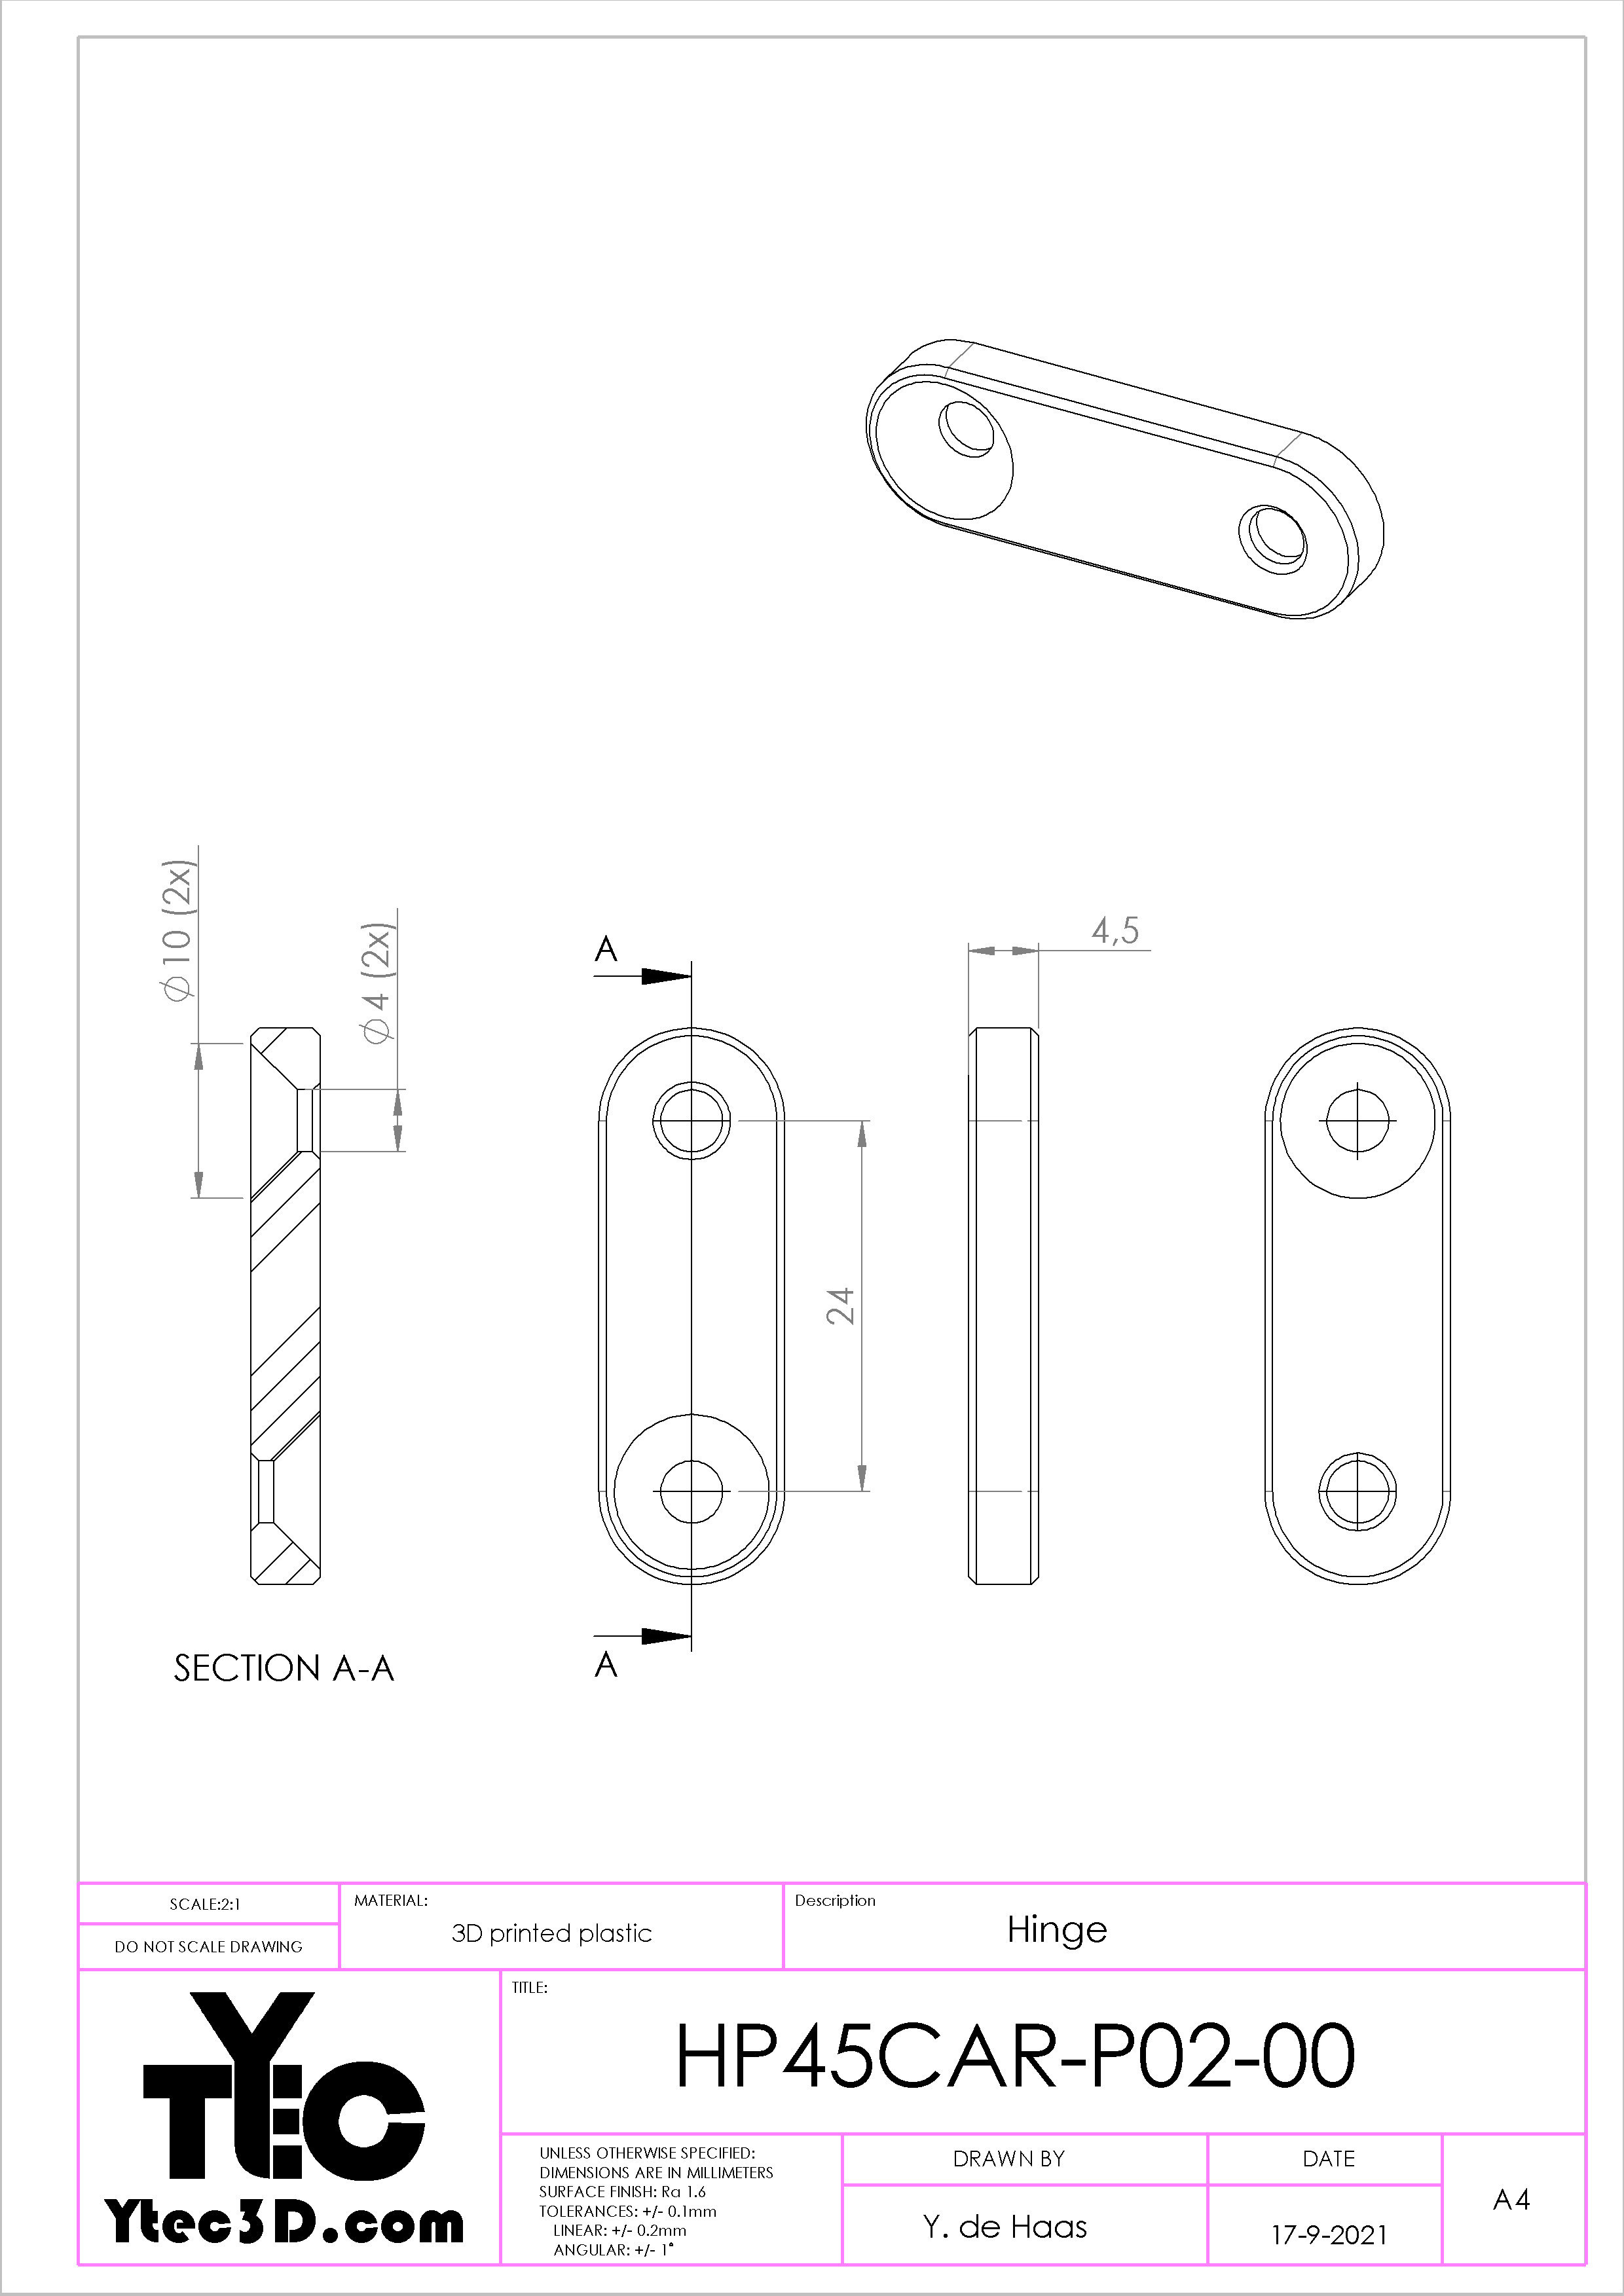
| HP45CAR-P02-00 | Hinges | 2 | 3D printed |
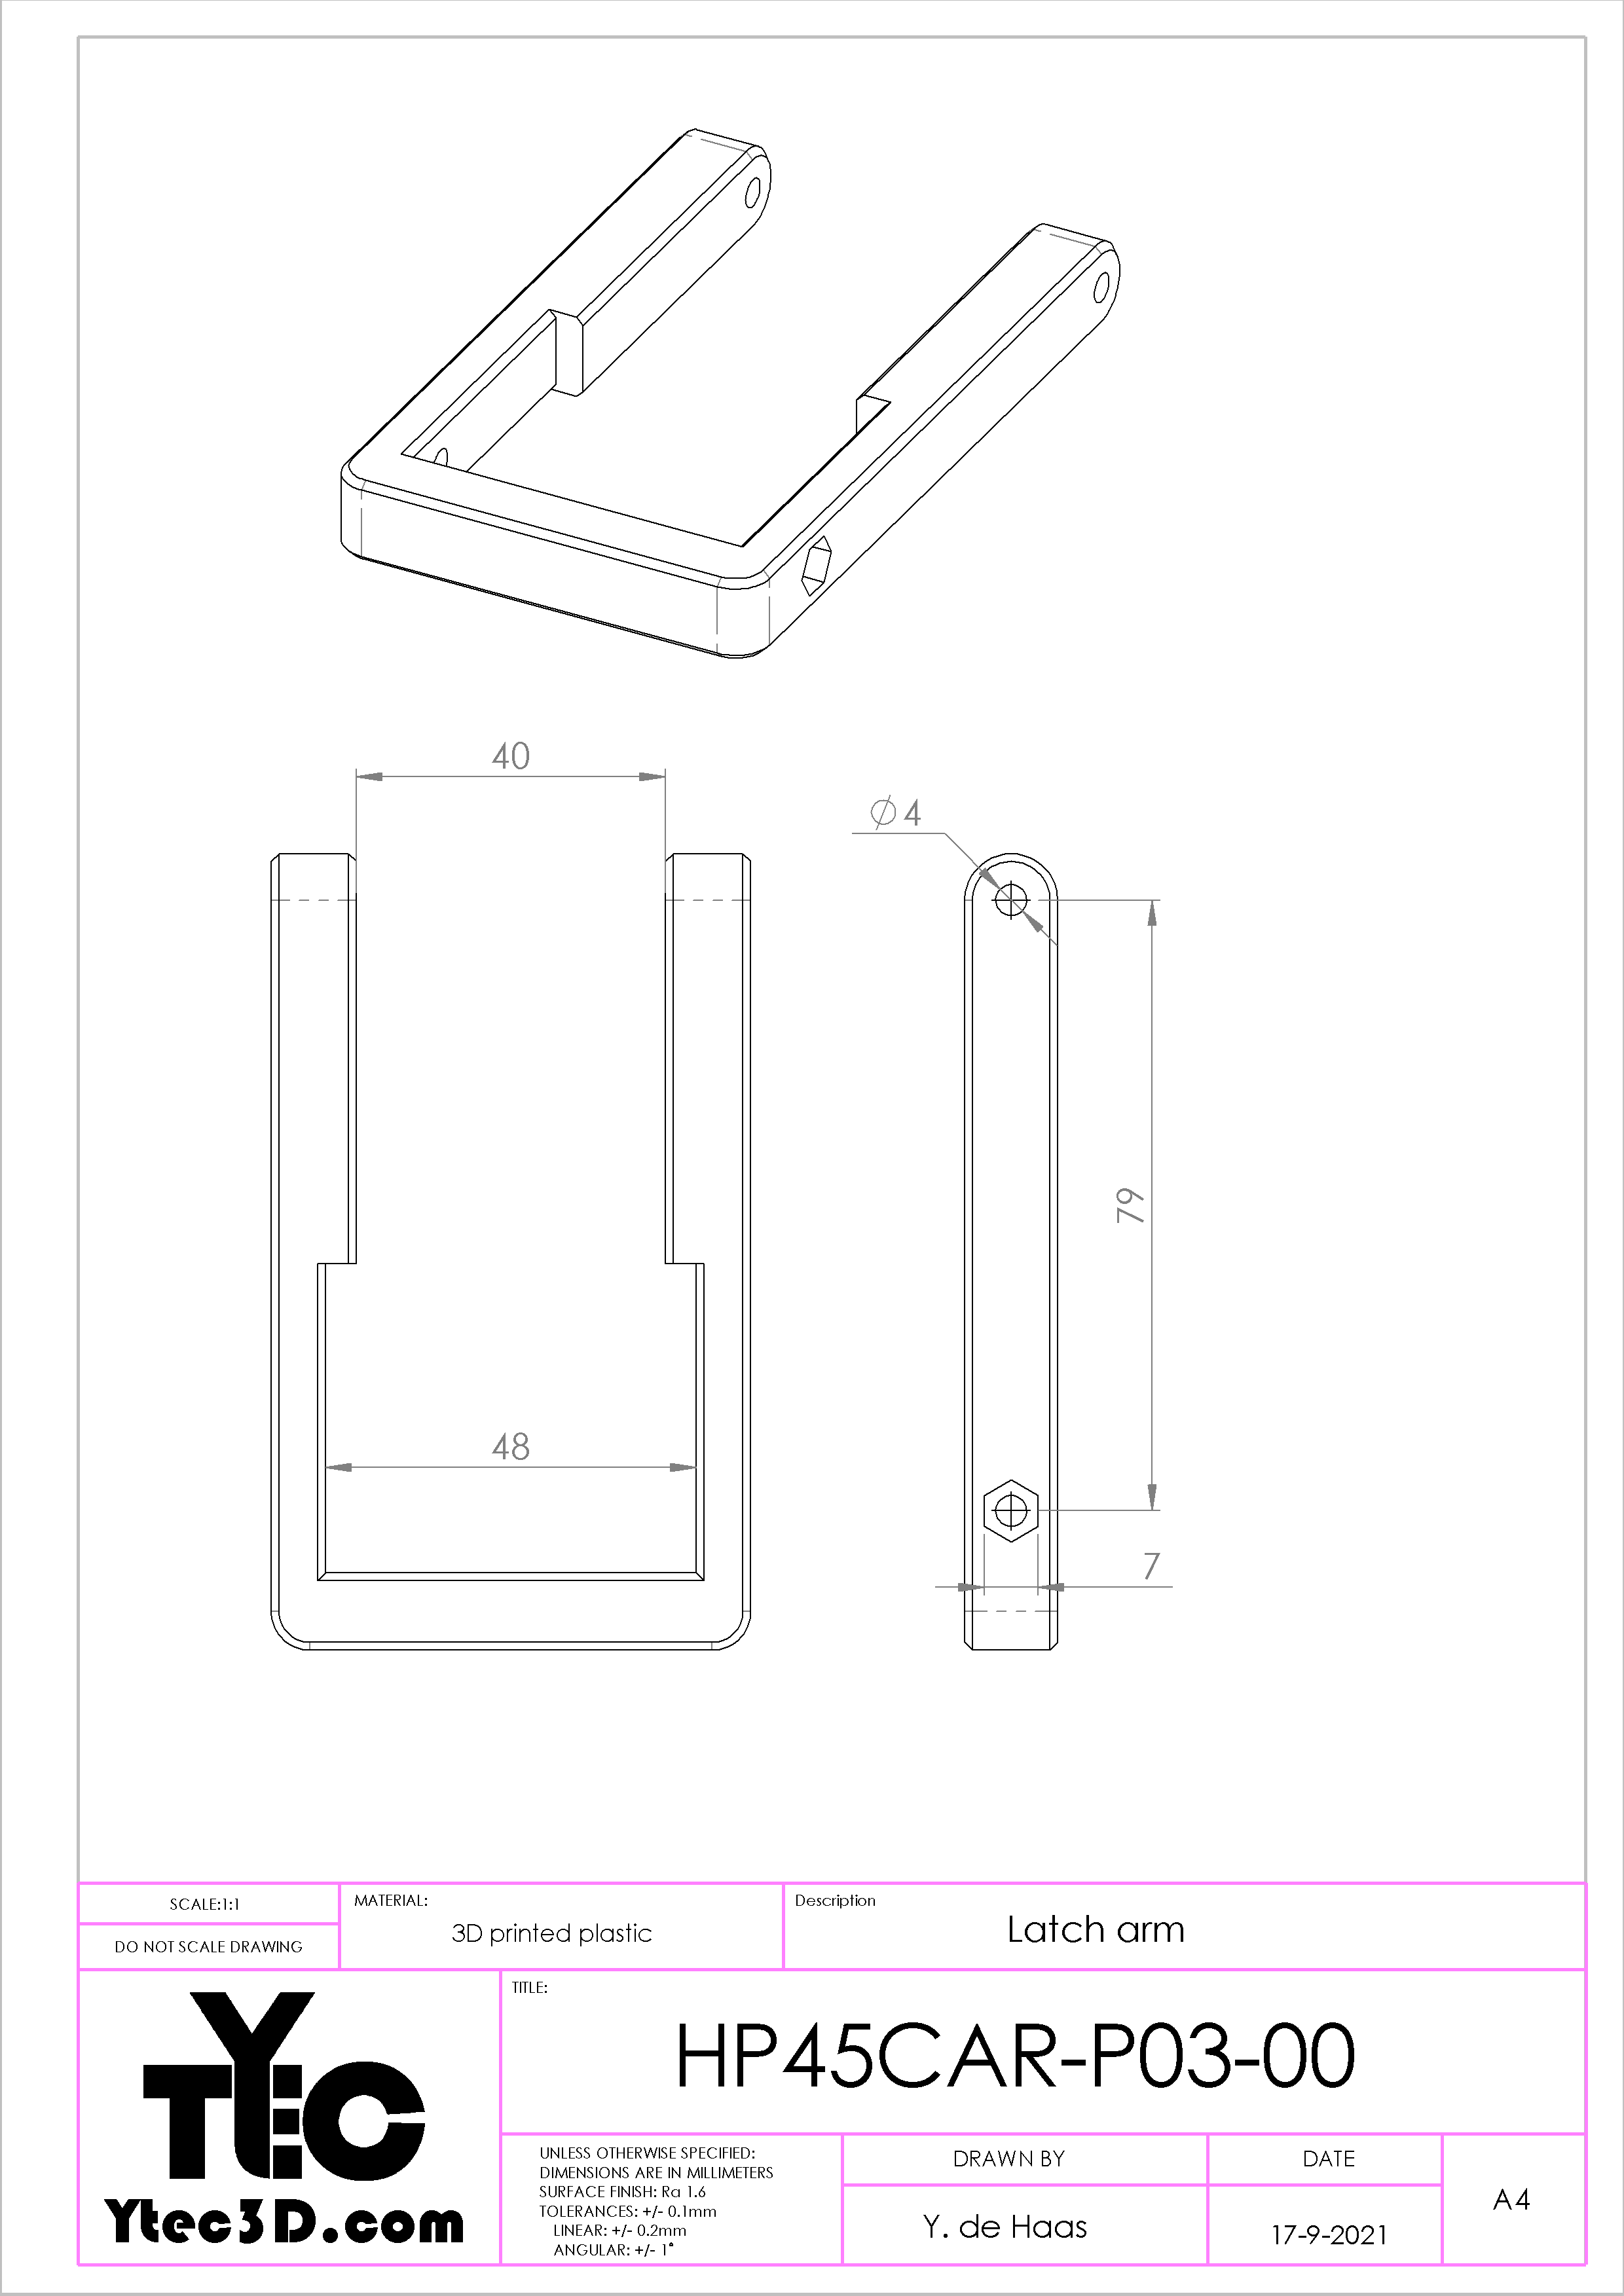
| HP45CAR-P03-00 | Latch arm | 1 | 3D printed |
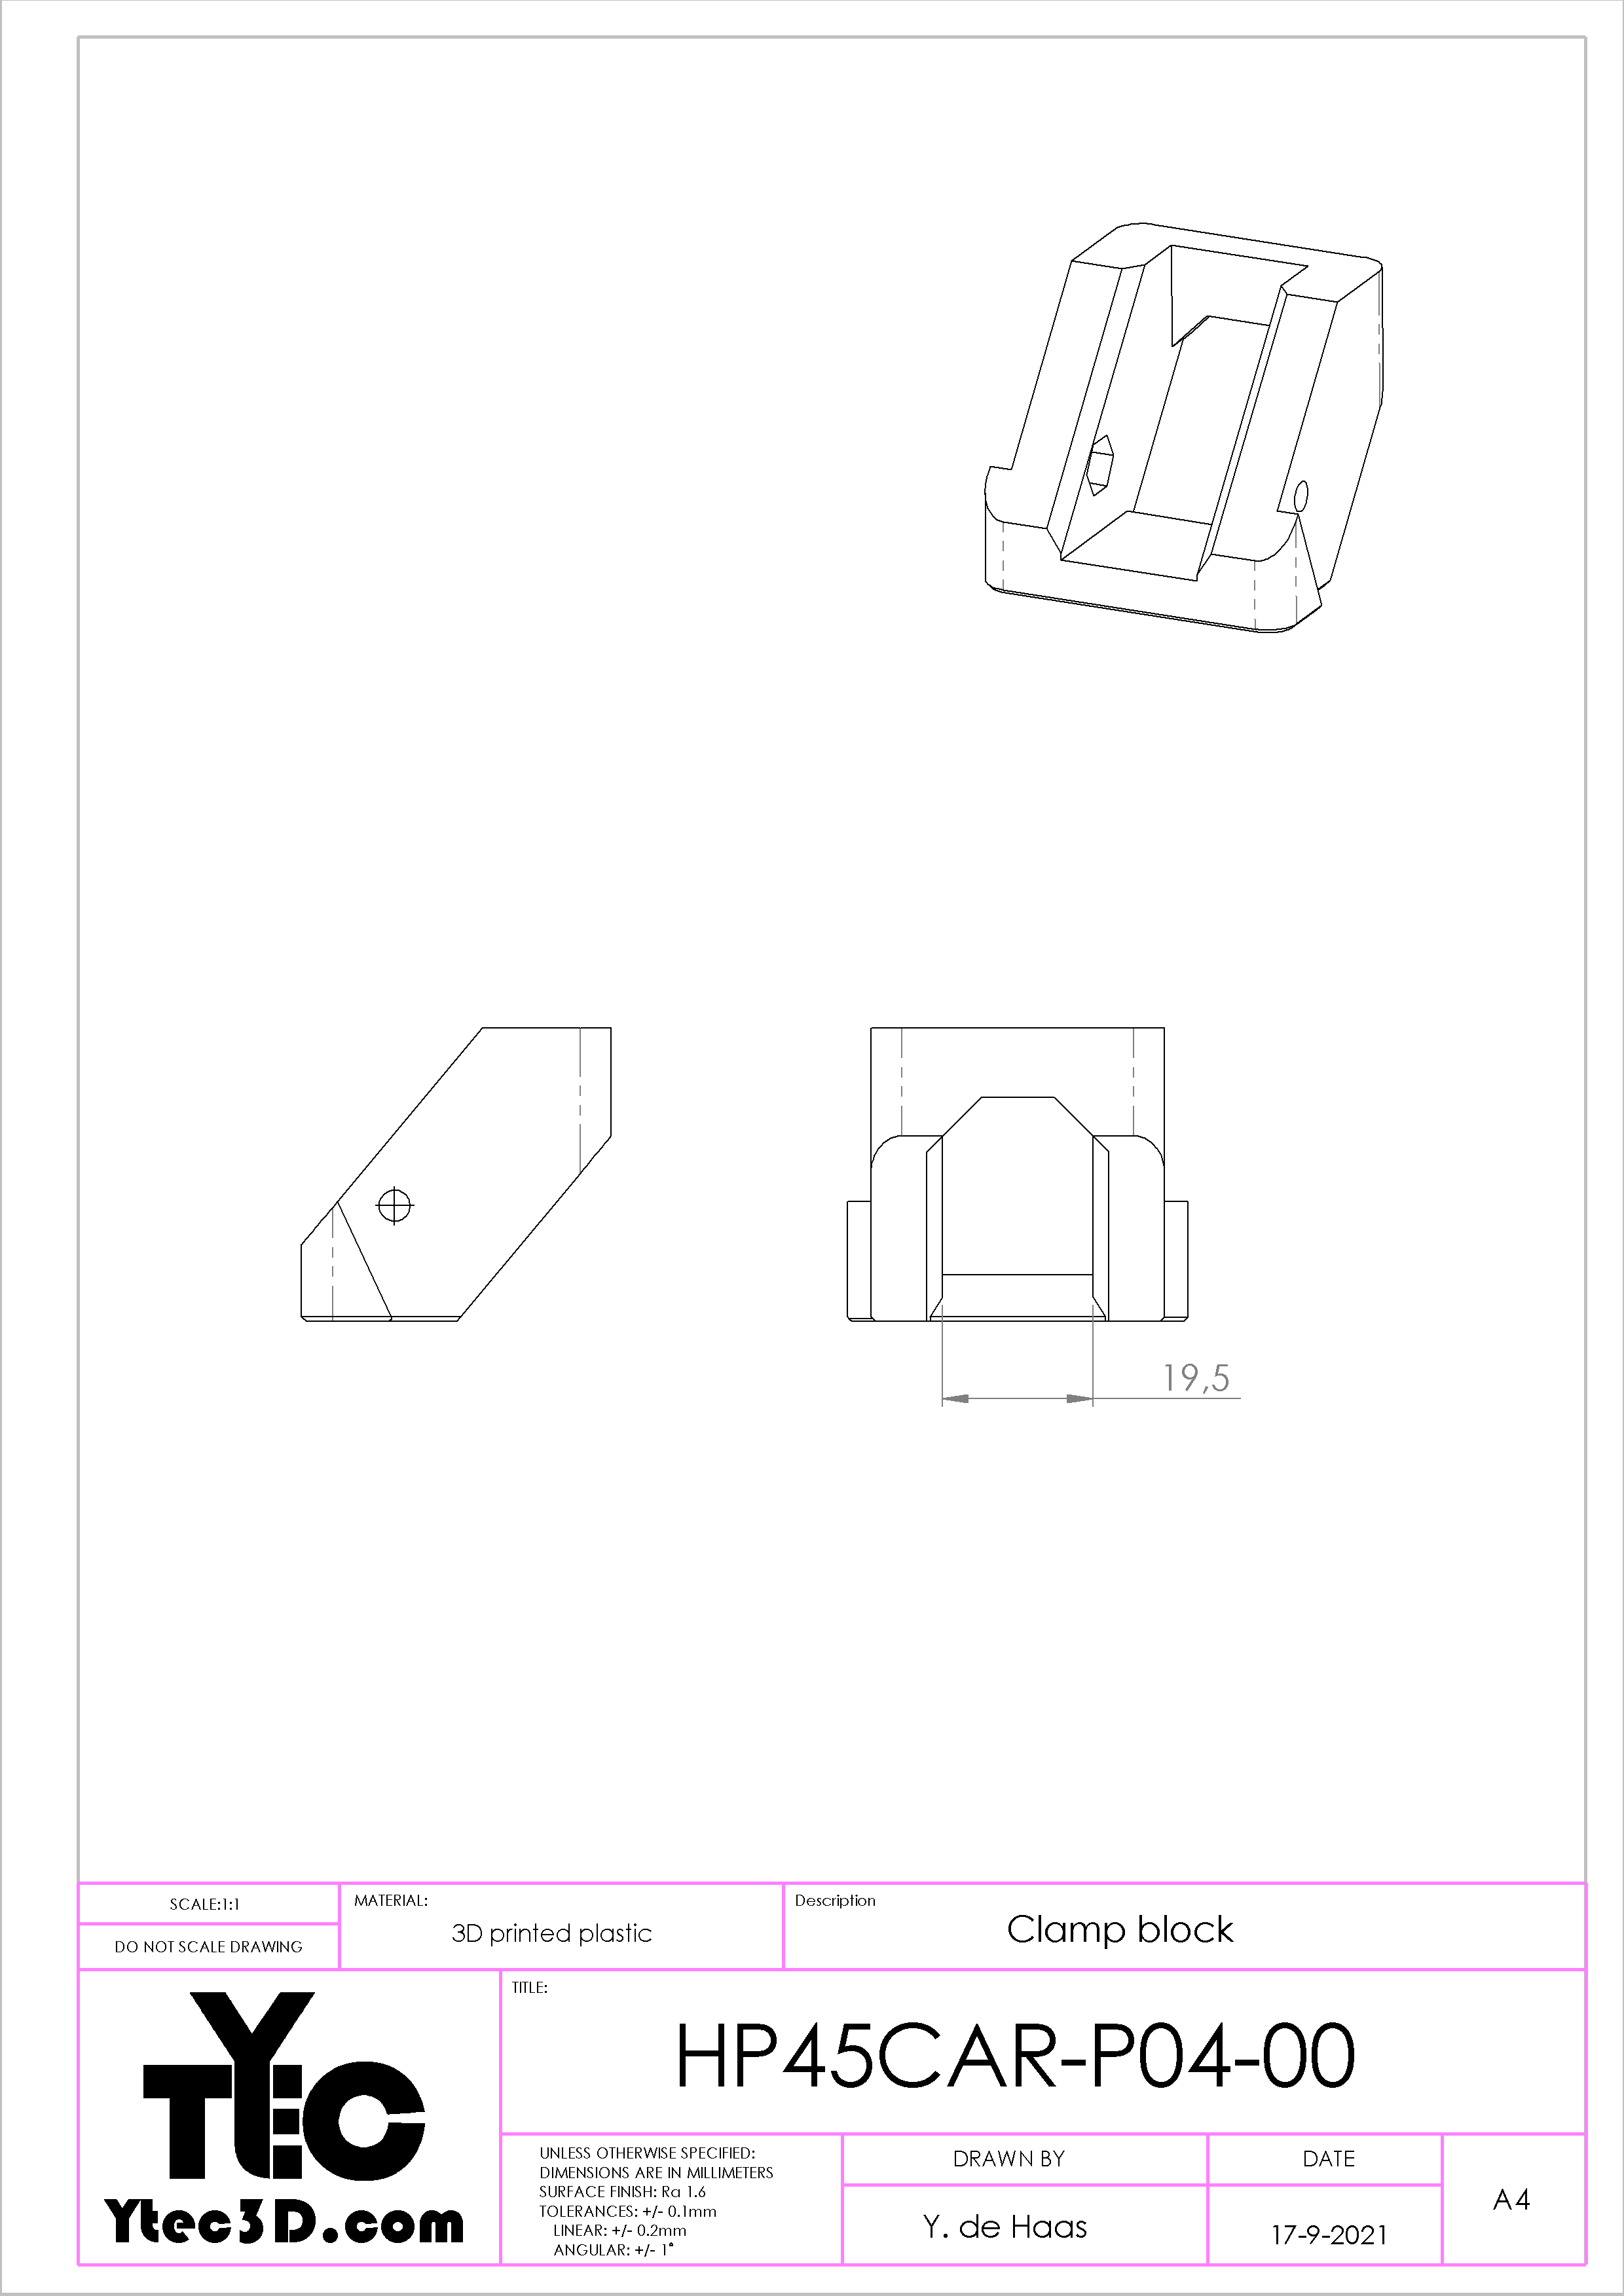
| HP45CAR-P04-00 | Clamp block | 1 | 3D printed |
| HP45 controller | Assembled PCB controller | 1 | Ytec3D |
| DIN 125 M4 | Washer | 2 | DIN/ISO part |
| DIN 912 M3x10 | Hex. socket head cap screw | 4 | DIN/ISO part |
| DIN 912 M4x20 | Hex. socket head cap screw | 2 | DIN/ISO part |
| DIN 985 M3 | Nyloc hex nut | 4 | DIN/ISO part |
| DIN 985 M4 | Nyloc hex nut | 6 | DIN/ISO part |
| DIN 7991 M4x12 | Hex. socket countersunk head cap screw | 4 | DIN/ISO part |
3D printing
Click the button below to download the 3D print files for the HP45 V4 controller carriage.

Exact print settings do not really matter for the 3D prints. 0.2mm layer height, 25% infill and 3 perimeters are a personal preference. The parts are oriented to be supportless.
Below a set of drawings for the carrier with assemblies and the separate parts. The dimensions below are given for reference. If the dimensions of your prints are off by more than around 0.3mm, your printer settings need to be changed. I have printed these parts on a Prusa I4 Mk2S.

Assembly

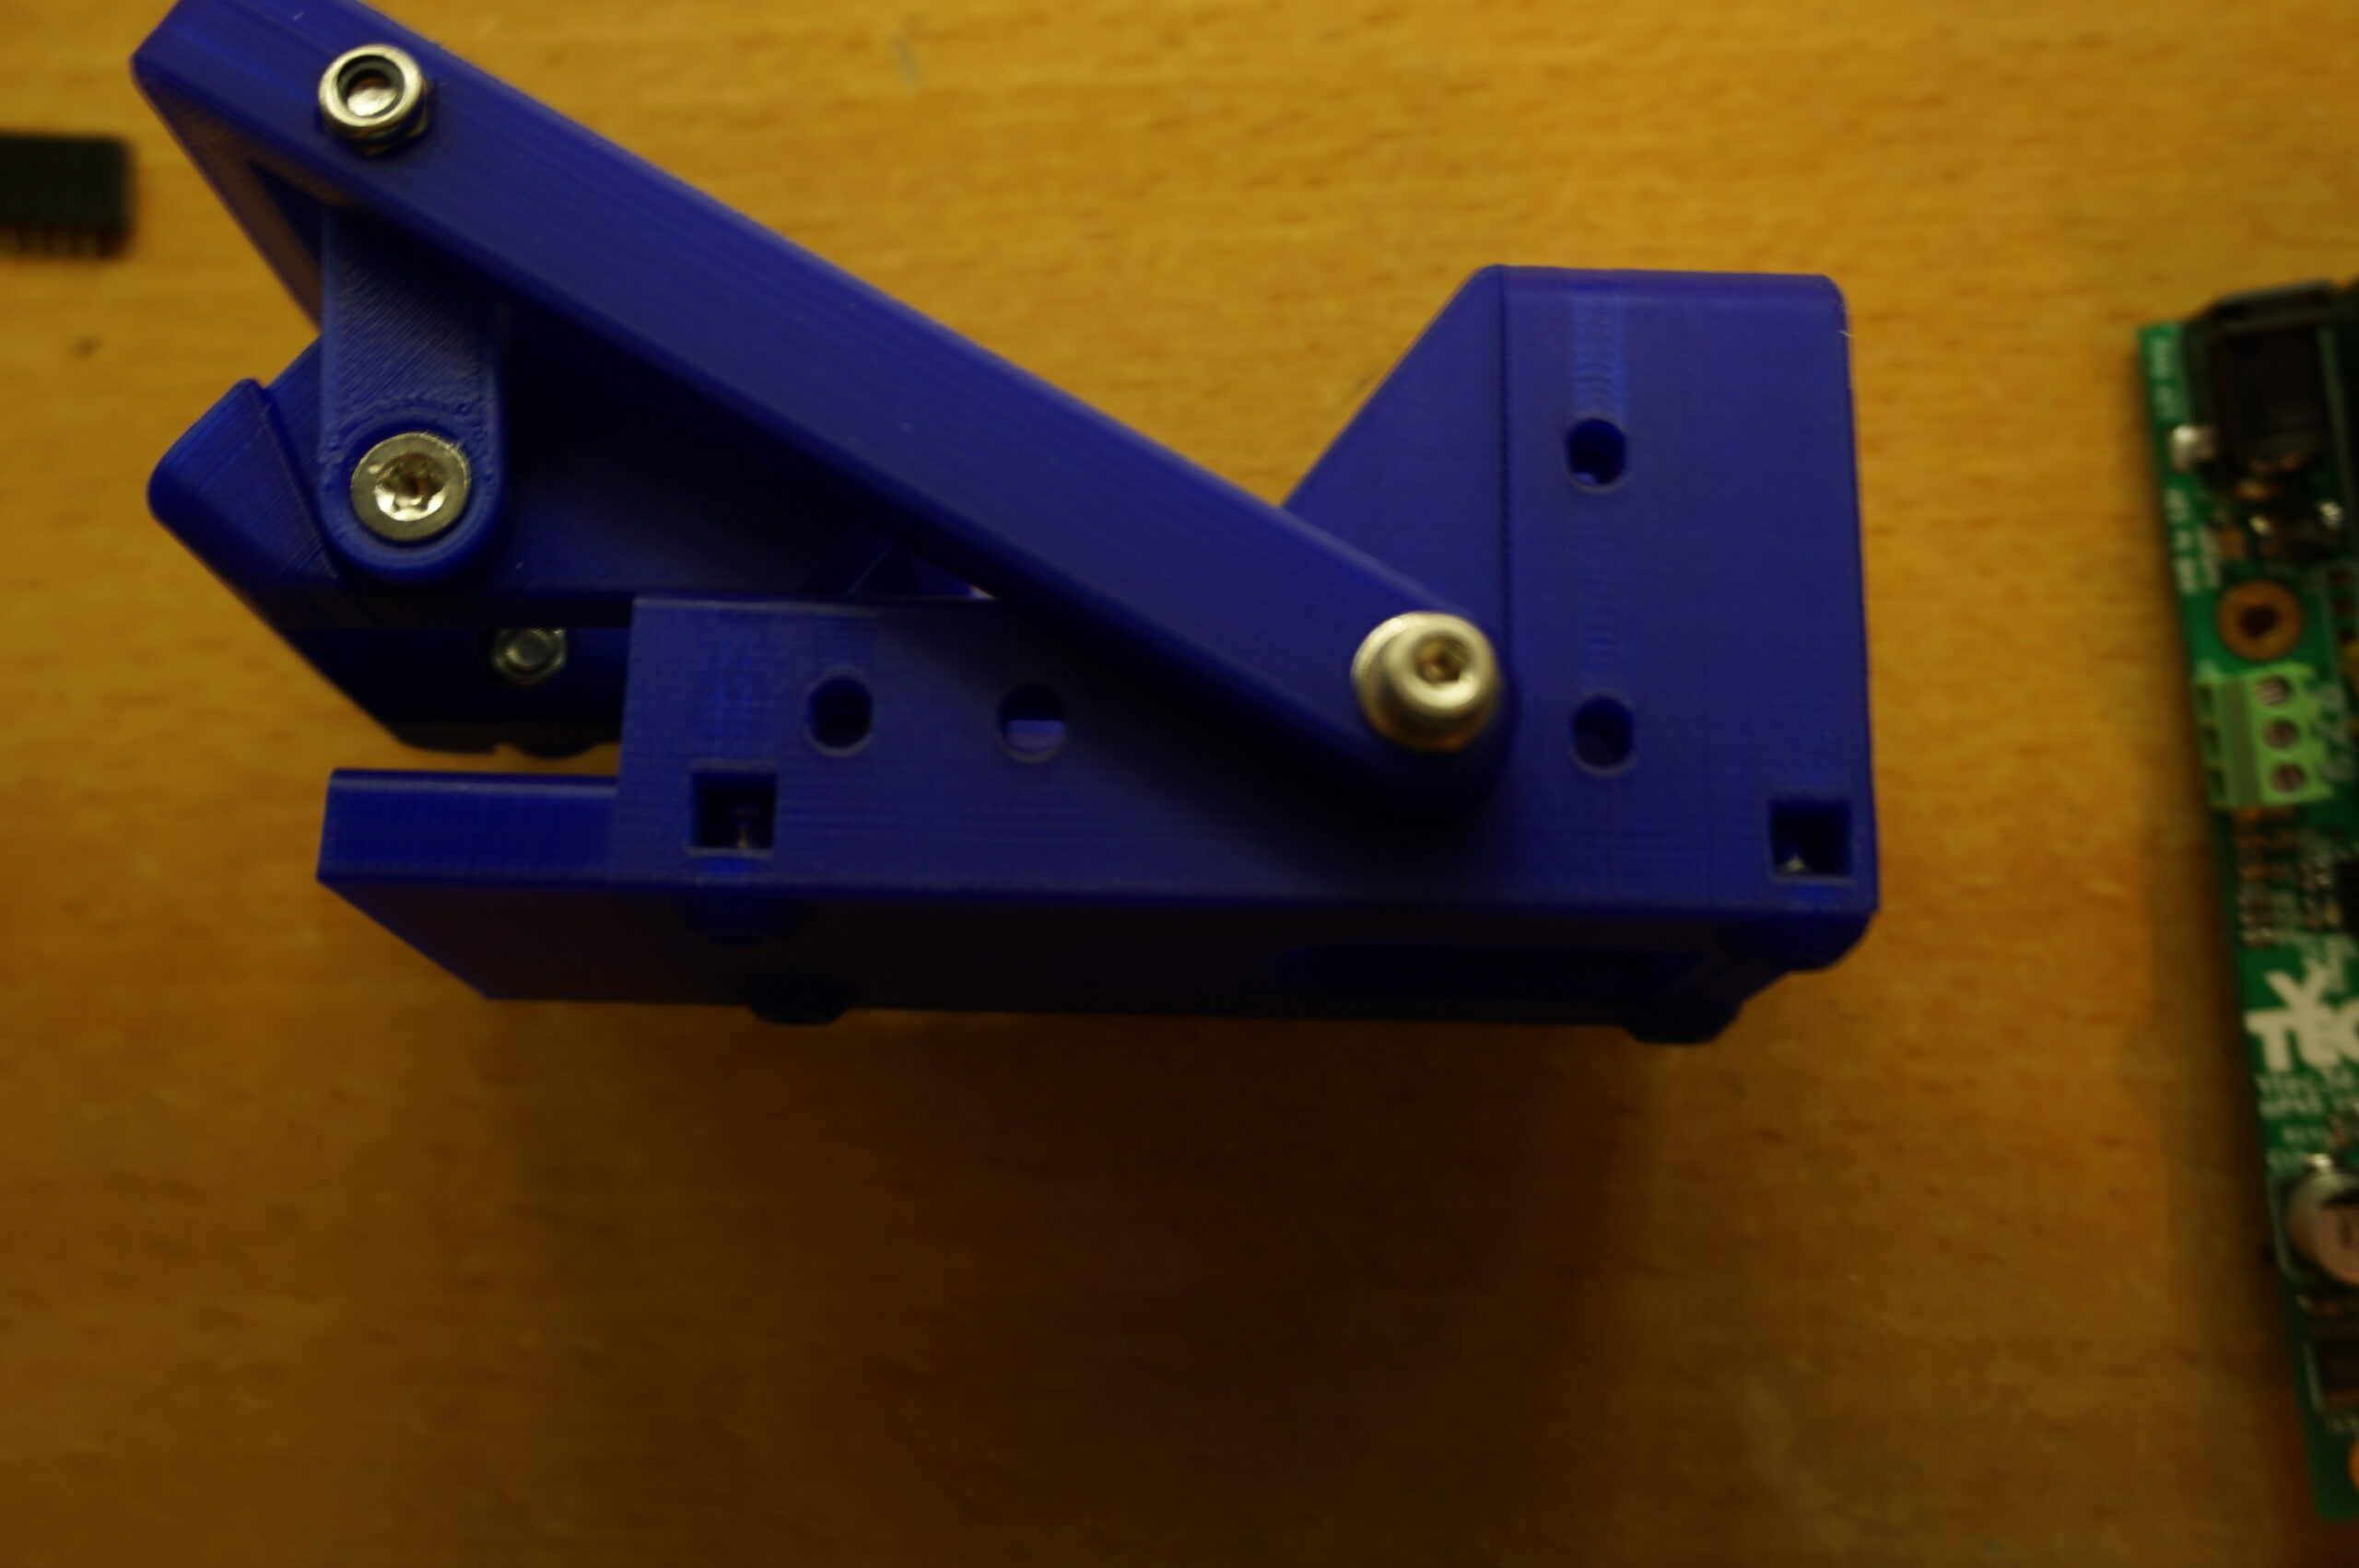
Attach the arm HP45CAR-P03-00 to the body HP45CAR-P01-00 using 2x DIN 912 M4x20, 2x DIN 125 M4 washers and 2x DIN 985 nuts. There is a pocket on the inside of the body for the nut.
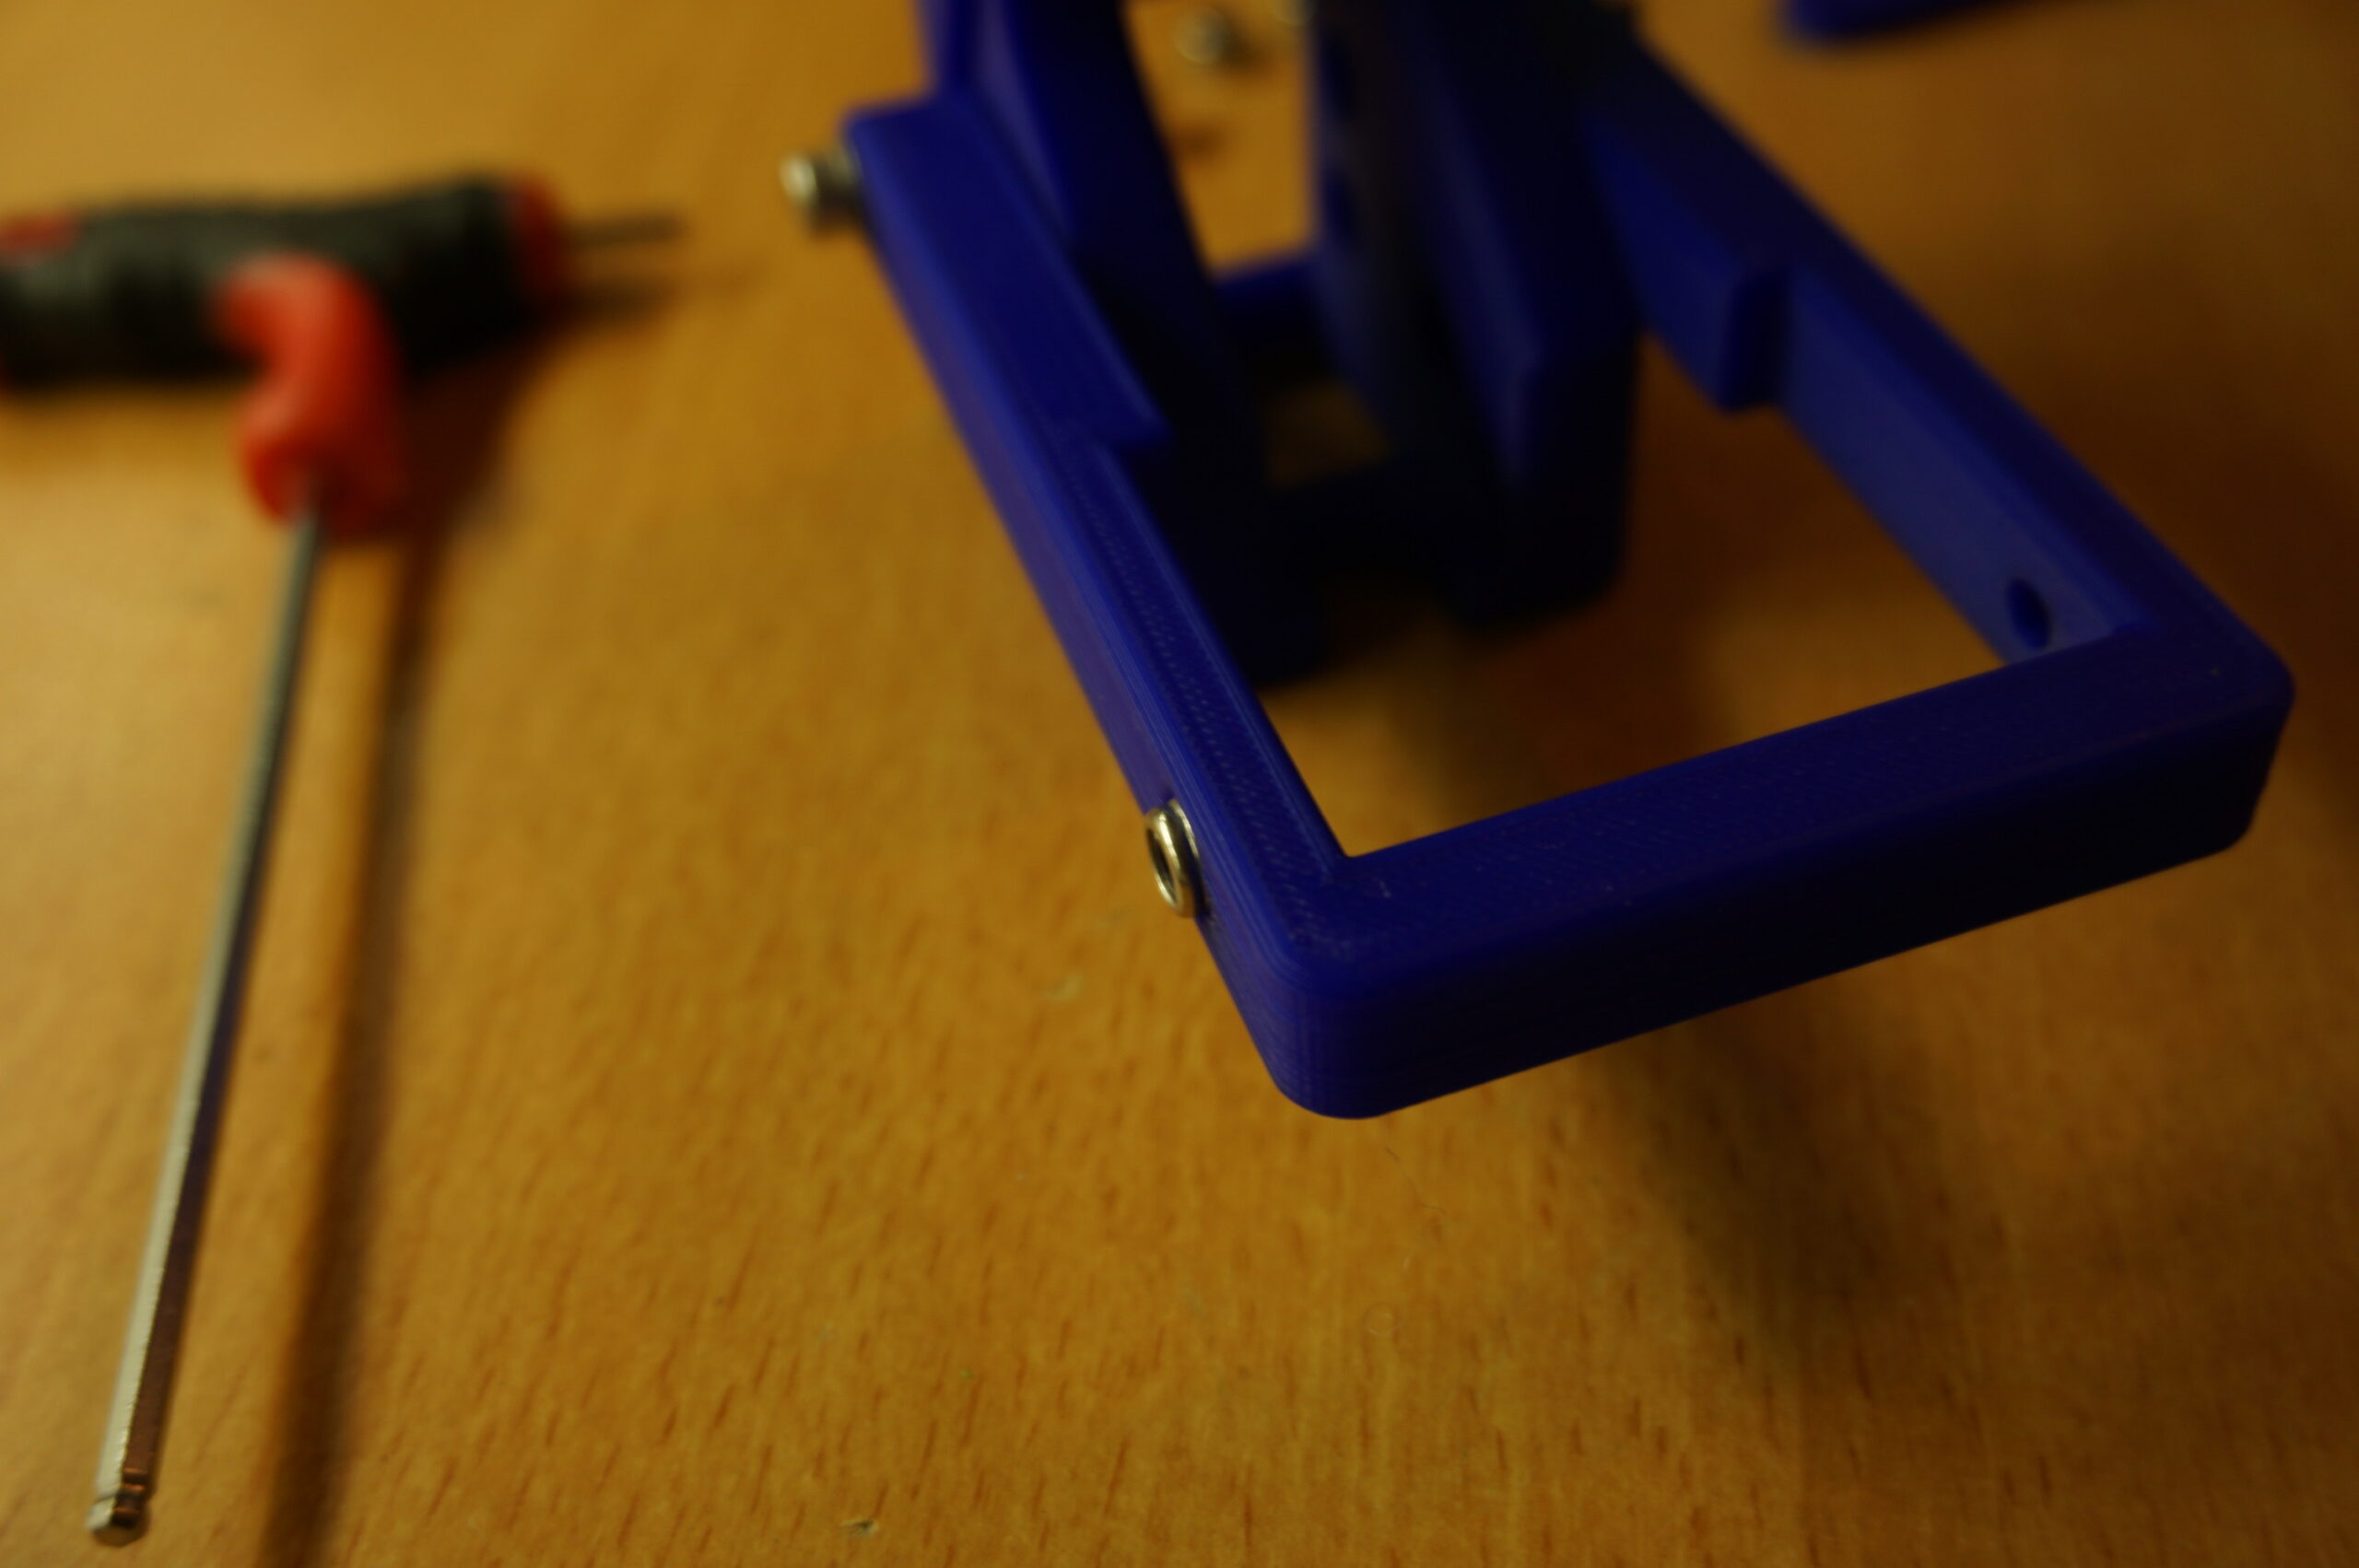
Press 2x M4 nut in the outside hex pockets of the arm HP45CAR-P03-00.
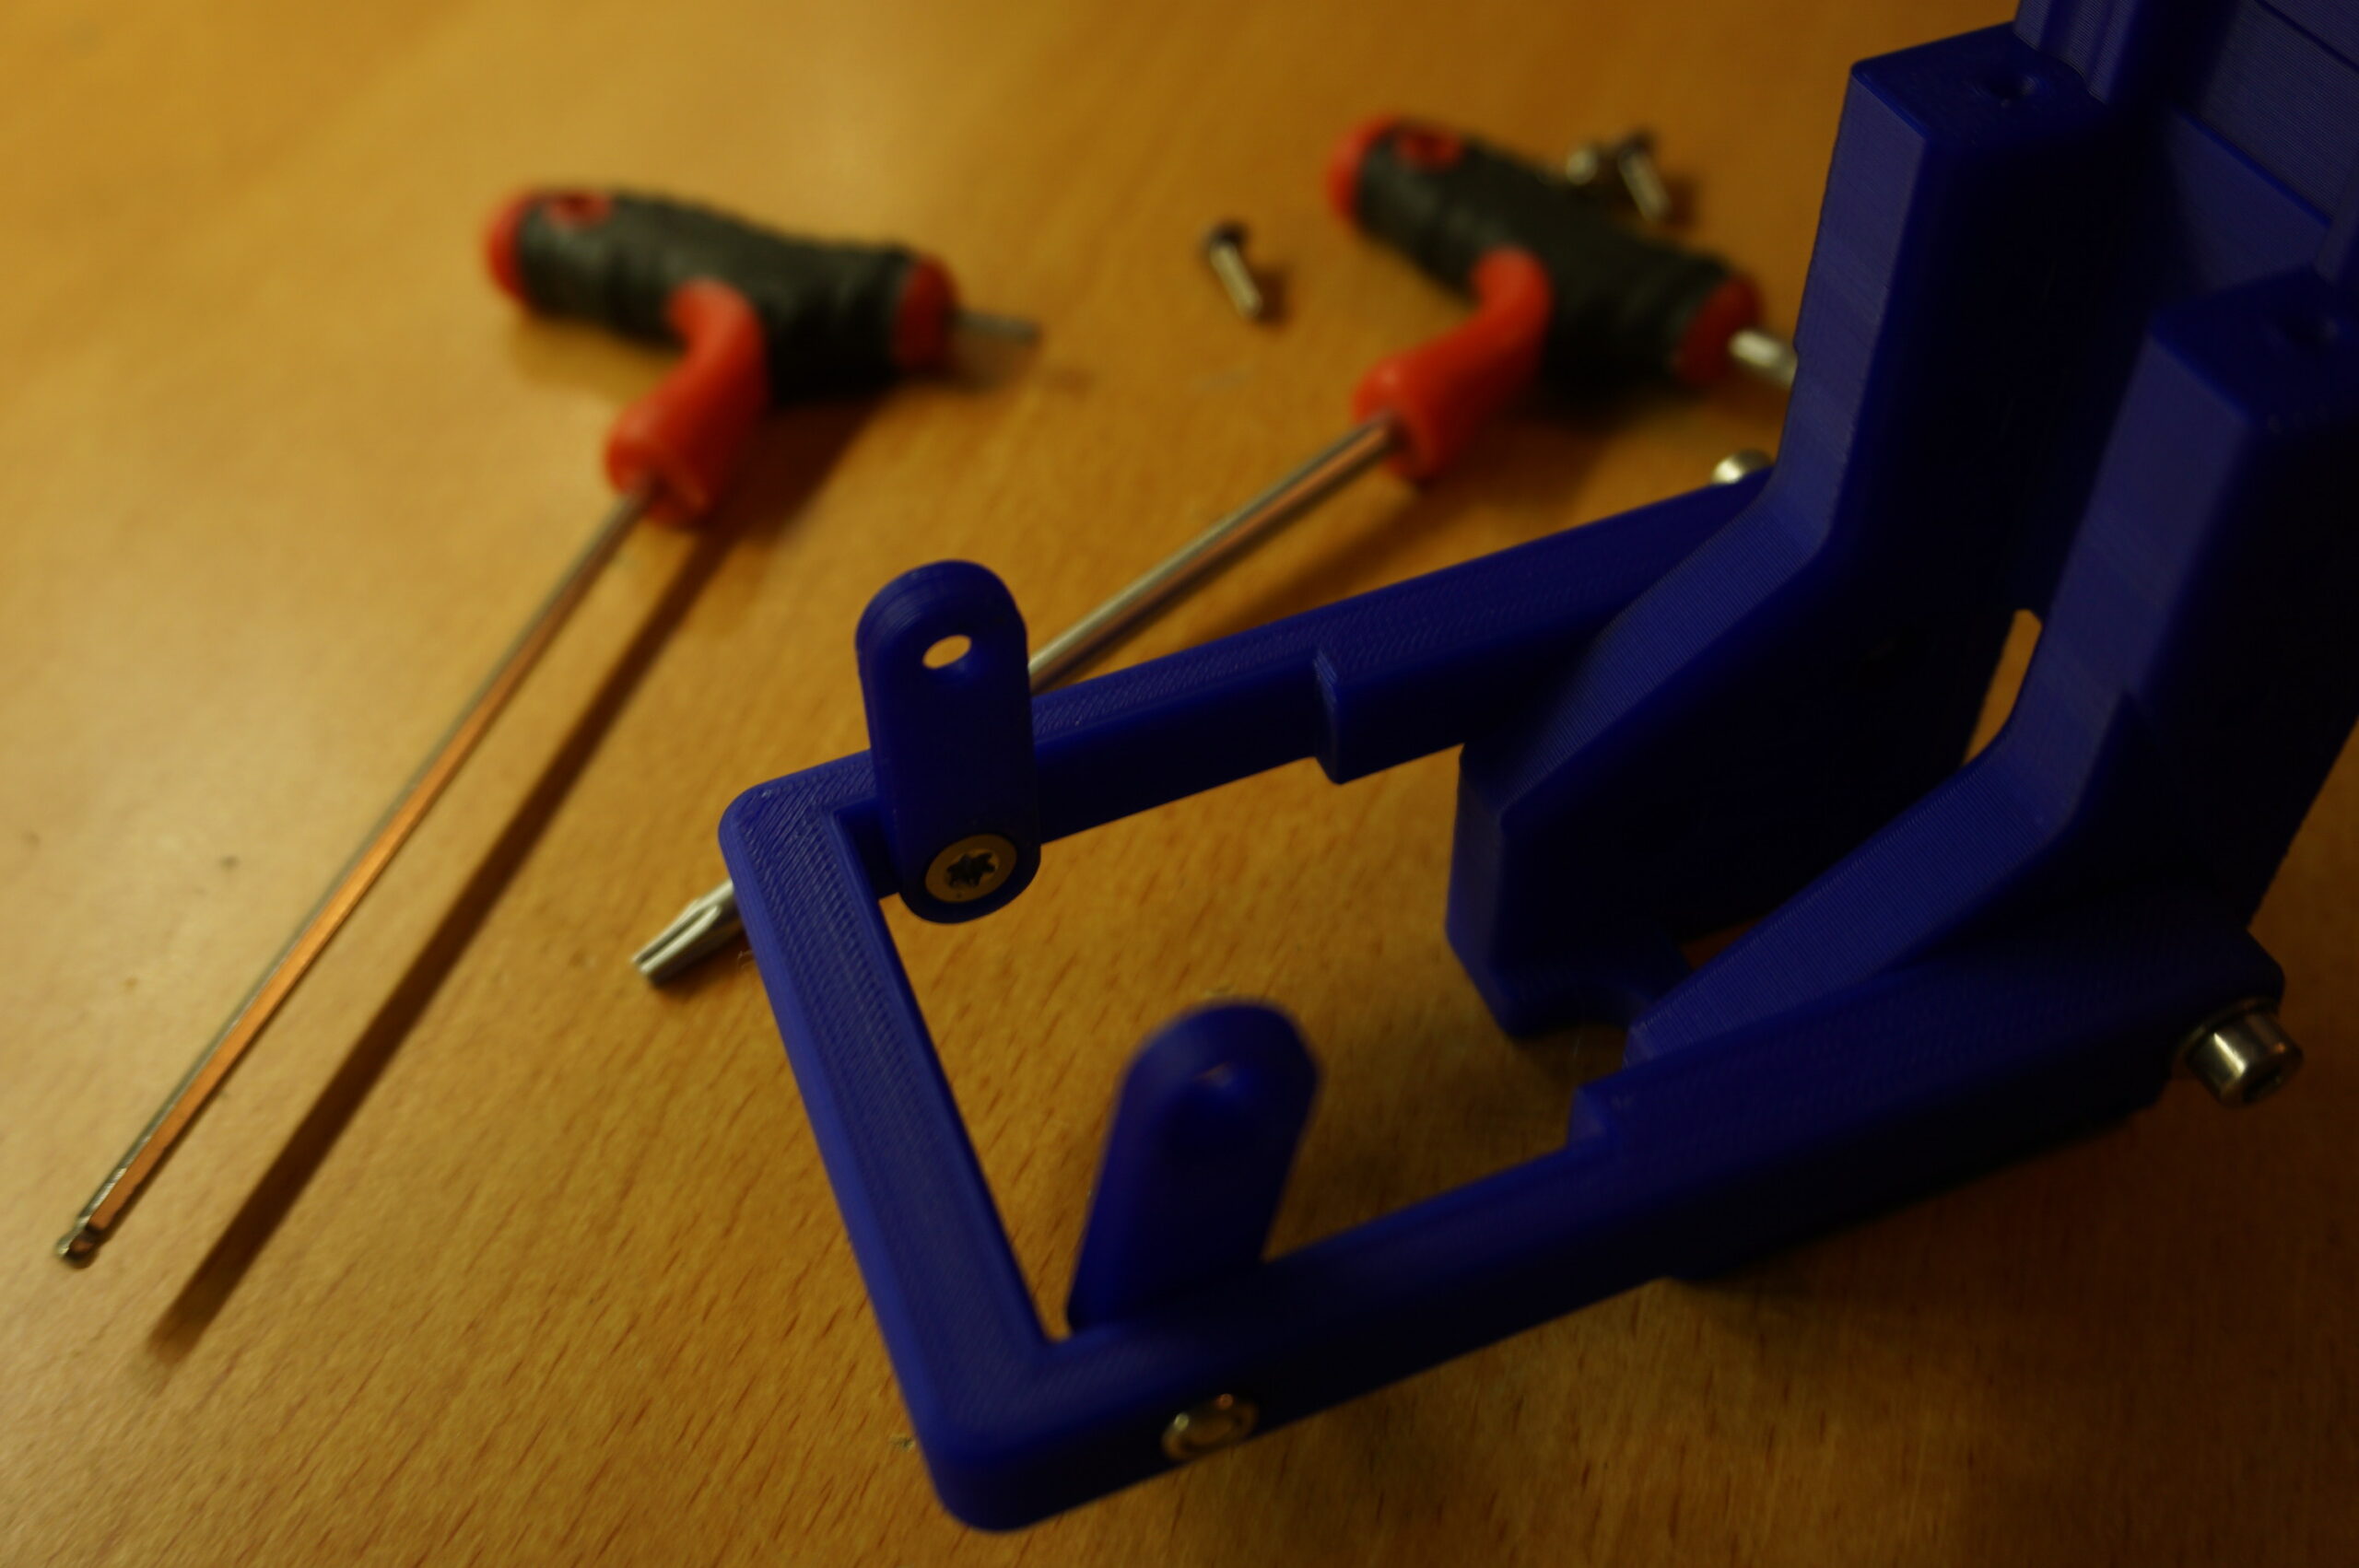
Attach 2x hinges HP45CAR-P02-00 to the arm HP45CAR-P03-00 using 2x DIN 7991 M4x12 screws. Do not over tighten these. The hinges need to move freely.

Add the clamp HP45CAR-P04-00 using the remaining 2x DIN 7991 M4x12 and 2x DIN 985 M4 nuts. There are pockets in the clamp for the nuts

From the side of the body HP45CAR-P01-00 insert 4x DIN 985 M3 nuts
Press the nuts to the bottom of the hole

Mount the assembled HP45 controller using 4x DIN 912 M3x10 screws
(Better photos and guide coming soon™)