Table of content:
- Full Scale Portal Turret
- How It Works: Full Scale Portal Turret
- The Making Of: Full Scale Portal Turret (Part 1)
- The Making Of: Full Scale Portal Turret (Part 2)
In this page I will give a rough overview of what is in the turret and what it does. This is the amount of detail not everyone cares about the same, so I stashed it on this page. It also allows me to use less than perfect pictures, so be aware.
Base
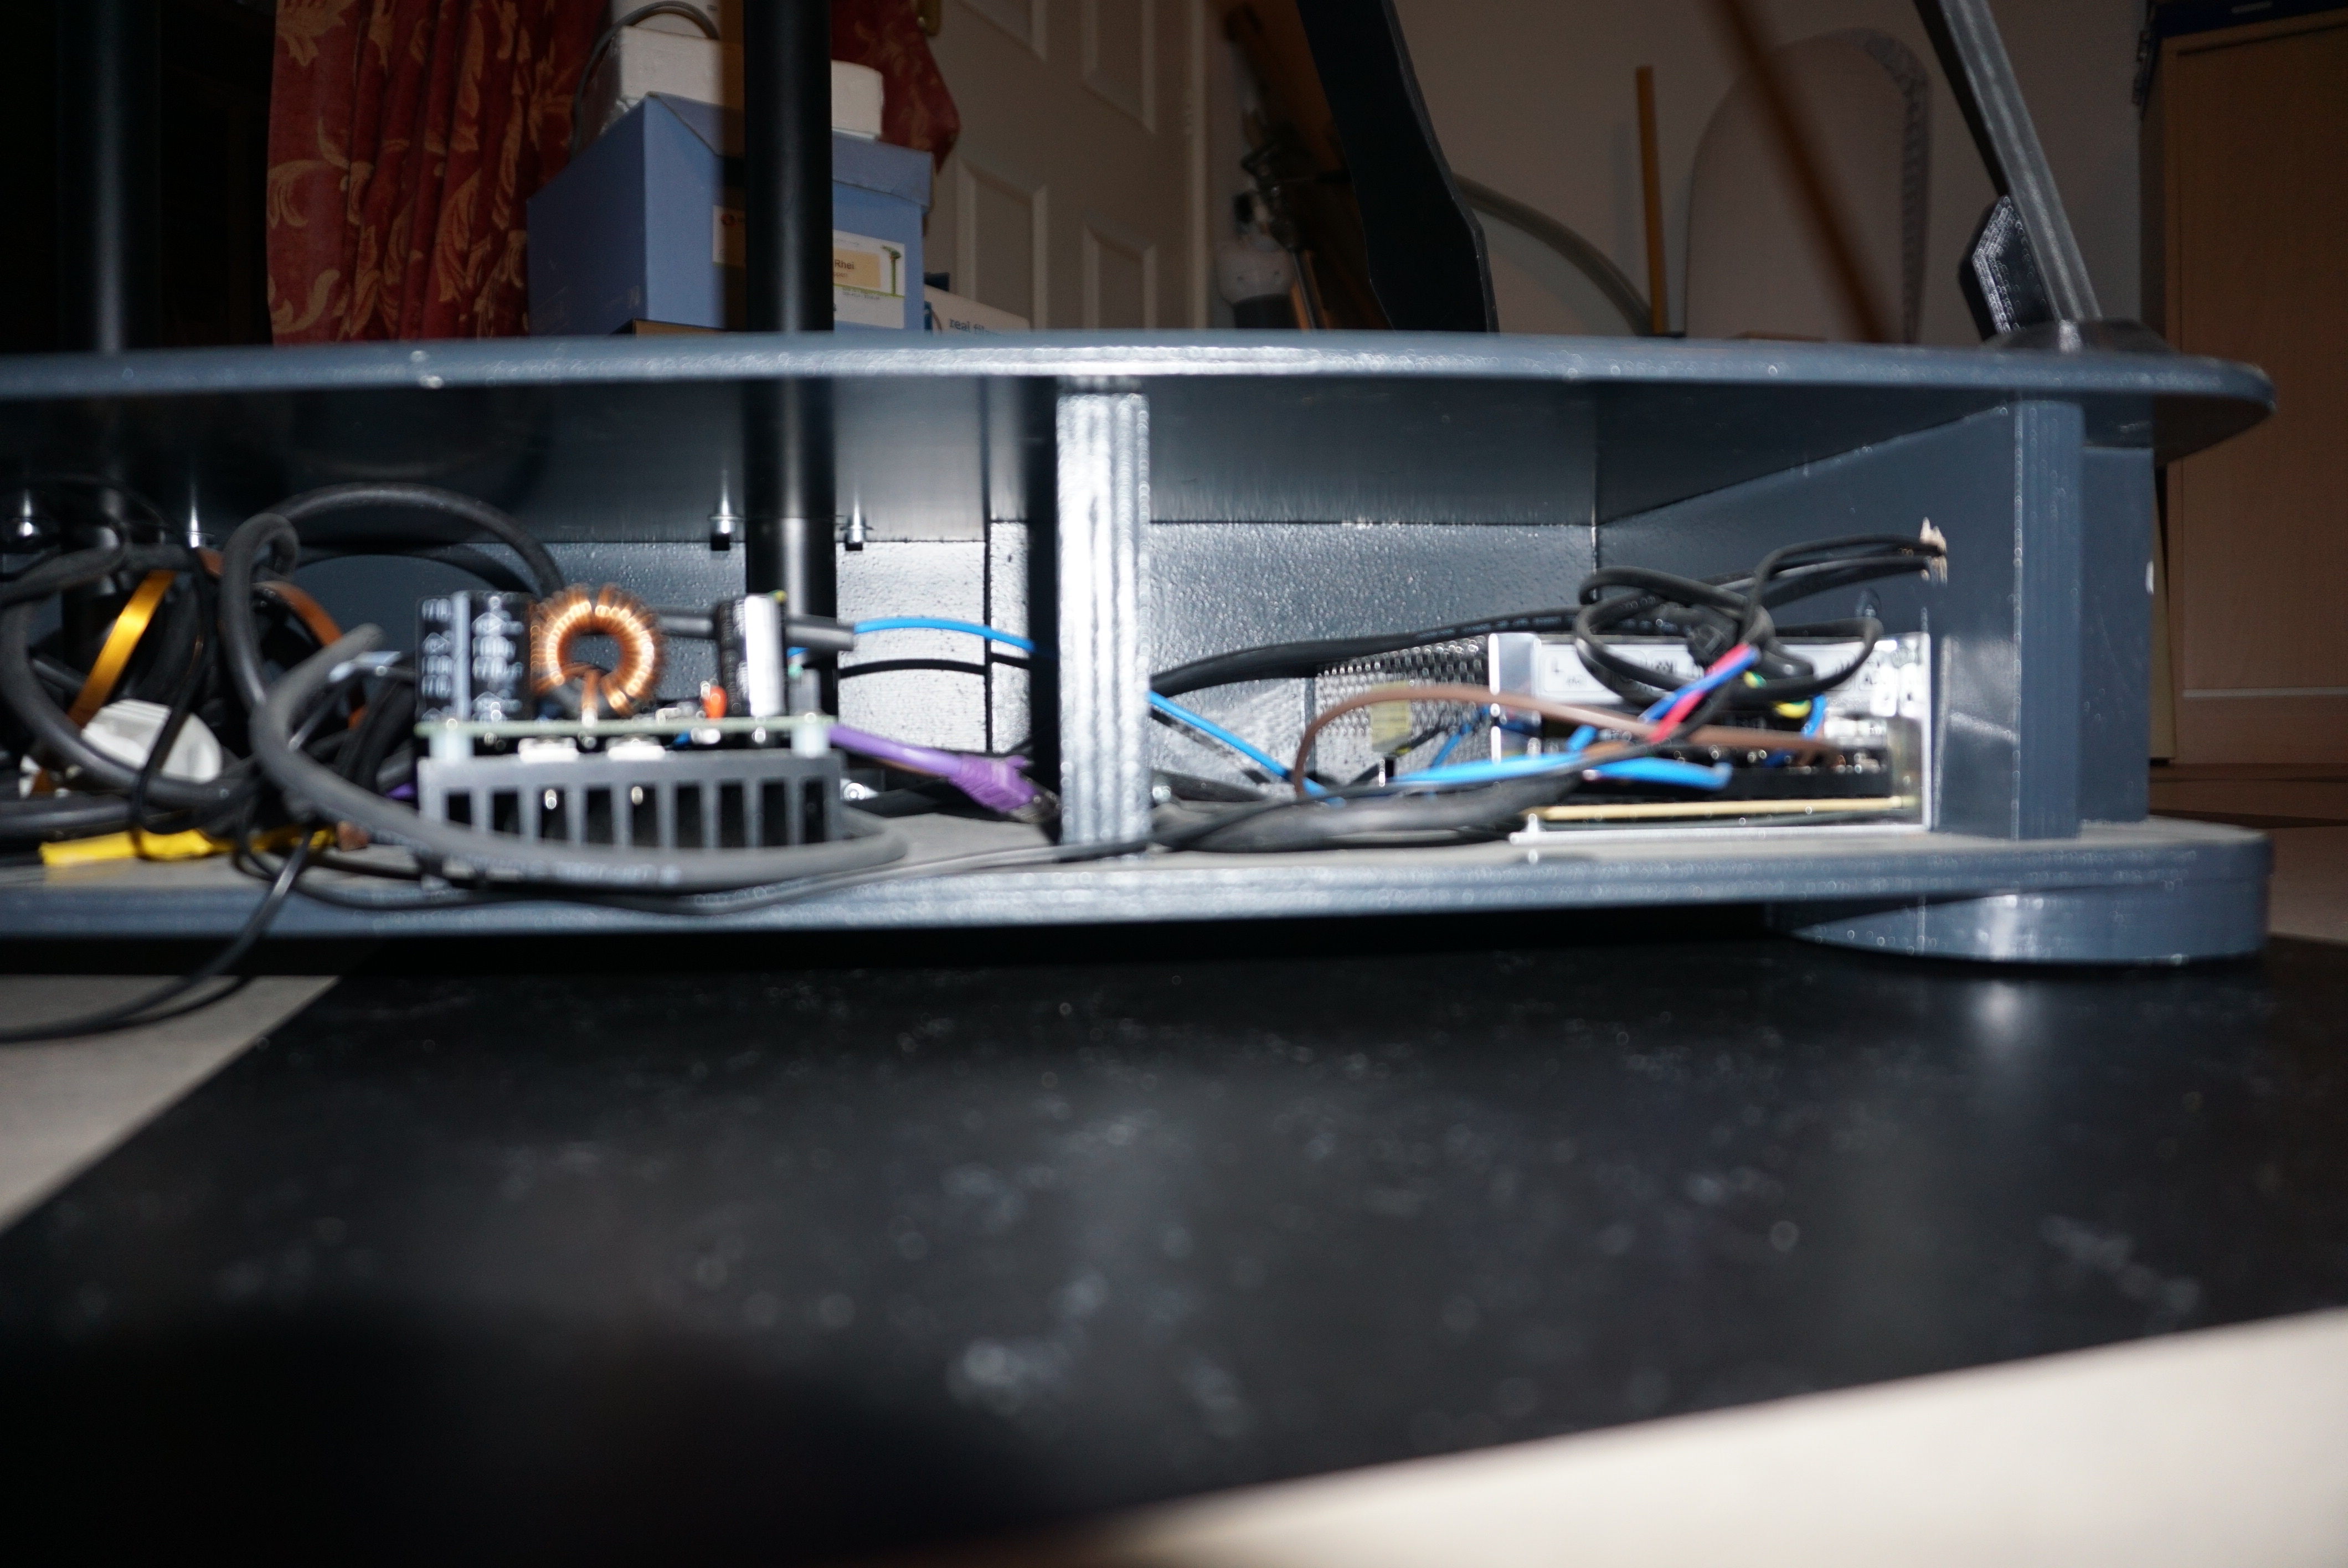
Lets start at the bottom, and work our way up. The turret has a base. This is the big grey cabinet under the turret. The base provides a support for the turret, and a place for the power supply and speakers. Ideally I would love to have a free standing turret, but given the weight and the materials I can use, I have chosen a base. The base has 2 aluminium tubes (painted black) that support the actual turret. The legs are only for show and cannot support any weight. The tube also carry power wires, speaker wires and an Ethernet cable. the power for the turret comes in at the back.

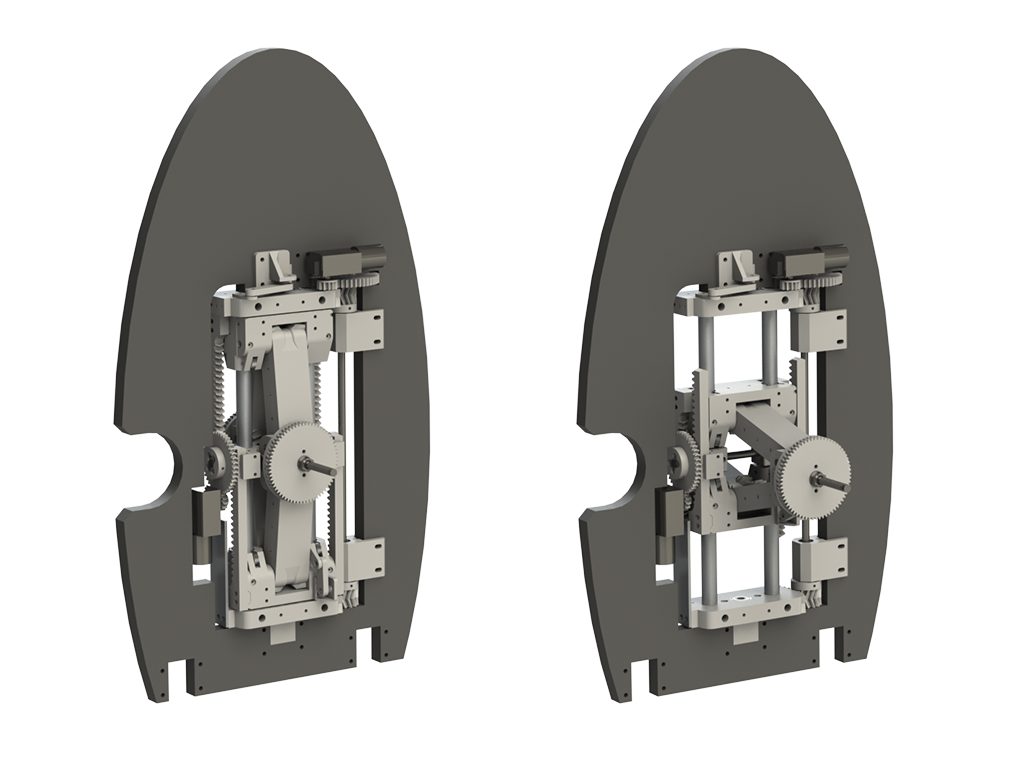
Core movement
The main movement of the turret is made using the pan/open mechanism that sits in the hart of the turret.
The opening mechanism is a scissor mechanism that is controlled using a rack and pinion. This scissor mechanism is 70mm thick when closed, but still has a 90mm stroke on each side. A small DC gearmotor drives the opening mechanism. A potmeter and switches provide feedback.
To pan the guns, the whole scissor mechanism is moved around. On the pan mechanism is a section of gear teeth. These teeth are driven using a set of small gears driven by a similar DC motor to the opening mechanism. a potmeter provides feedback.
Eye
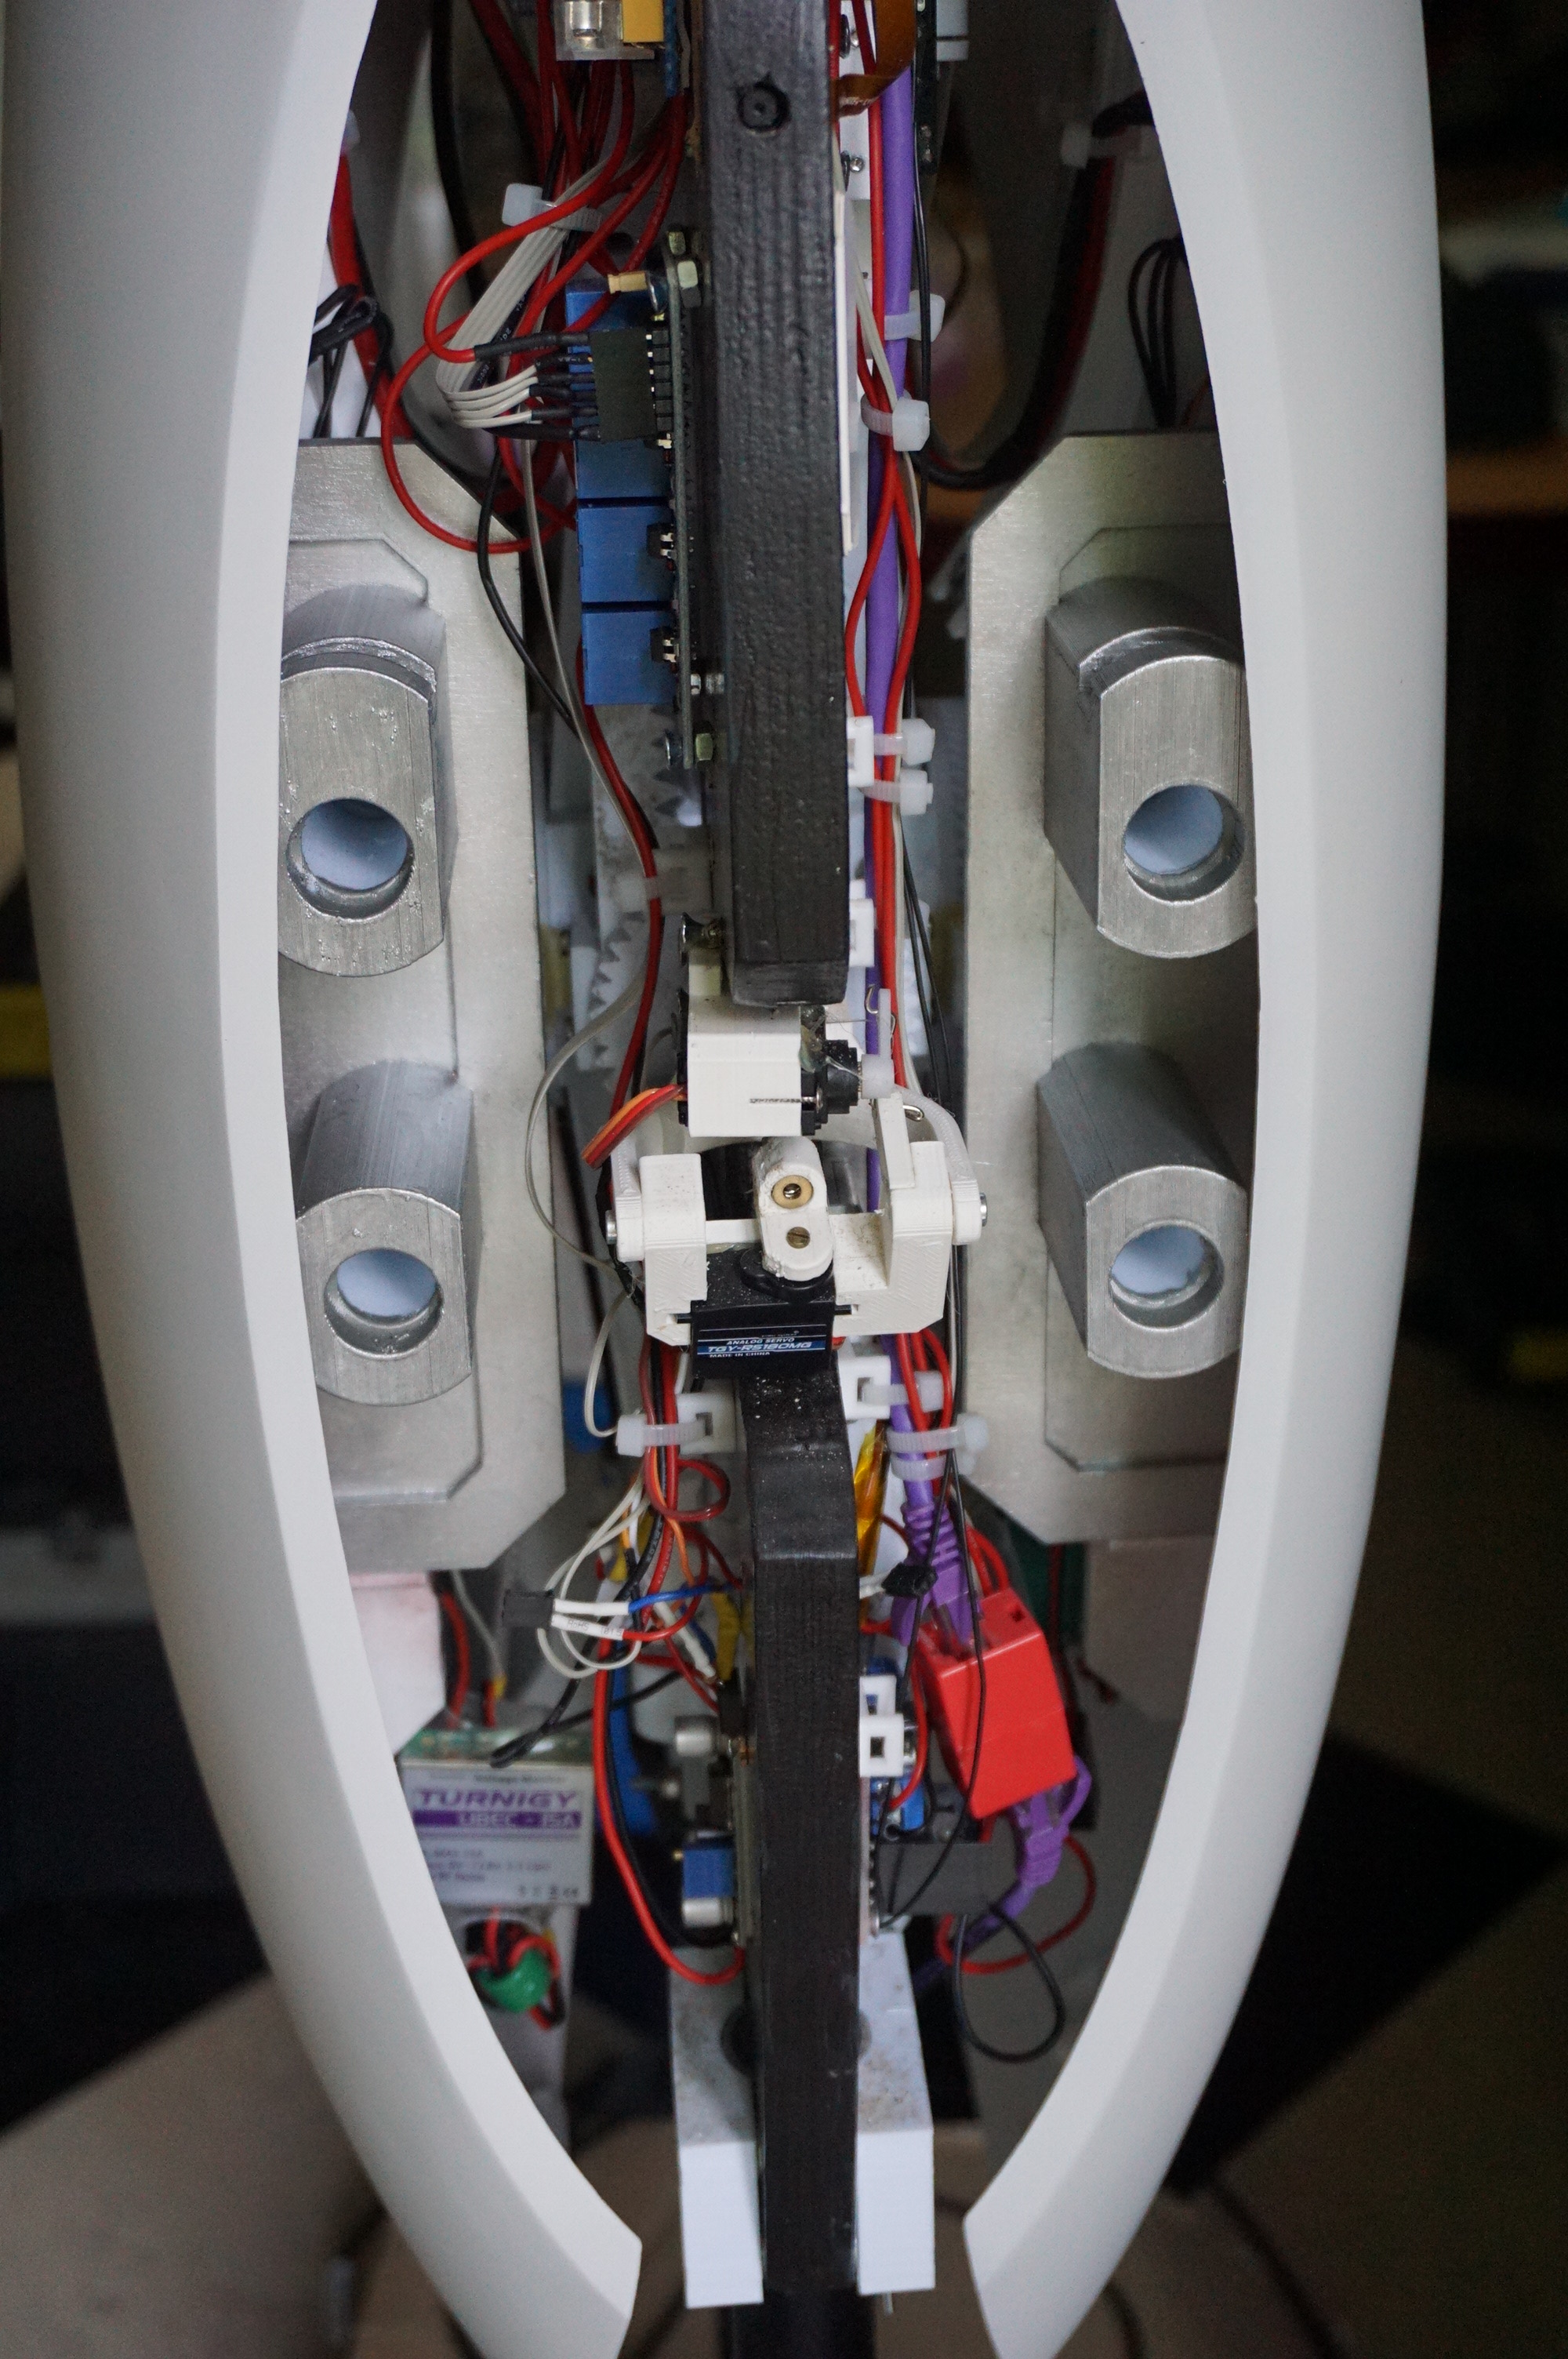
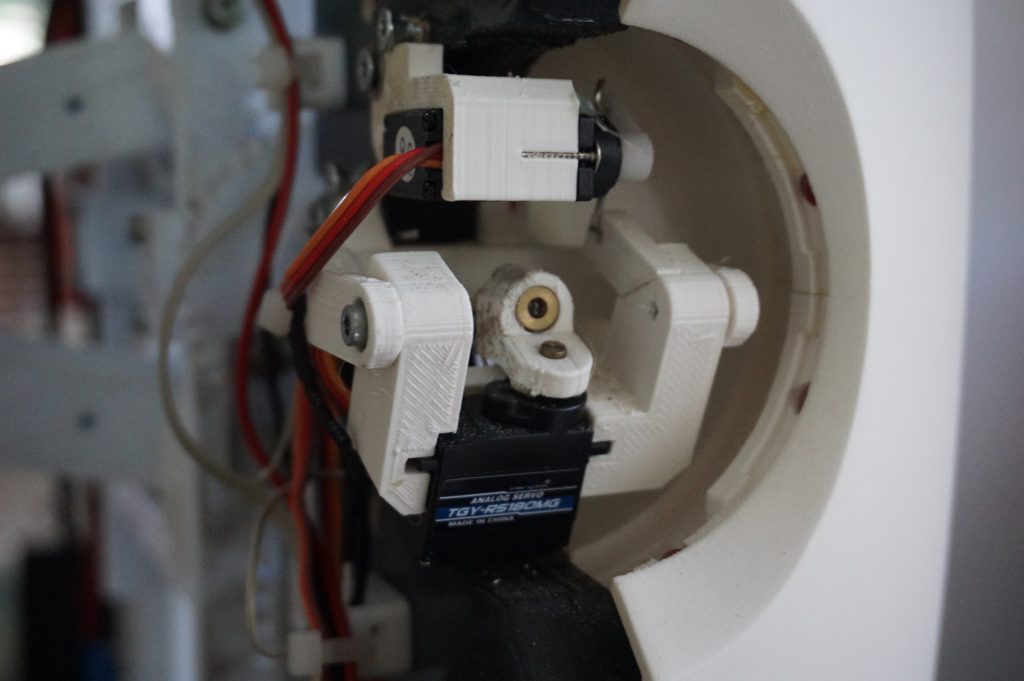
The eye consists of a laser diode with pan/tilt, and a set of leds to illuminate the red lens of the eye. A hole in the middle of the lens allows the laser to pass. The leds for the eye are housed in the shell, and shine on the side of the lens to illuminate it. The whole eye mechanism is covered with a white shell to reflect the light forward. Without this, the eye would hardly light up, and the parts behind the eye would shine bright.
The pan tilt mechanism itself is not very impressive, but there is one problematic challenge. Because the laser needs to shine through a small hole in the lens, the pivots need to be quite close to the lens. Because of this, the pan servo is mounted at a 20 degree angle to the tilt. At -20 degrees tilt, the pan servo sits flush with the lens. This does mean that the pan axis has a curve to it, but other solutions would be more problematic.
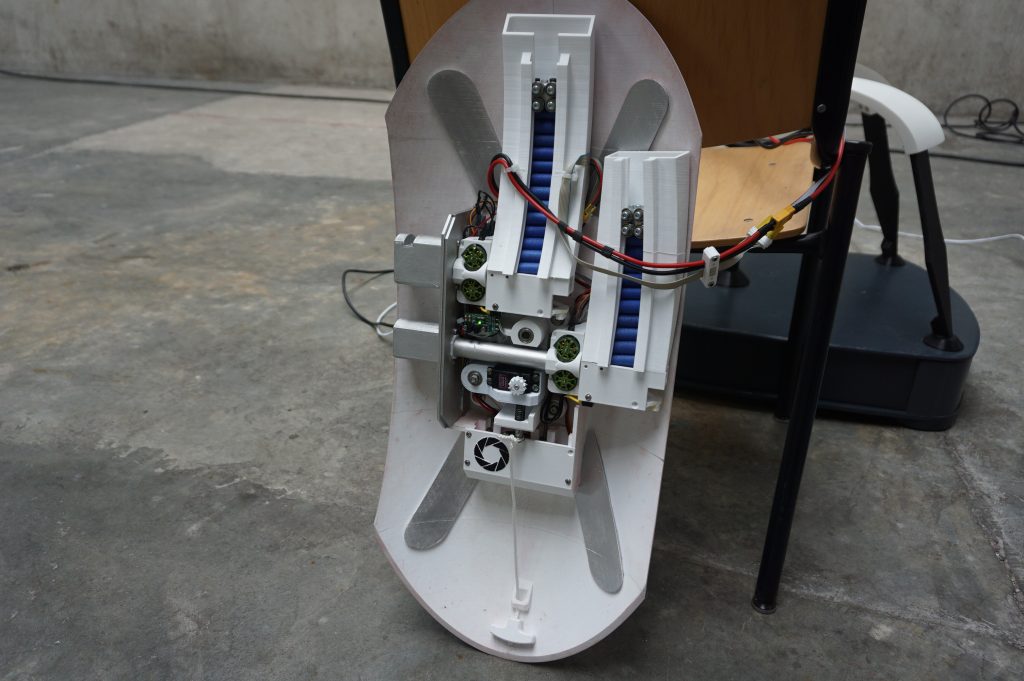
Guns
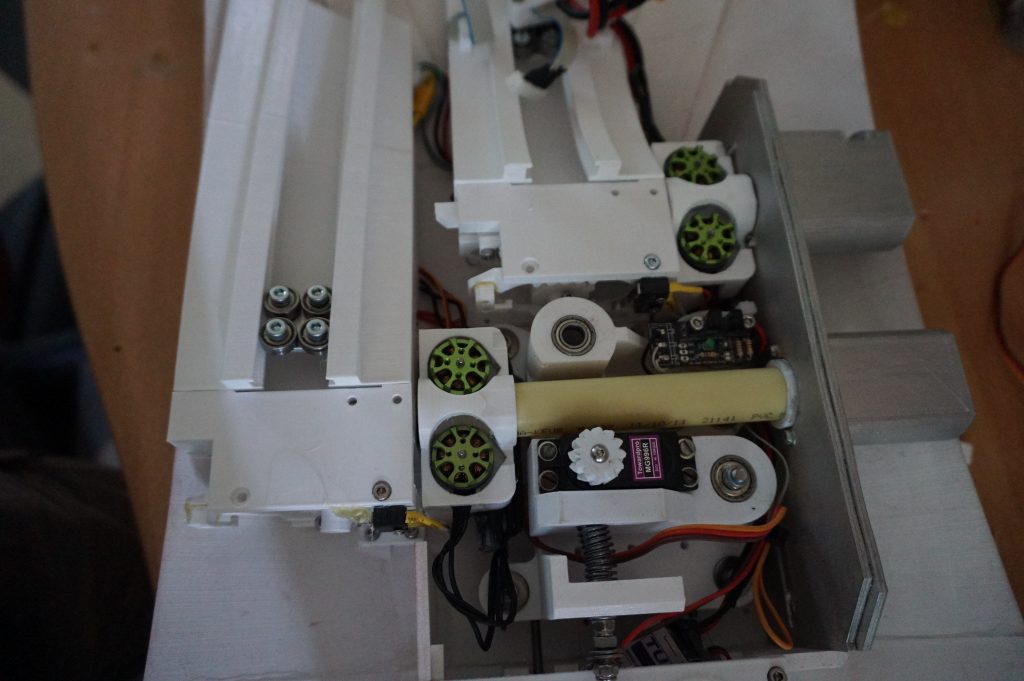
Each gun has a separate tilt, a set of bearings for the tilt and 2 nerf guns. The tilt motor is a spring loaded hobby servo that pushes into the gear of the pan/open mechanism. Because the gearing is heringbone, the gear locks the tilt in place. When pushed down, the motor gear disengages the big gear on the pan/open and the shell can be taken off. A wire also connects to the spring loaded part, so I can remove the shells, even if the turret is closed.
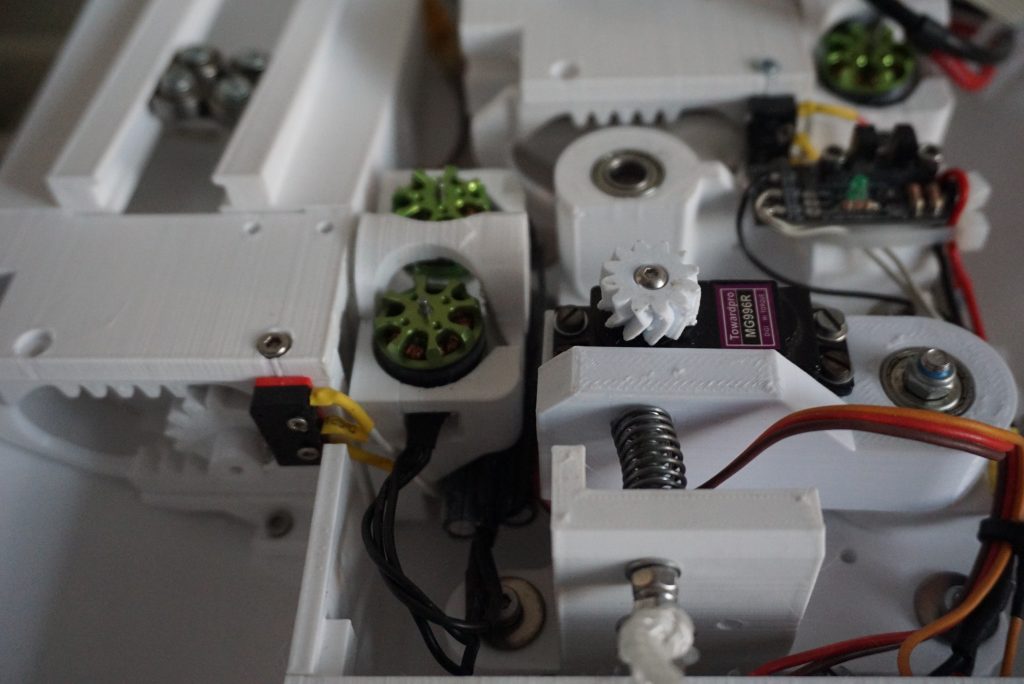
Each of the guns consists of a gravity fed magazine, a feeder and a flywheel shooter based on 2 outrunner motors. To shoot, first the flywheels are powered. Then the feeder starts moving. It moves to the back using a rack and pinion system (shown below). The rack and pinion then moves the feeder to the front, hopefully with a dart. When the dart hits the flywheels, it is accelerated and shoots out.
I said hopefully because gravity fed nerfs work poorly. There are extra weights on each magazine and even with those the guns do sometimes jam up. Luckily, with 4 guns, the chance of 1 working is quite big.
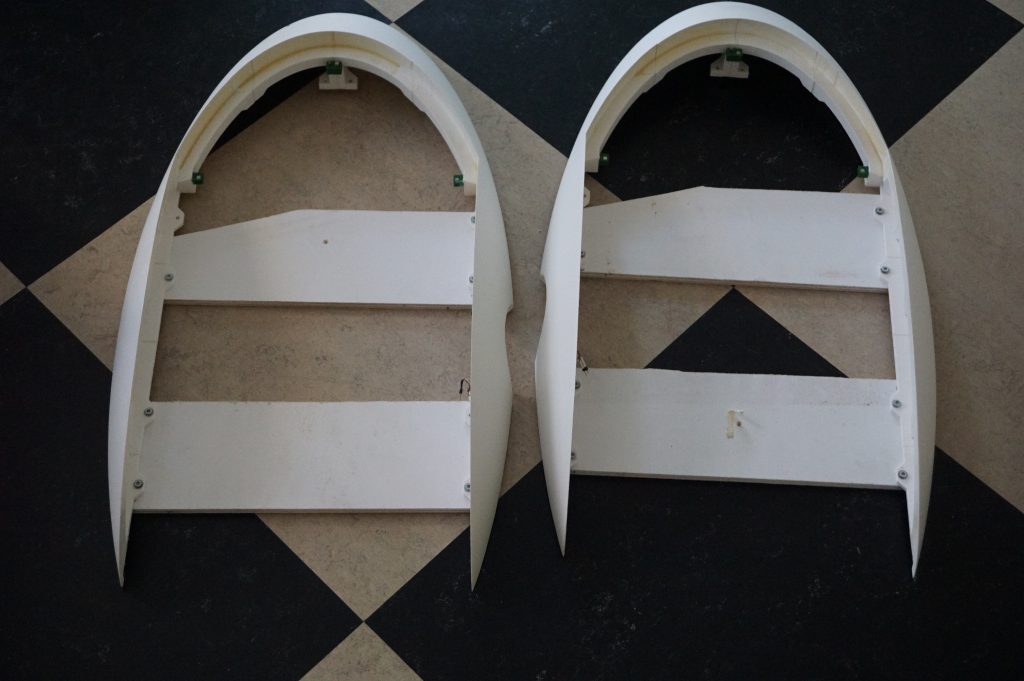
Shells and core
The shells and core are the big white parts of the turret. In my system, the shells are for the guns, and the core is the center of the turret. Together with the legs and head covers, they make up 60-80% of the actual printing. Each core consists of 14 blocks that take around 8 hours each. Each shell consists of 10 big parts that take around 8 hours each. with the legs and the head covers also taking around 12 hours each, you can imagine this is a big print.
All of the white parts were also sanded, coated with XTC3D, sanded again, primed, sanded, painted and clear coated. This took quite a bit longer than I had hoped.

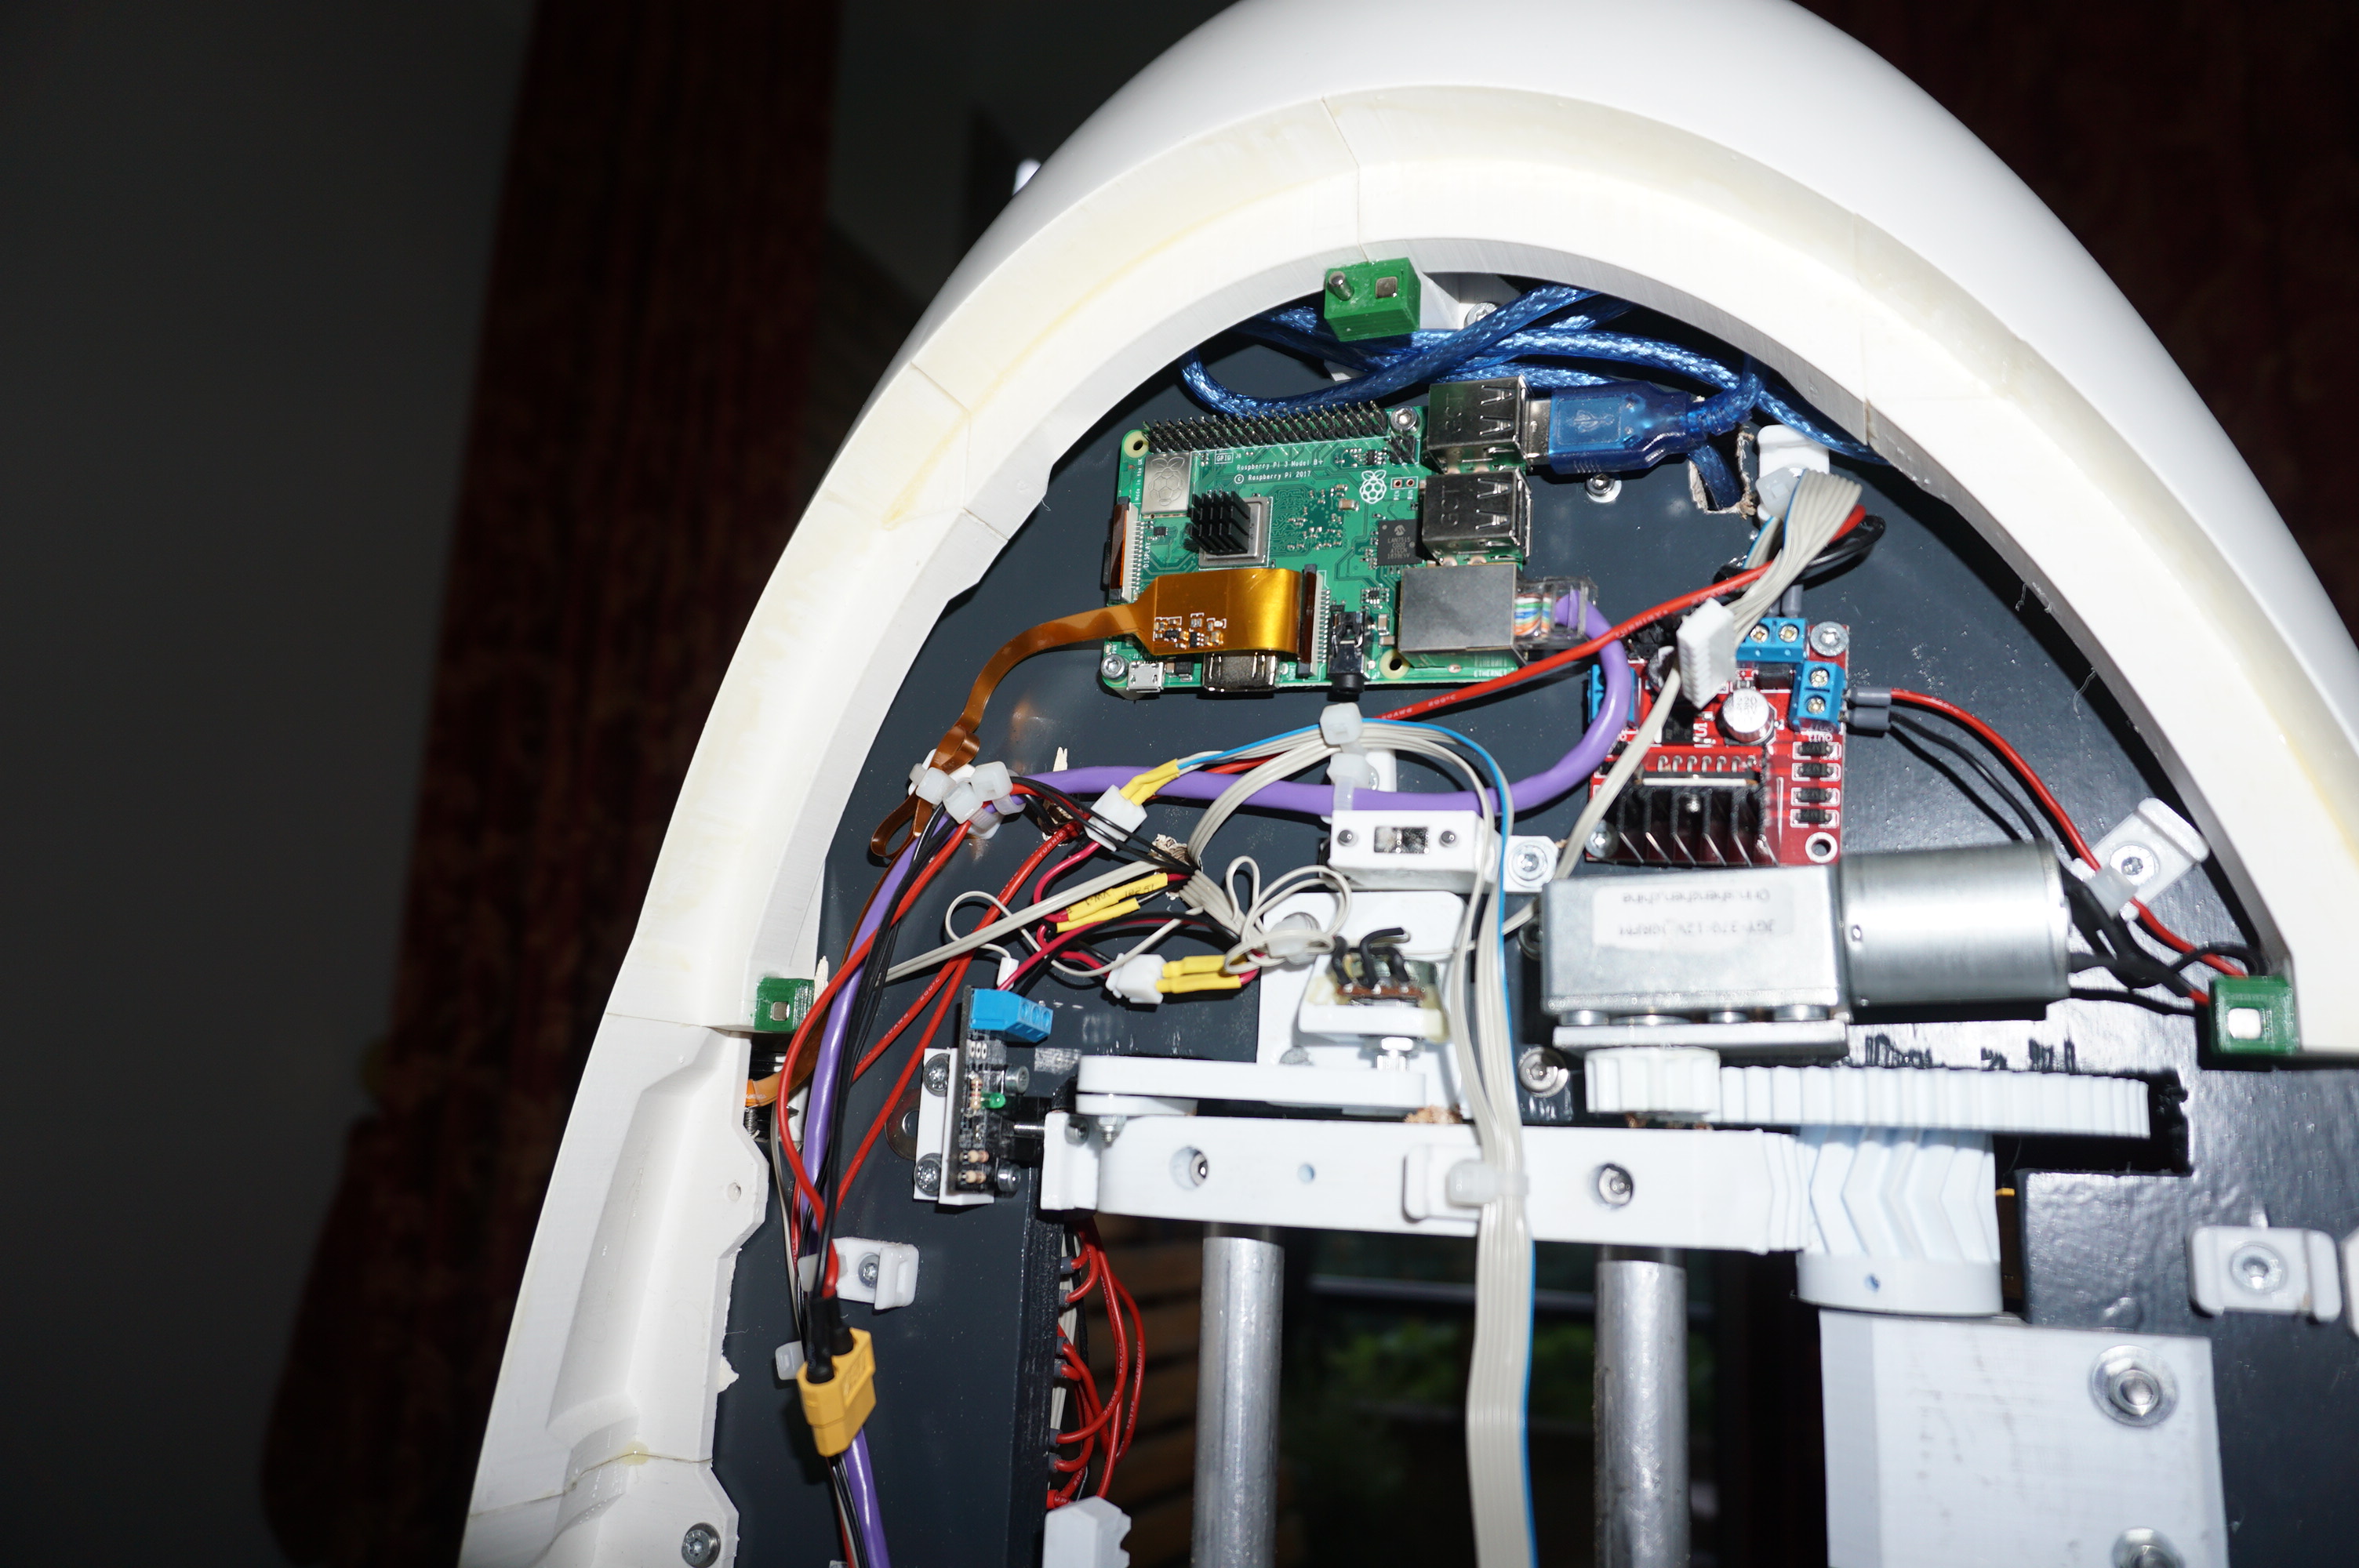
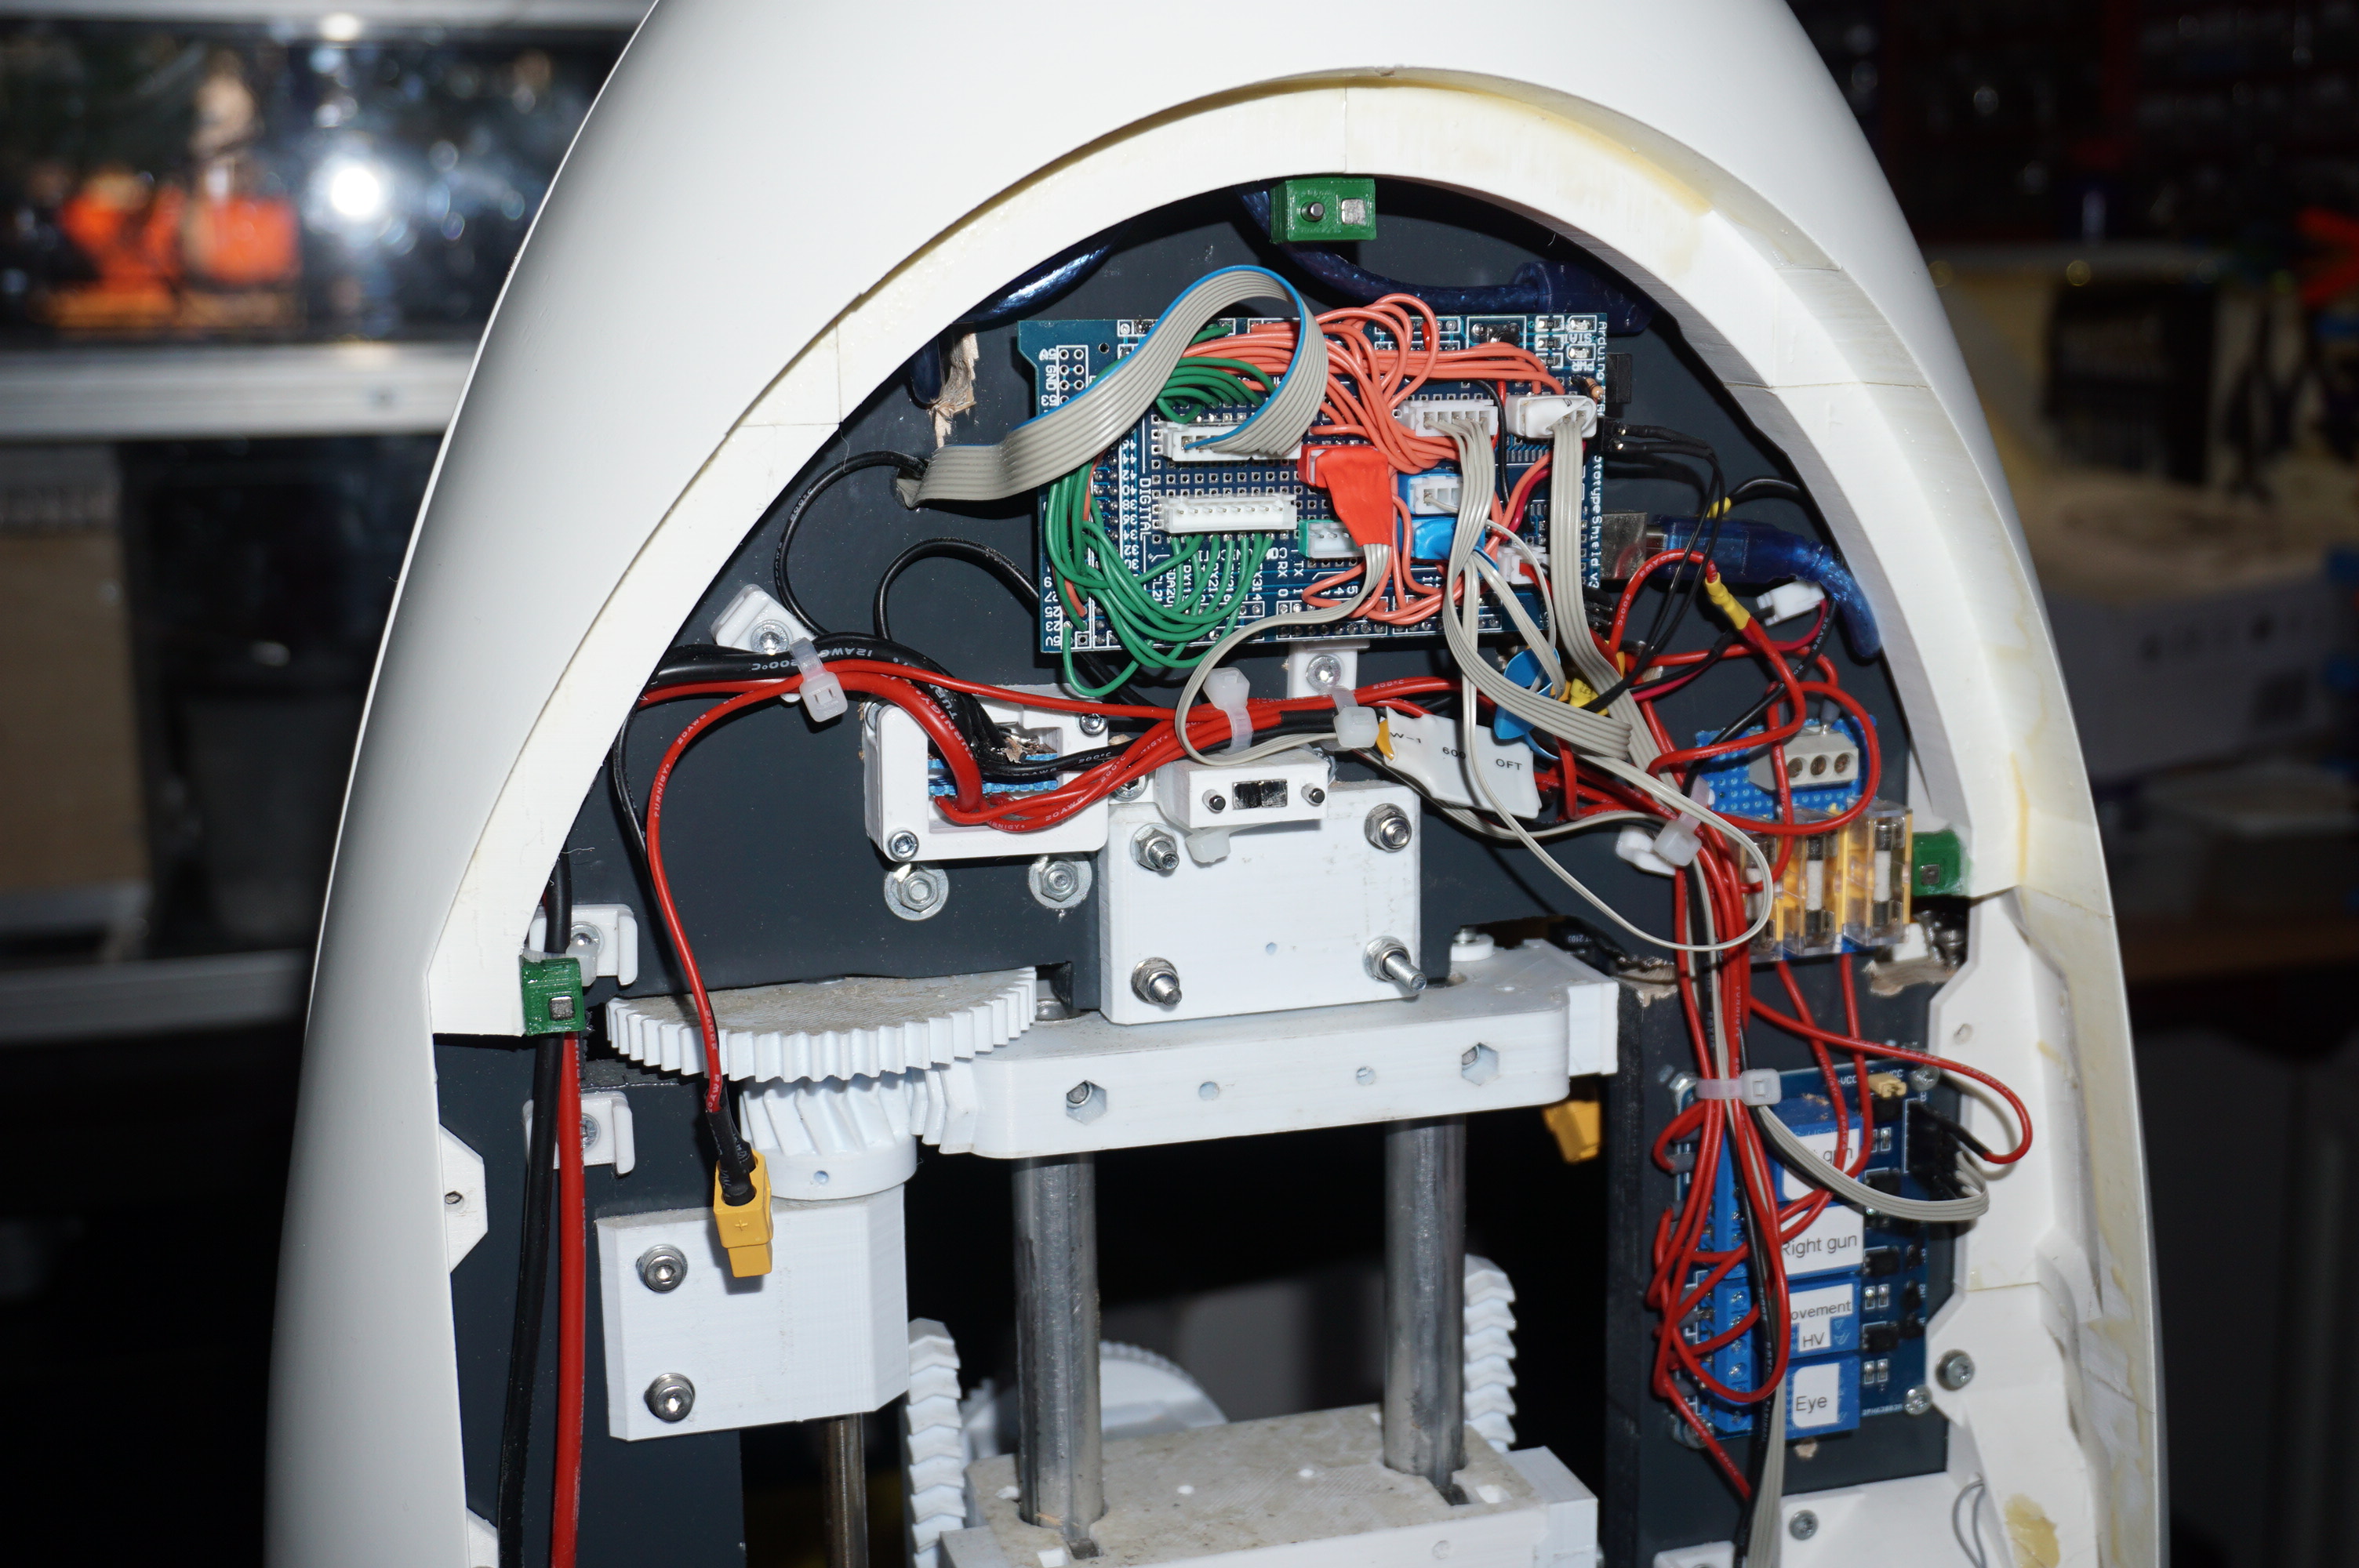
Electronics
The wiring took surprisingly long. Even with a schematic in hand, there is a lot of stuff going on. From the base, 12V and 18V enter the turret. Both pass through a relay and fuses so the power can be cut in case of problems. The 18V then goes to the open/close motor driver, and the 12V gets passed through the turret. It enters voltage regulators to be converted to 5V, it enters into the shells and powers the guns, it powers the eye.
In all places where there are separations, there are connectors. This way, I can quickly detach a shell without hassle. In all other places the wiring is soldered in place.

Control
The turret is controlled using an Arduino mega 2560 and a Raspberry pi 3+. The Arduino mega does all of the visible parts. It moves all axes, it has several layers of protection for each motion, it handles all of the leds and servo motors. However, it has no intelligence. It can receive commands via serial and executes them.
The Raspberry pi is responsible for the intelligent stuff. It looks at either a camera input or manual input, and determines where the turret needs to move. It also handles the speakers in the base. Together, they can make all the functions on the turret work.
Now while I would love to say the software could do amazing work, it cannot. Currently it does simple blob tracking with Pygame in python. It is a poor method of tracking targets, but it is a simple way and I was running out of time. Also, the autonomous operation is not really there at the moment. The firmware can handle autonomous operation, but the software does very little automatically at the moment. I might add this later, or let some other keep people at my hackerspace do this, but this is not present at the moment.