(Edit 2024-01-21: The project development for this project and related HP45 control projects has stopped. The Teensy 3.5 that the project requires is no longer available, and I have stopped fully supporting this design. The way to control the printhead and testing circuitry can still be used for reference, but this project is not a finished project that you can replicate with the expectation that it will just work. Make at your own risk.)
The HP45 controller is used to directly control the HP45 inkjet printhead. It gives direct control of every nozzle of the printhead. The printhead can be used to mark any object with text or images. It can be integrated into existing machines to print larger objects.
The HP45 controller is still a working prototype. While it is now operational enough for actual use, it might still lack features or still contain bugs that might be problematic to some users. If you have any bugs to report, or have features you might want to have added, you can contact me through the contact form.
Specs
| Controller | |
| Voltage | 12V |
| Max. current | 4A |
| Controller | Teensy 3.5 |
| Max. controllable printheads | 1 |
| Printhead | |
| Printhead technology | Thermal inkjet (TIJ) |
| Nozzles | 300 |
| Dots Per Inch | 600 |
| Swatch size | 0.5″ (12.7mm) |
| Rows of nozzles | 2 |
| Max. printing speed (@600DPI) | 110mm/s (2600 shots per nozzle per second) |
Hardware overview
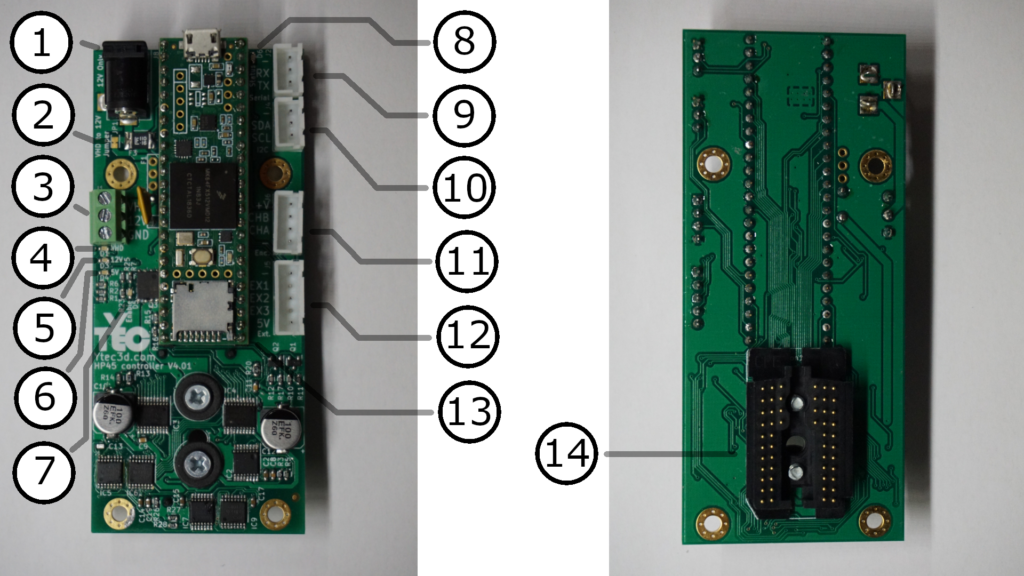
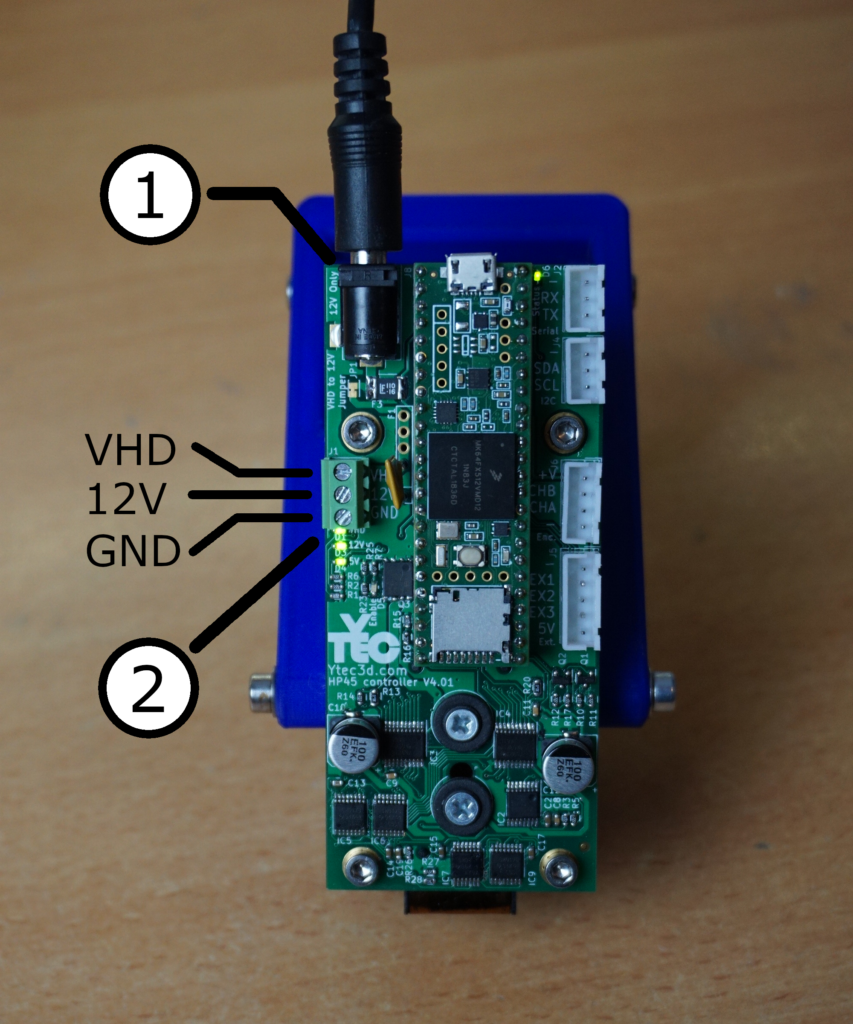
| 1. | Power input jack* | 12V only input on a DC barrel jack (12V, max. 4A. Does not contain reverse polarity protection) |
| 2. | VHD to 12V Jumper | Jumper that connects 12V to VHD (connected by default) |
| 3. | Power input terminal* | Power input terminal for Ground, 12V and VHD (Cut jumper if using separate VHD and 12V. Does not contain reverse polarity protection ) |
| 4. | VHD Led | VHD power Led (Lights up when VHD is powered) |
| 5. | 12V Led | 12V power Led (Lights up when 12V is powered) |
| 6. | 5V Led | 5V power Led (lights up when 5V is powered) |
| 7. | Printhead enable Led | Printhead enable Led lights up when the printhead is enabled |
| 8. | Status Led | Status led lights or blinks depending on controller status. On is no problem, slow blink is warning. Fast blink is error |
| 9. | Serial connector | Connections for RS232 serial (5V or 3.3V) |
| 10. | I2C connector | Connections for I2C (5V or 3.3V, external pull-up required) |
| 11. | Encoder connector | Connections for a quadrature encoder (NPN encoders only, 3.3V or 5V, max. power draw 300mA) |
| 12. | External connector | External connector for triggers (3.3V or 5V, pull-up or pull-down configurable, max power draw 300mA) |
| 13. | Teensy 3.5 | The microcontroller controlling the printhead |
| 14 | HP45 connector | The connector to interface with the HP45 printhead |
*(Do not use DC barrel jack and screw terminal at the same time)
Software
The easiest way to control the HP45 controller is a custom piece of software called “Inkjet Commander”. This is a python based program which can send images to be printed directly to the printhead. It can also be used to configure the printhead and the controller, and perform diagnostics on the printhead.
Just like the controller, “Inkjet Commander” is still a work in progress. Bugs will be fixed, features will be added and the interface and performance will be refined.
(Inkjet commander is only tested on a windows PC. It has not yet been tested on Linux, mac or Raspberry pi. As soon as the project is more mature the software will be tested and optimized for more systems. Until then using the software on anything other than a windows PC gives no guarantees)
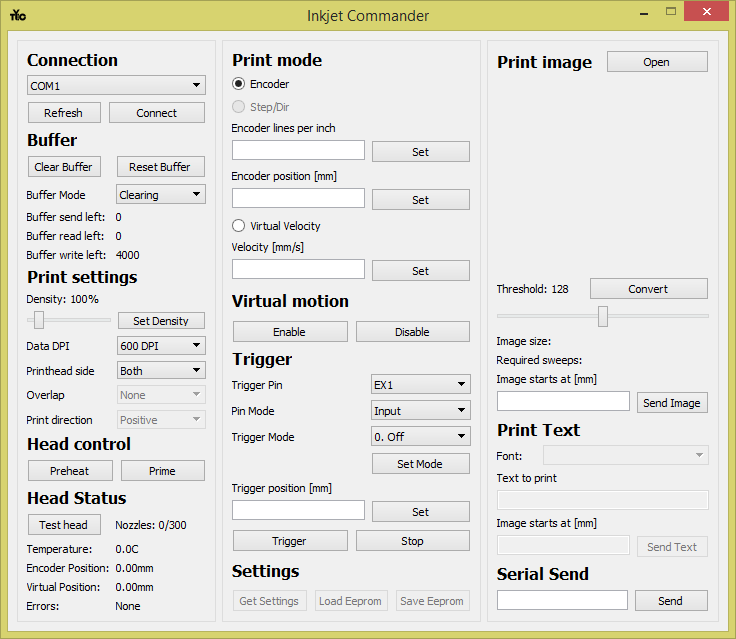
A coarse list of the features currently in “Inkjet Commander”:
- Connect to the printhead
- Report back temperatures and positions to the user
- Perform a full diagnostic on the controller and the printhead
- Manage the print buffer of the controller
- Set inkjet density, DPI and which side of the printhead is used
- Configure encoders
- Configure virtual velocity
- Configure trigger pins and modes
- Load a bitmap image and convert it for printing
- Send a converted image to the controller
- Send a direct serial command to the controller
A complete guide to the software can be found at the following link: https://ytec3d.com/inkjet-commander-manual/
Software requirements
To control the printhead through a computer, the computer needs to know how to talk to a Teensy 3.5. For this the following software is required
- Arduino IDE 1.8.12 or higher (https://www.arduino.cc/en/software)
- Teensyduino (https://www.pjrc.com/teensy/teensyduino.html)
To run the python program “Inkjet Commander” directly, the following software and libraries are required:
- Python 3.6.2 or higher (https://www.python.org/downloads/)
Python needs the correct packages to run. These can be installed easily from the command line. A full guide on how to do this can be found here: (https://packaging.python.org/tutorials/installing-packages/)
When Python is installed correctly, installing the packages should be as easy as running “pip install ‘package'” in the command line. The required packages are:
- PyQT5 (https://pypi.org/project/PyQt5/)
- pip install PyQt5
- Numpy (https://numpy.org/)
- pip install Numpy
- Pyserial (https://pyserial.readthedocs.io/)
- pip install pyserial
Downloads
Software was moved to github to better share developments. Information above is outdated and will be removed at some point. Software can be found here: https://github.com/yvodehaas/Inkjet-commander
Revision history
| Version | Changes |
| V1.00 (2021-09-18) | Initial release |
(Software will be moved to Github at some point in the future)
Using the HP45 controller
powering the controller
To power the controller there are 2 options.
The first option is to use the 5.5mm DC barrel jack power connector (1) to power the controller. This powers the whole board with one convenient connector. The power needs to be 12V +/-1V, with an advised current of at least 4A. Make sure that the VHD to 12V jumper is bridged when using the power connector. VHD to 12V is bridged by default. 5.5×2.1mm barrel jacks are preferred. The center of the jack is positive, the outside is negative.
The second option is to use the screw terminal on the side (2). Here you can input 12V and ground the same way as with the DC barrel jack. The VHD to 12V jumper does then need to be bridged. The second option is to also connect the 12V and the VHD separately. This way the printhead can be run more efficiently, at the cost of an extra power supply and some calibration.
To use 2 power inputs, the VHD to 12V jumper NEEDS to be cut. The jumper is connected by default. 12V +/-1V with at least 1A is attached to the contact marked 12V. The contact marked VHD can have anywhere from 8V to 15V, with at least 3A. The exact voltage needs to be determined for each printhead. Keep lowering the voltage until the printhead stops ejecting ink reliably. The grounds of both power supplies need to be attached to the contact GND.
The controller has fuses in the form of polyfuses on each voltage rail. The 12V line has a 1.1A fuse. The VHD line has a 4A fuse and the internal 5V line has somewhere between 0.5A and 1.1A, depending on the use case and available fuses.
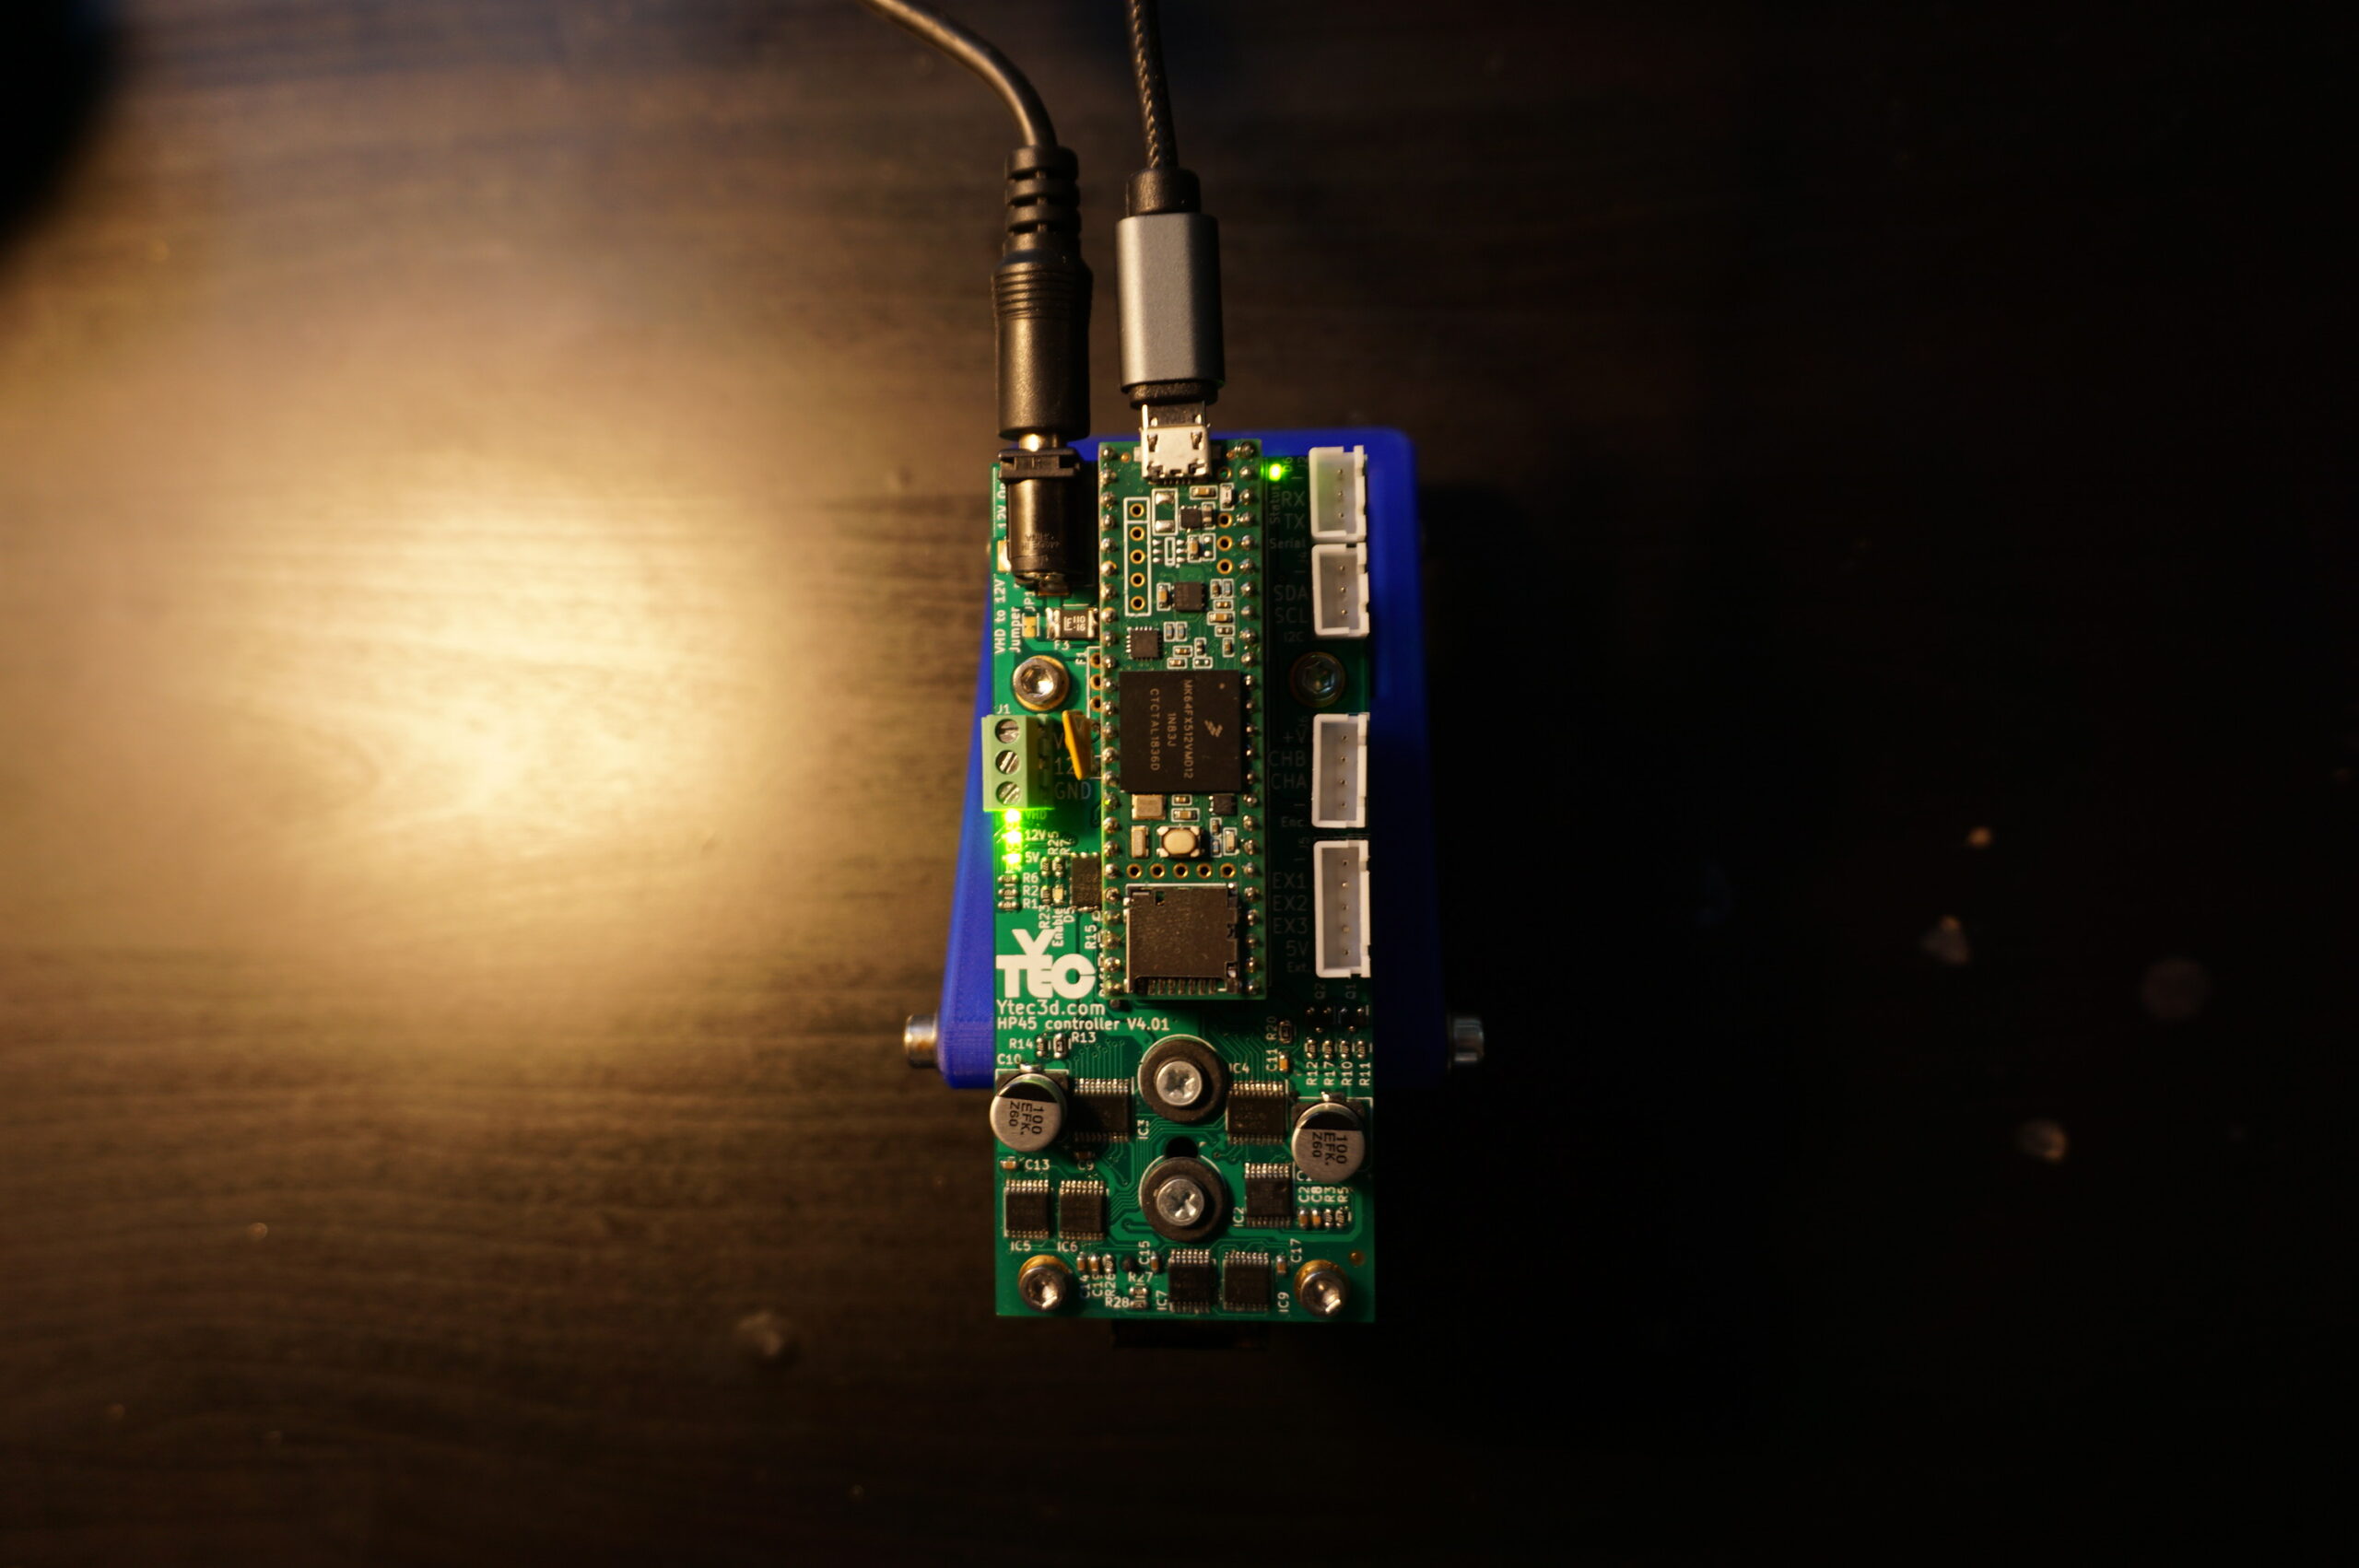
Connecting to USB
Currently the only way to connect to the HP45 controller is by the micro-usb port on the Teensy 3.5. Connecting the USB to a computer that can run Teensyduino will show the Teensy as a Serial port. Over this connection all functions of the HP45 controller can be accessed.
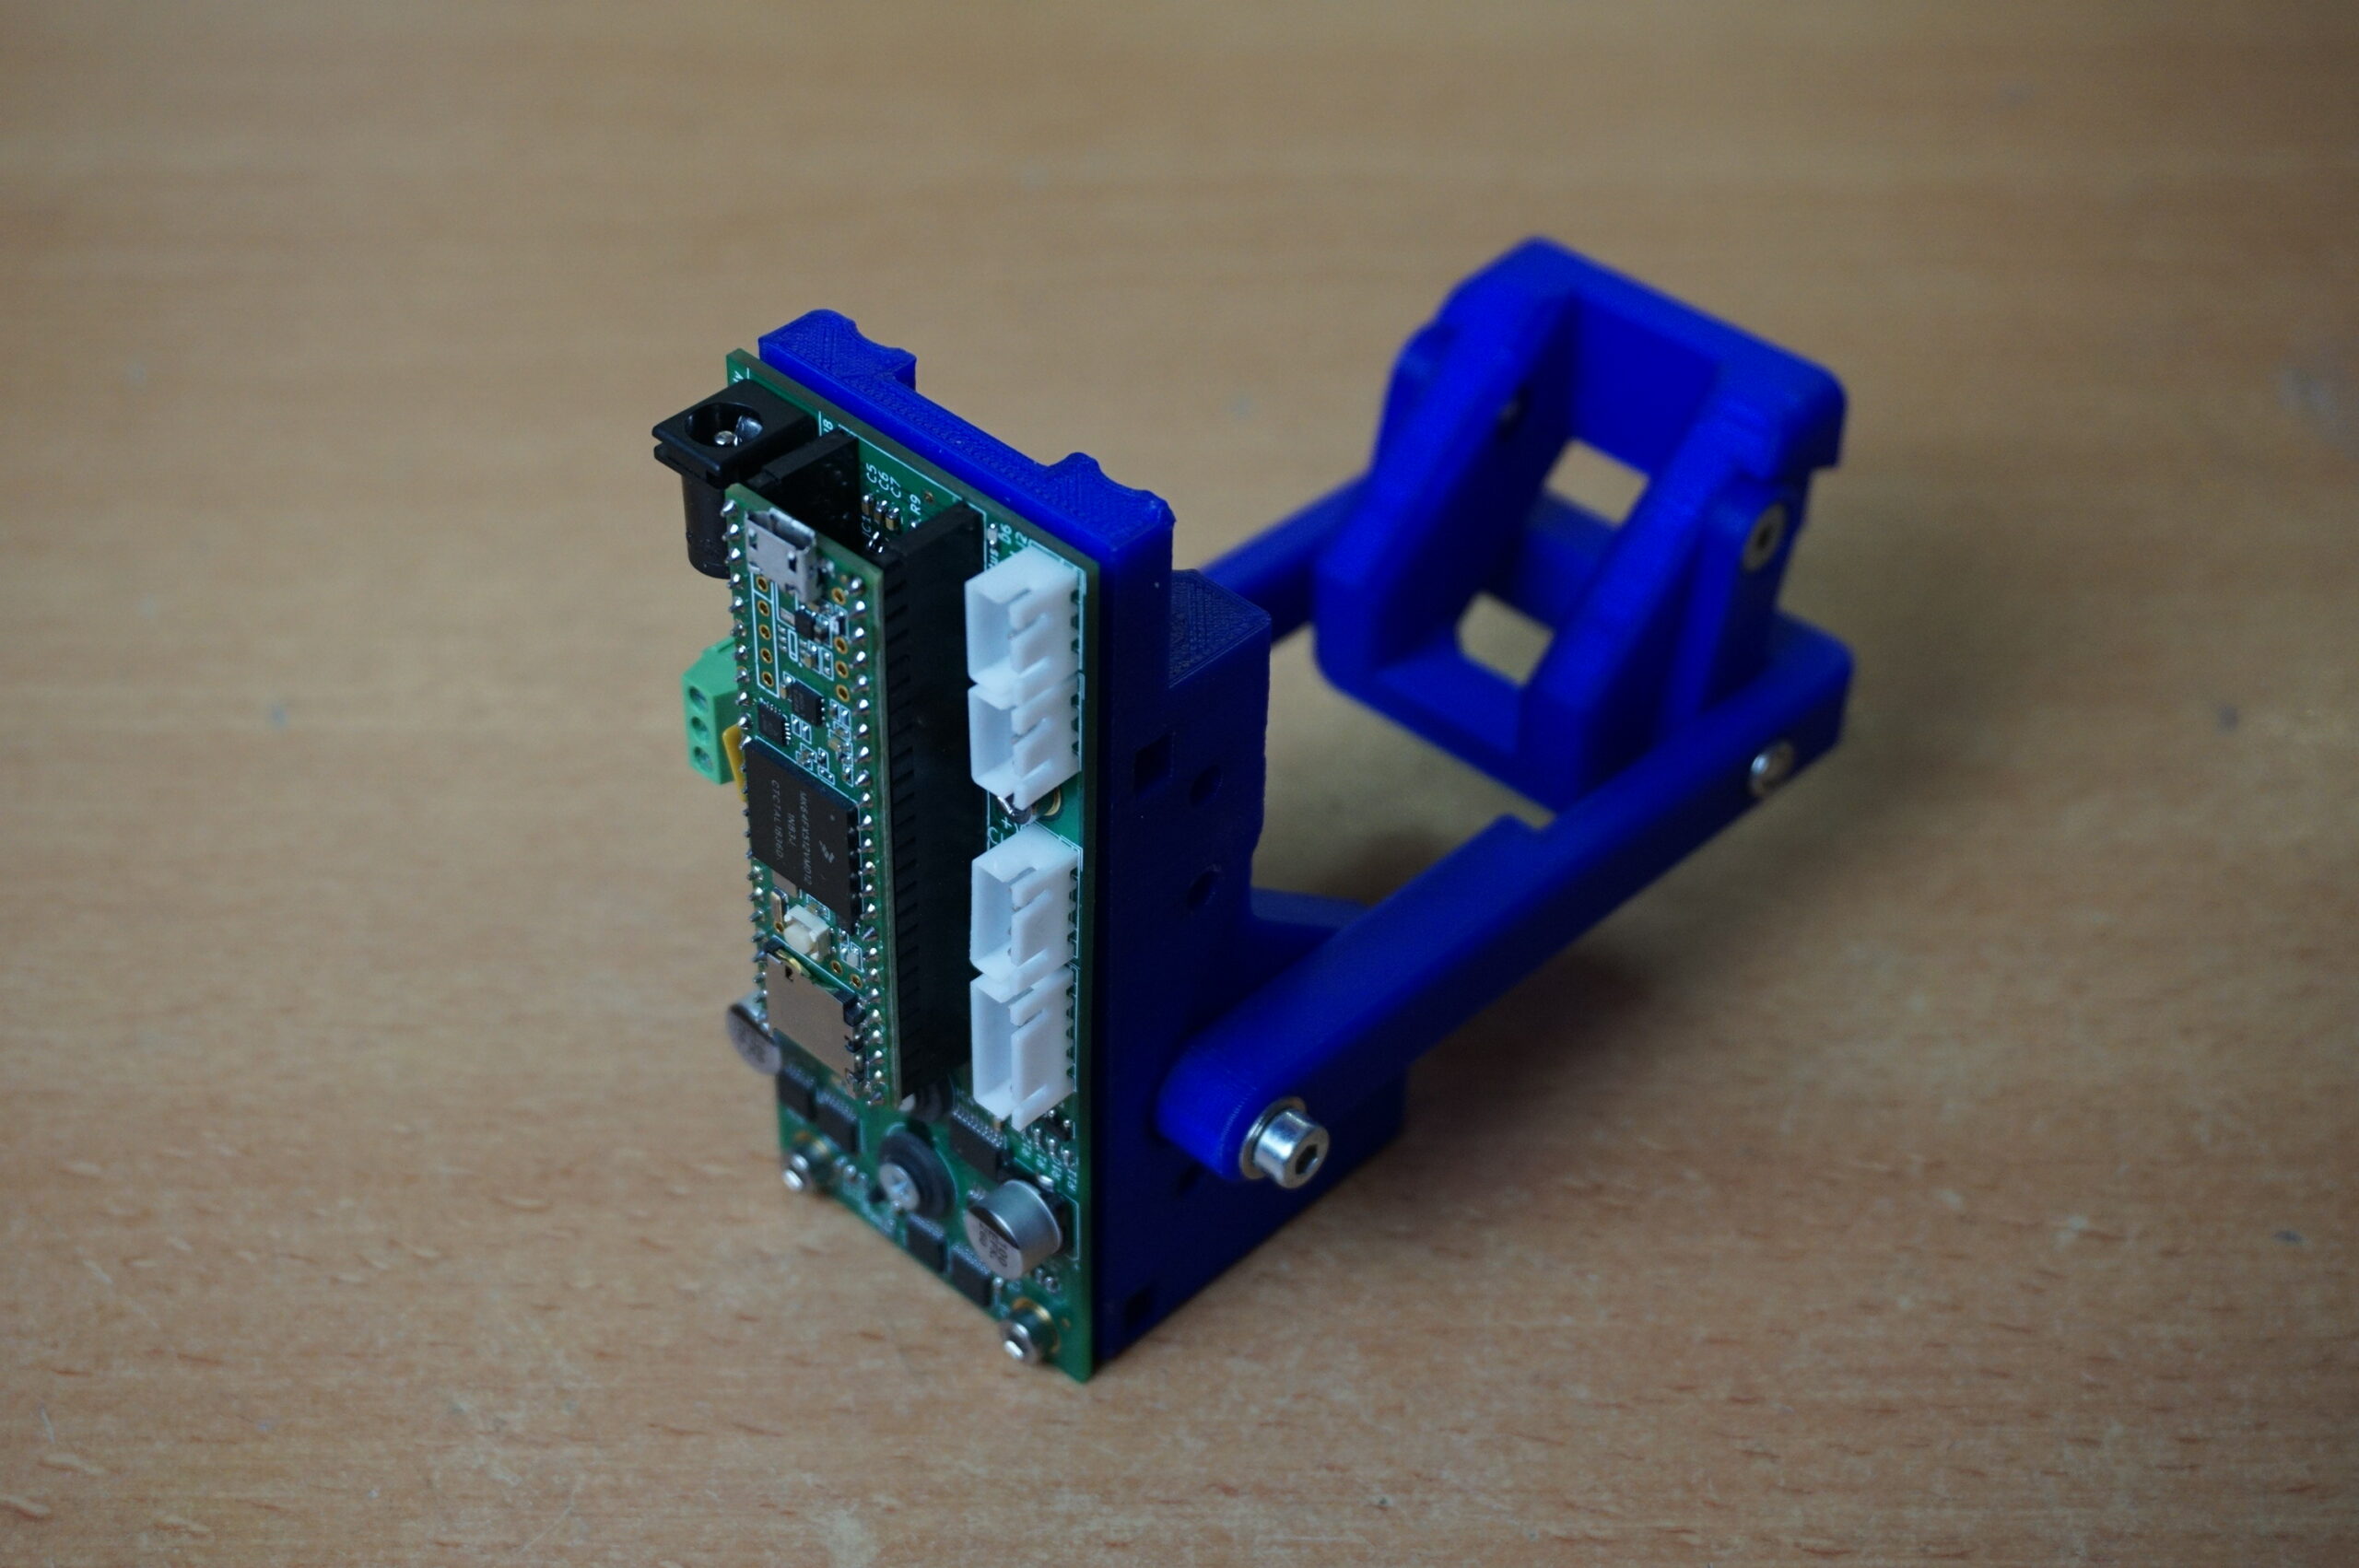
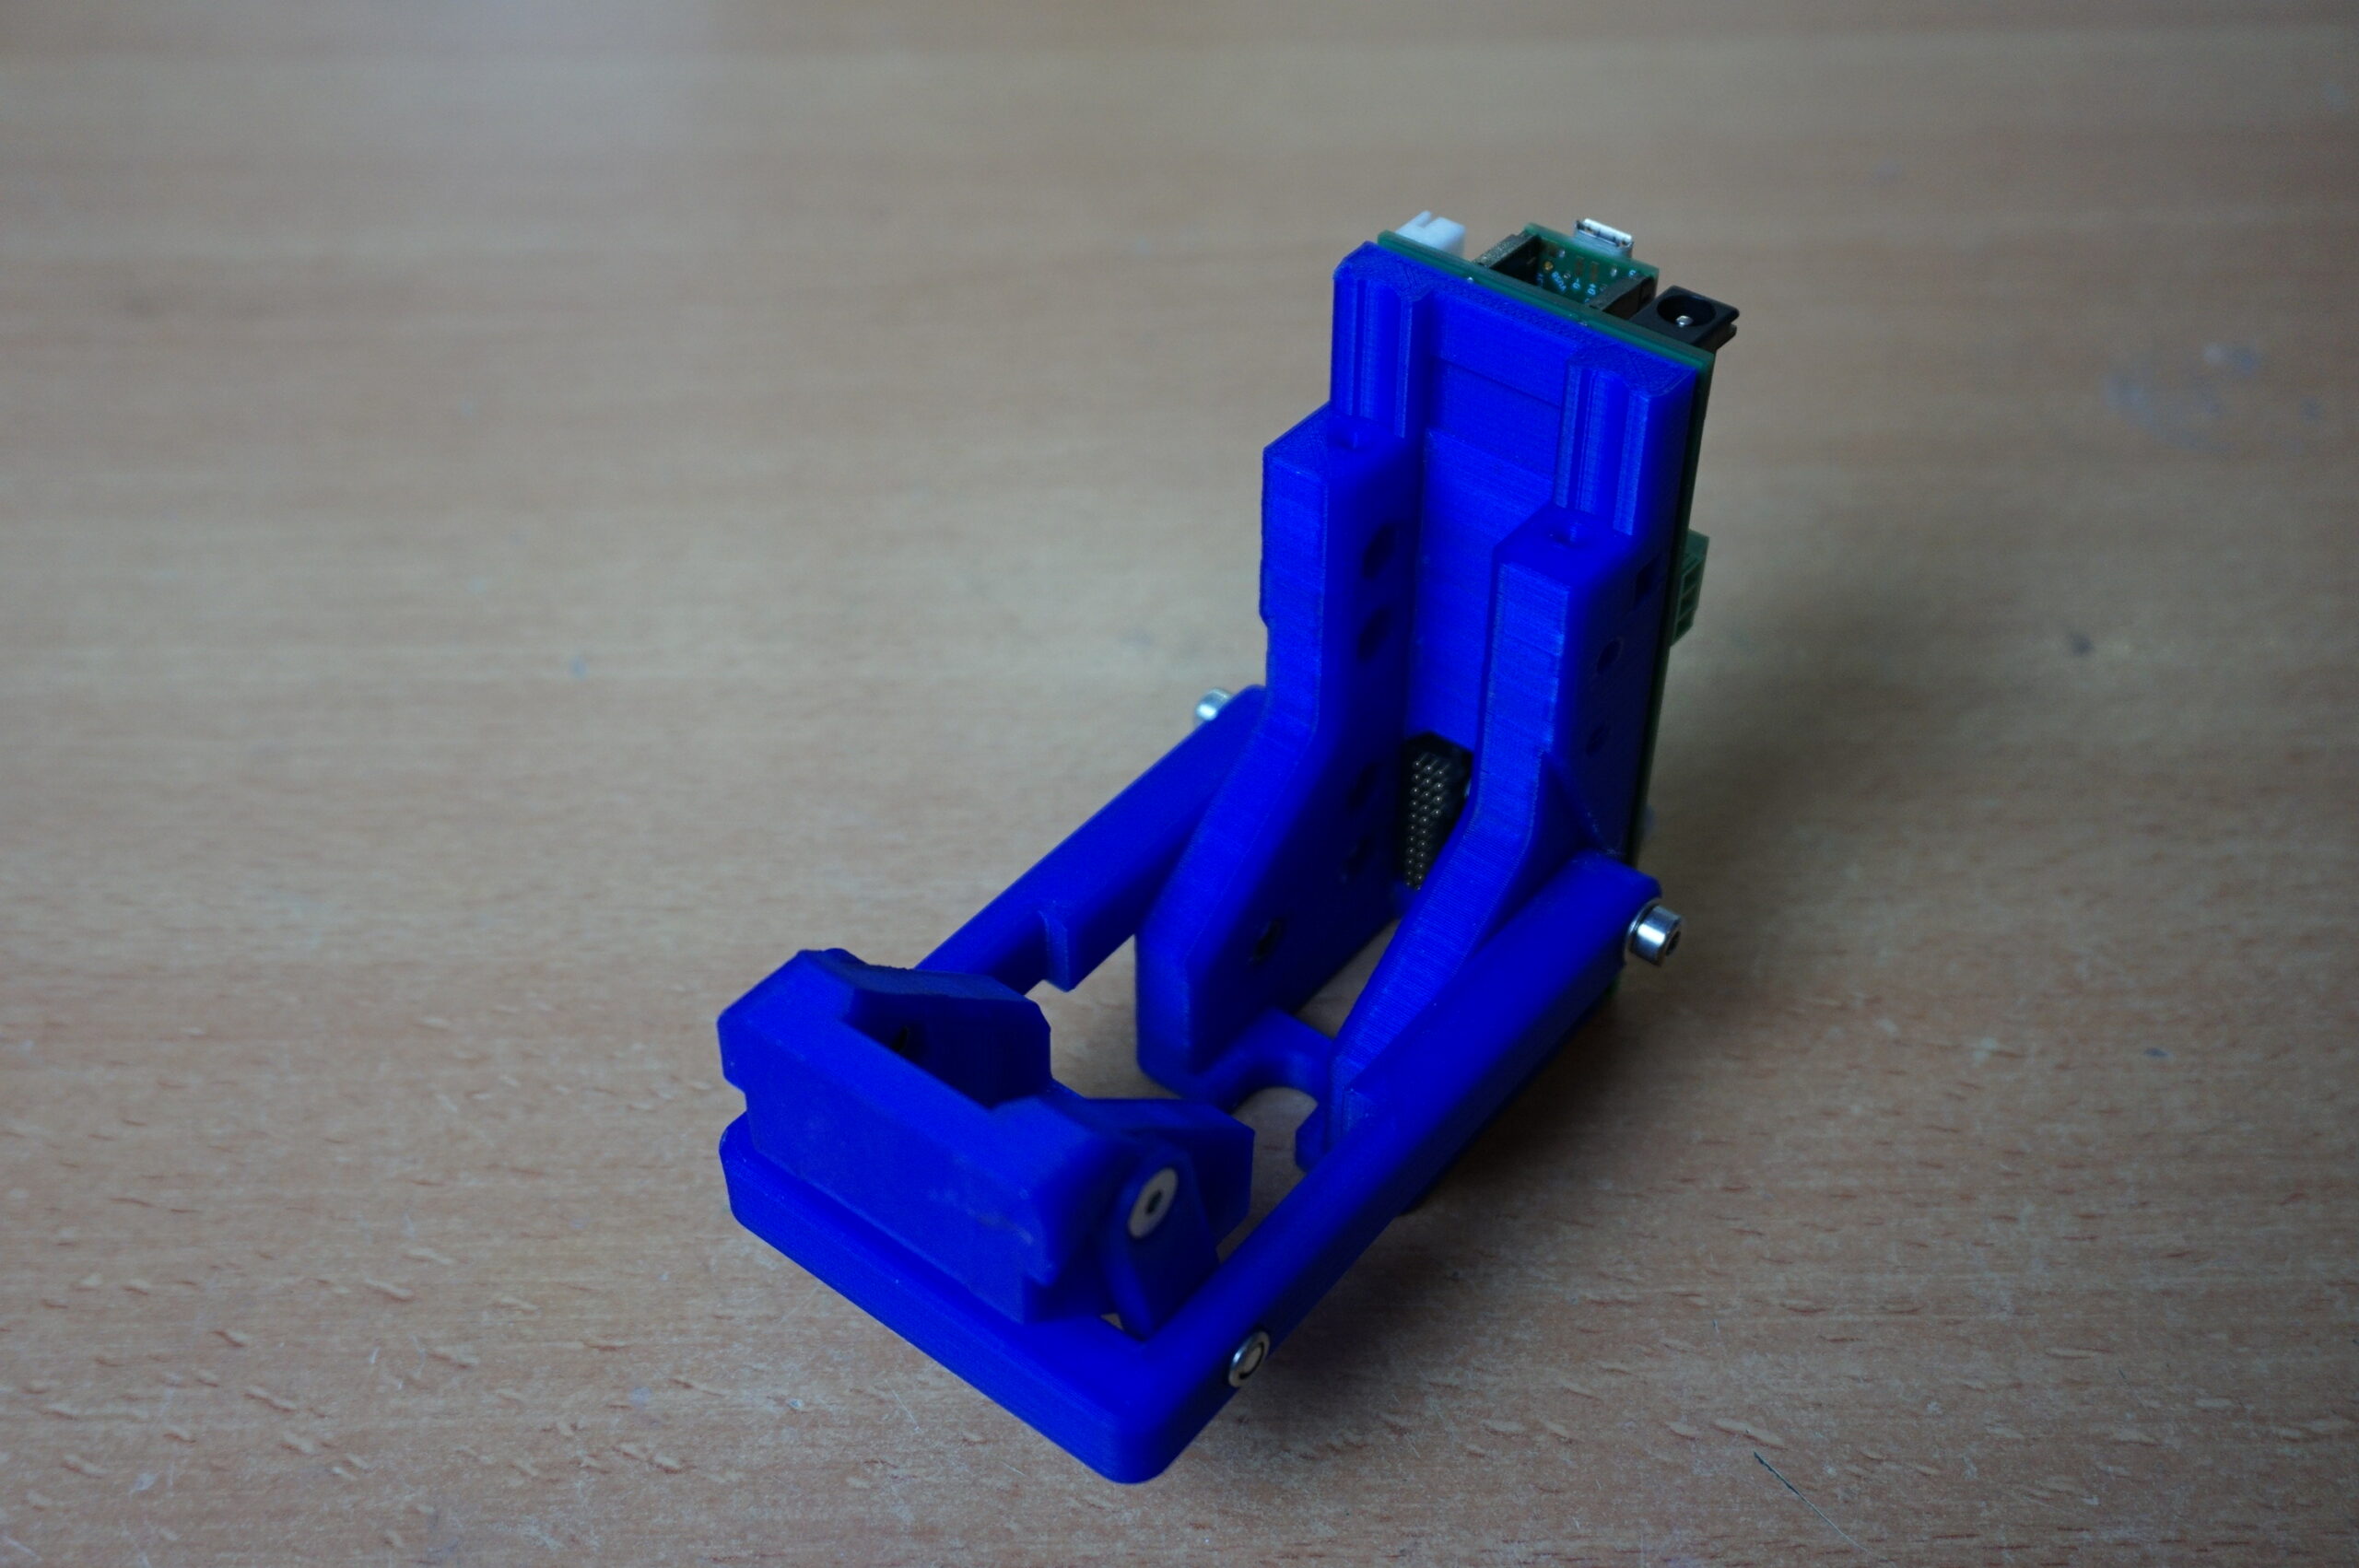
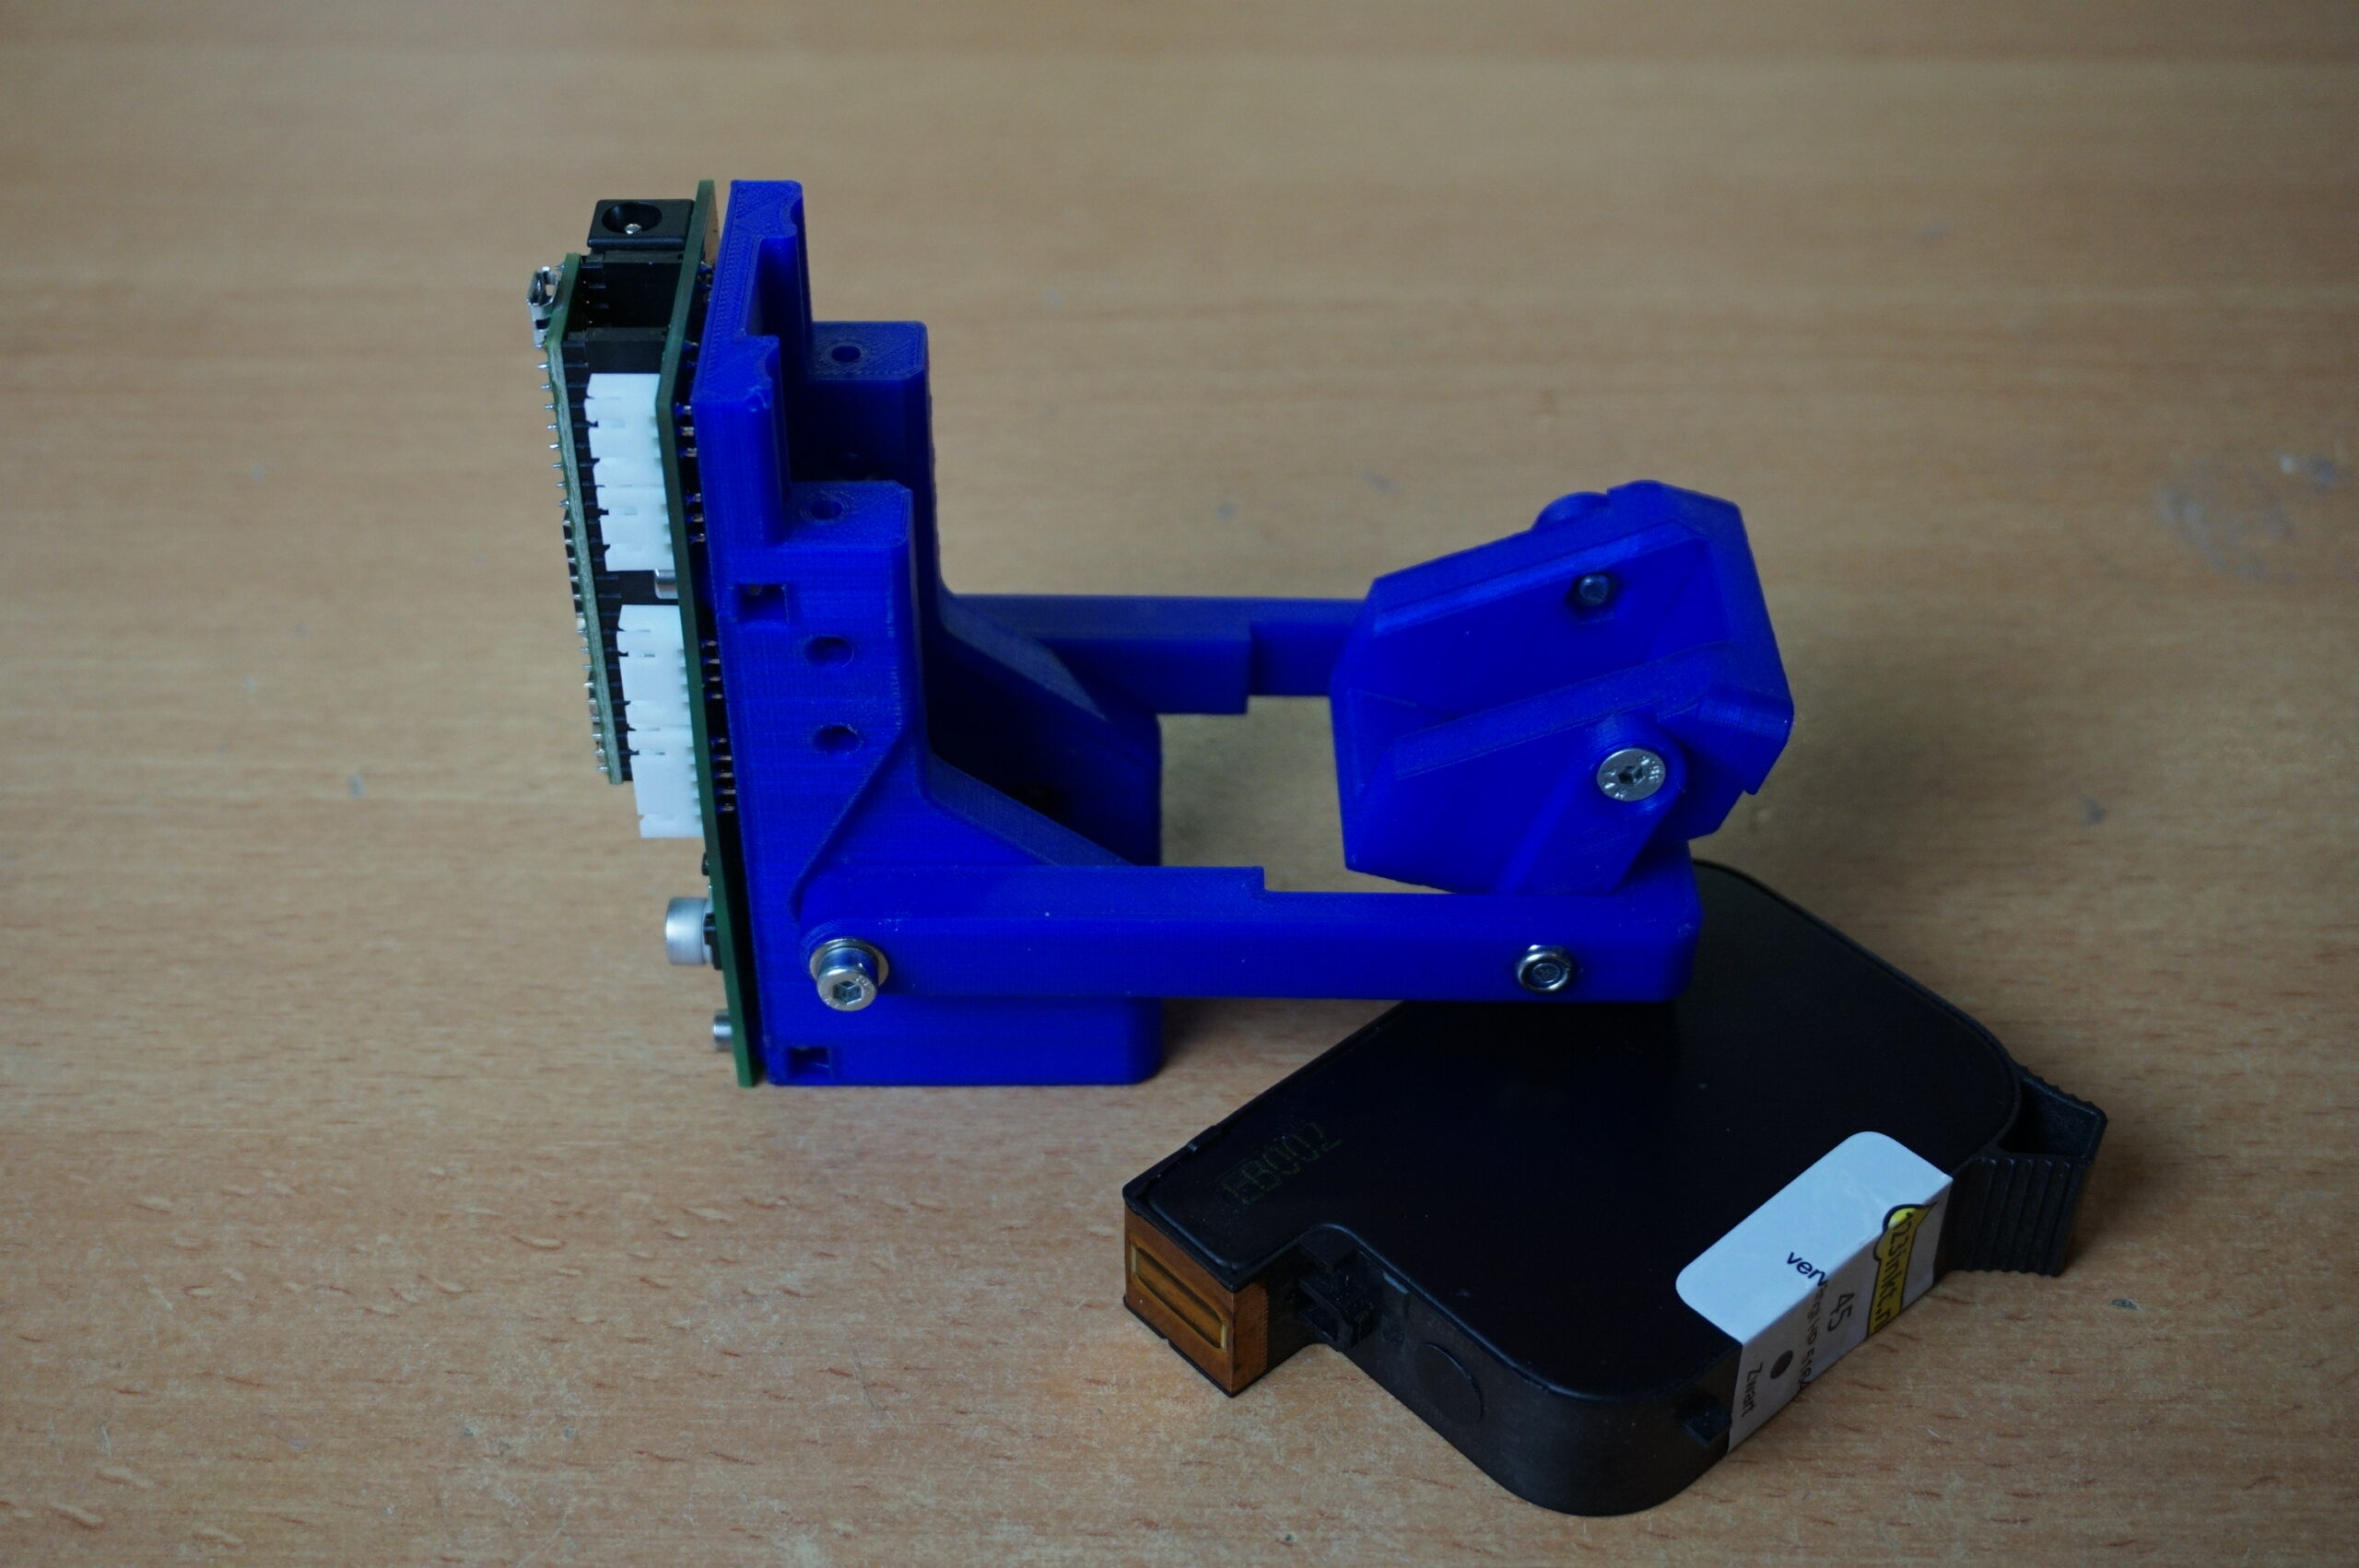
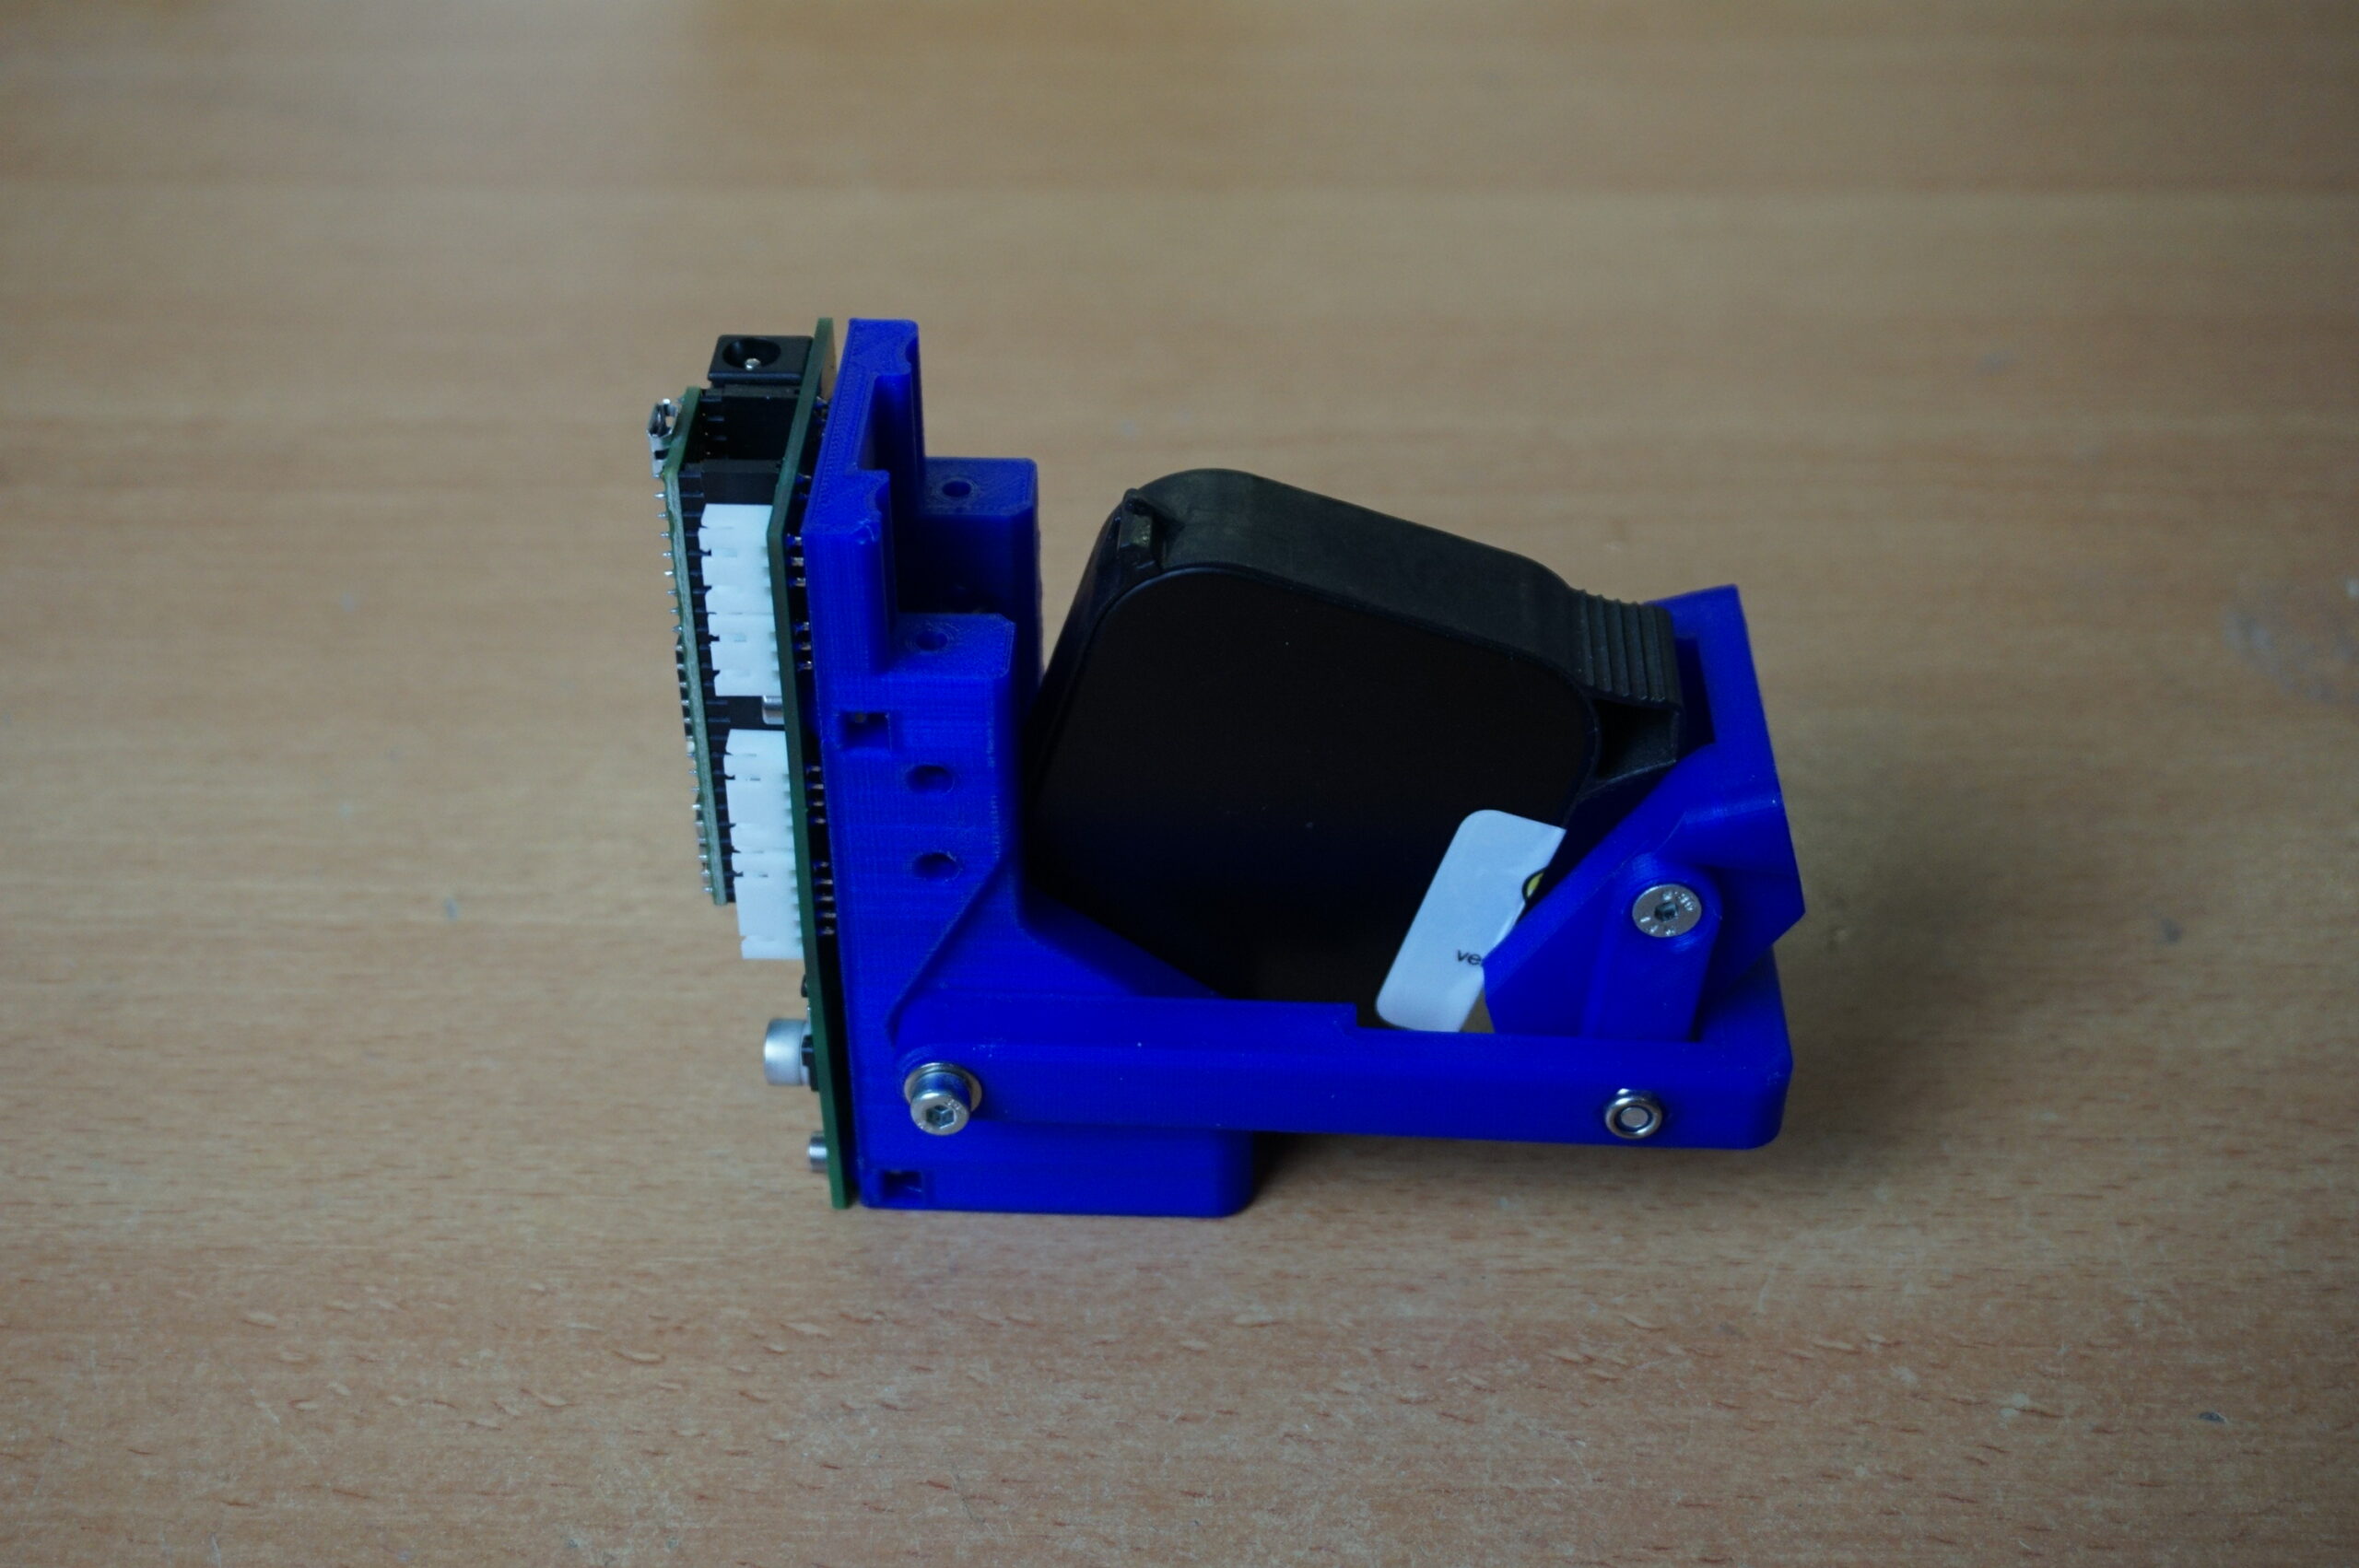
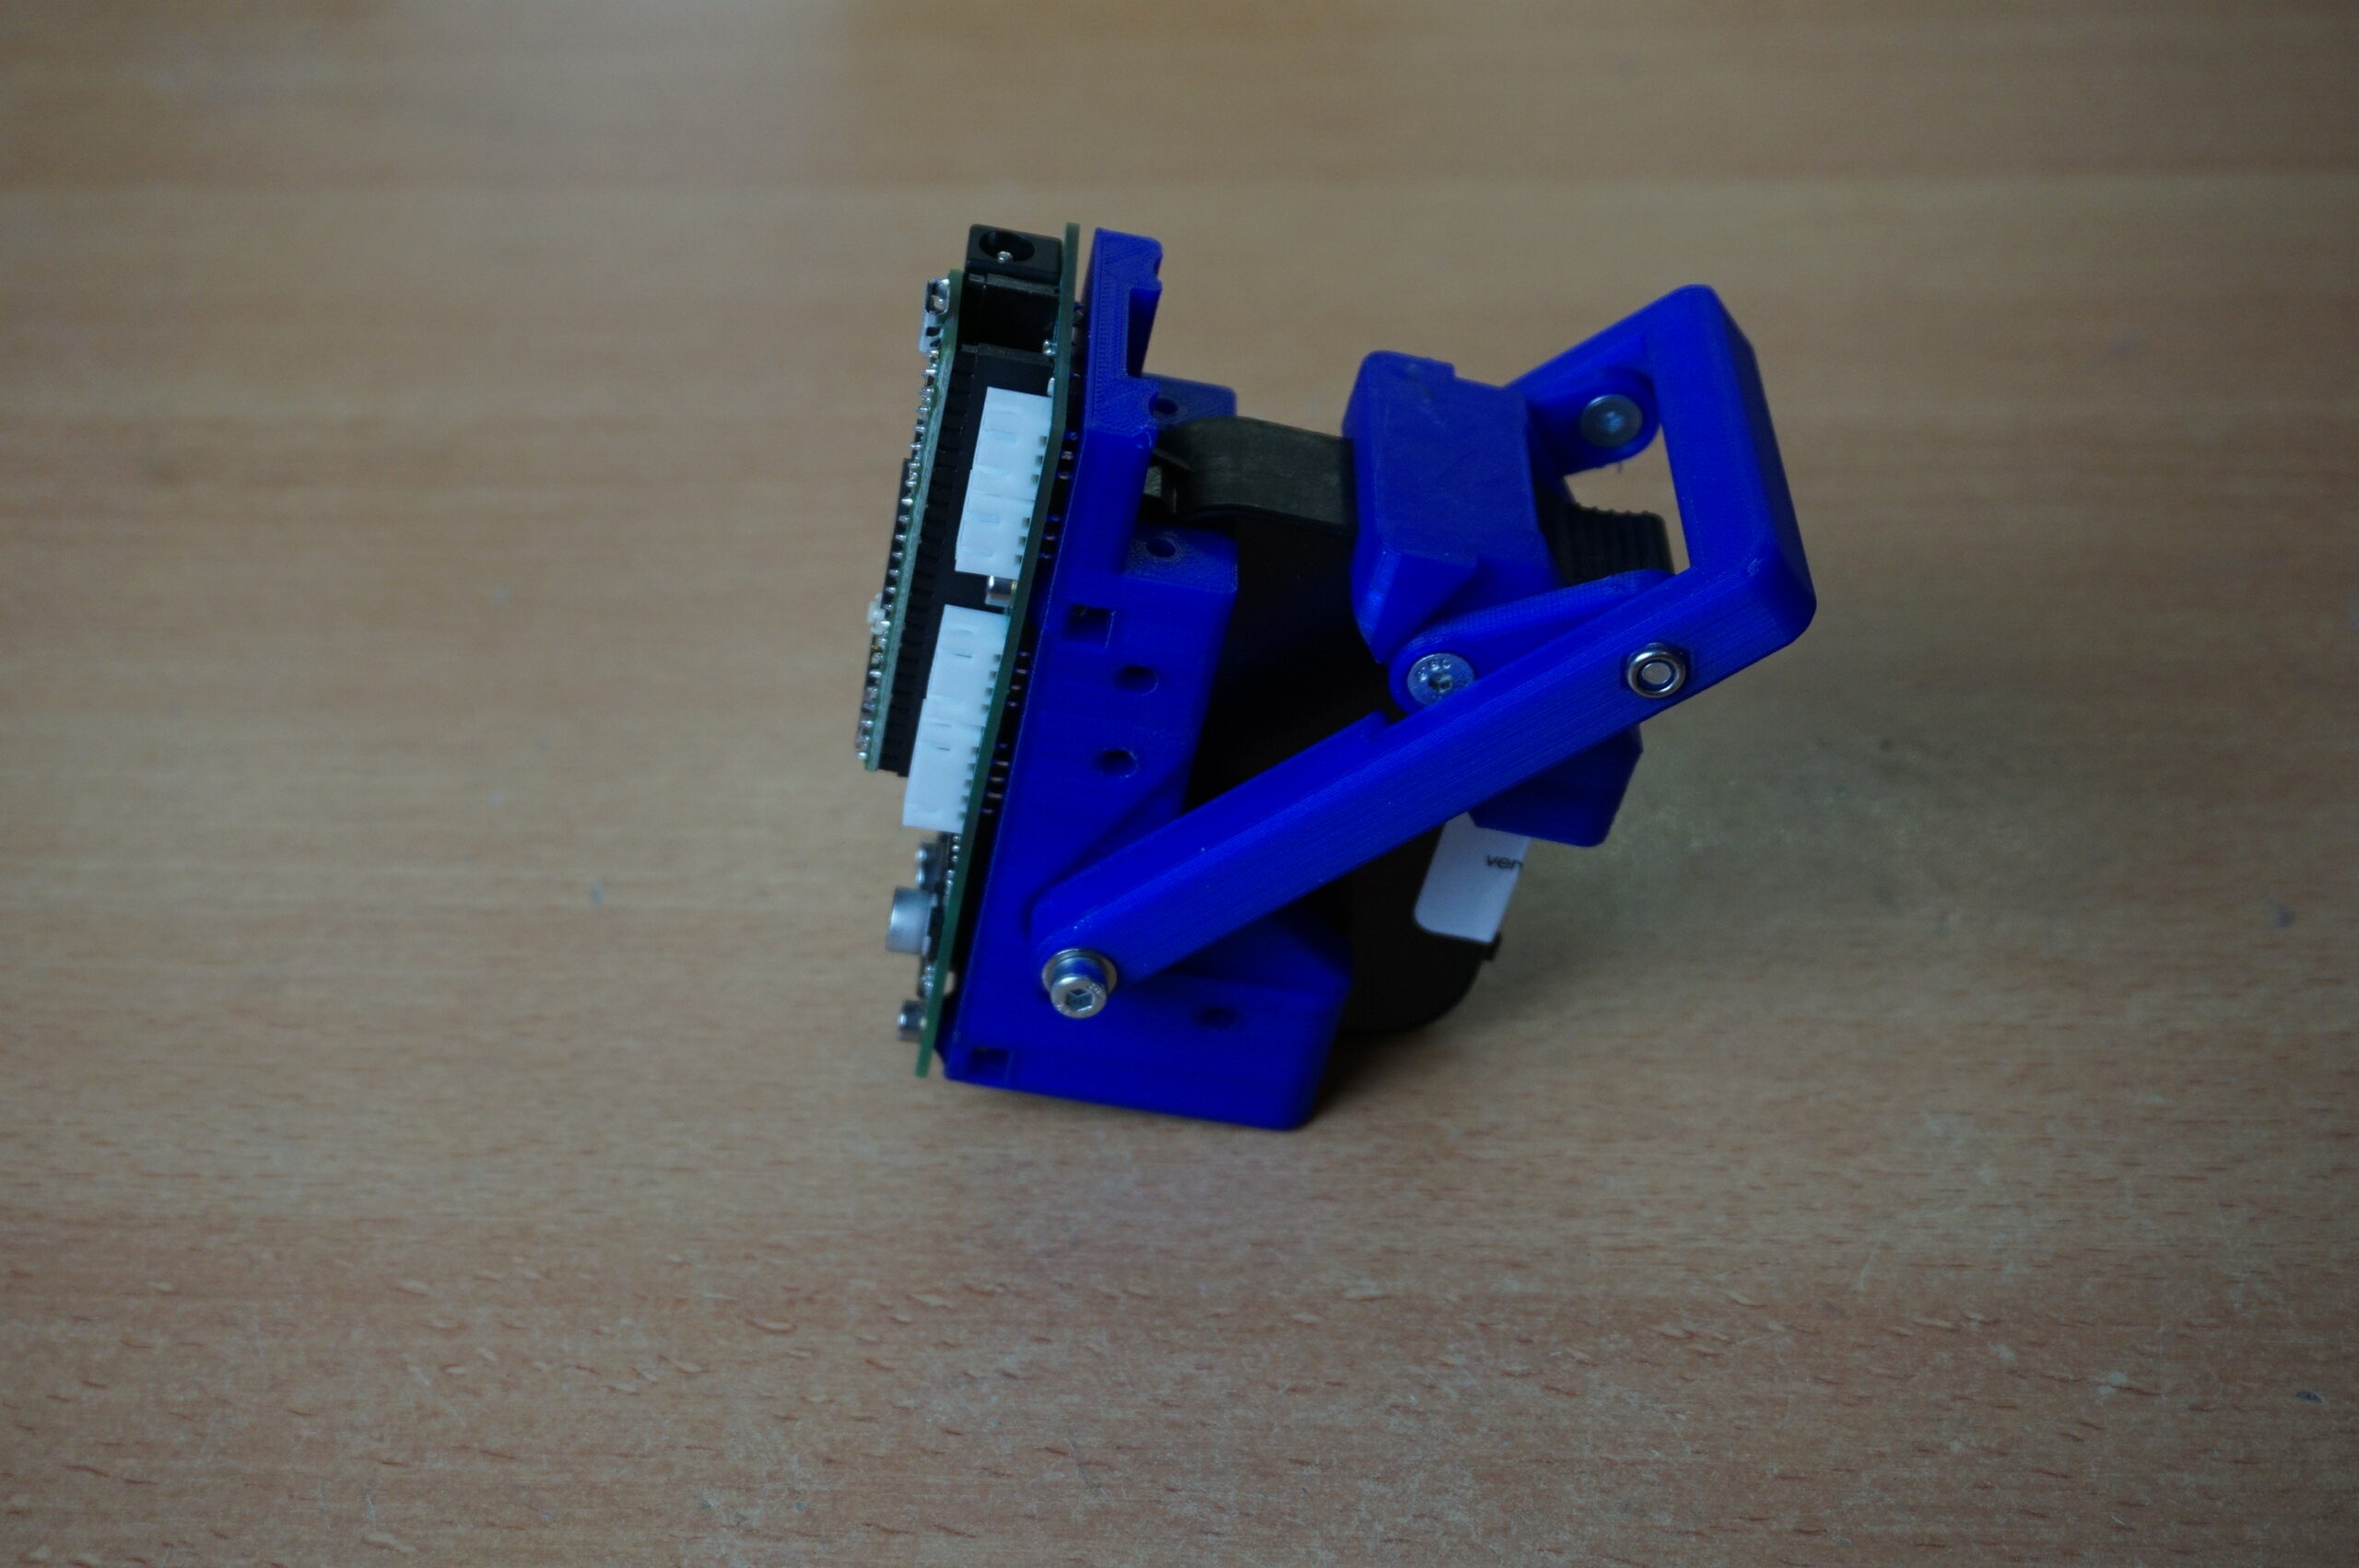
installing the printhead
A single latch mechanism locks the printhead firmly in place. To place the printhead, make sure the latch arm is down and the clamp is pointing up. Insert the printhead, making sure the clamp is not pushed under the printhead. Then raise the latch arm. The clamp should move around the printhead as the arm moves up. Move until the arm clicks in place. The printhead is now properly seated and locked in the controller.

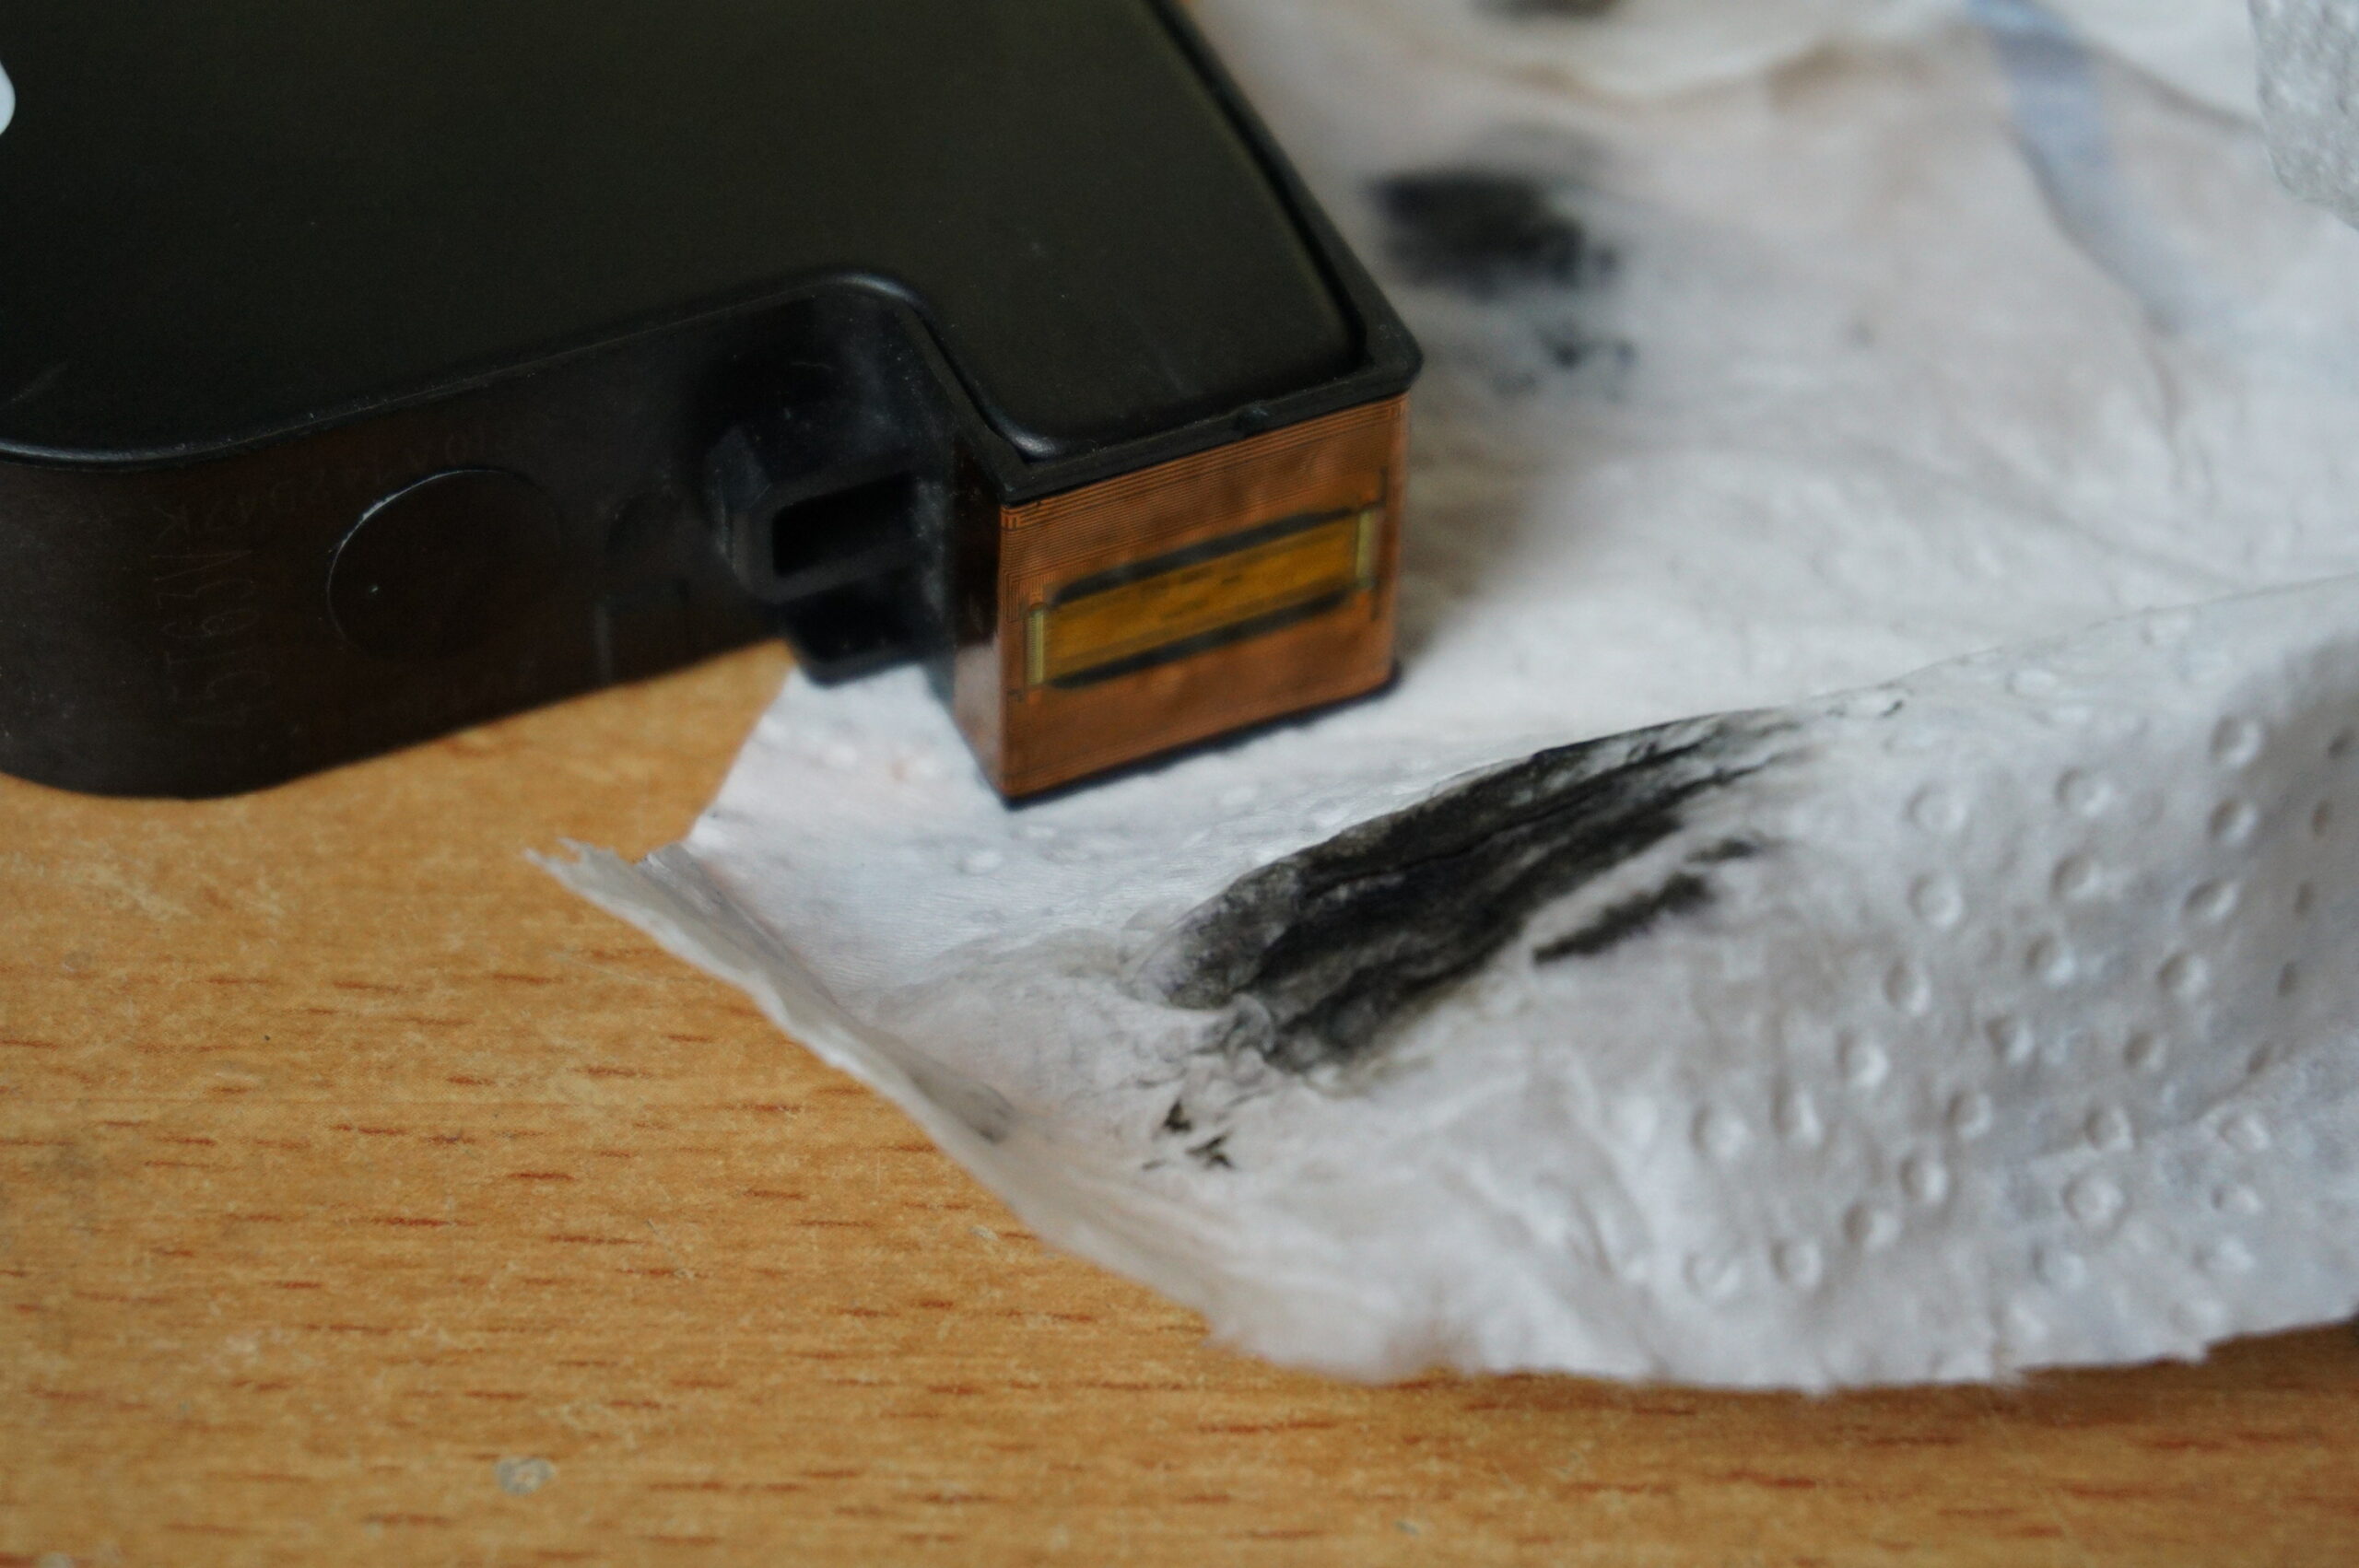
priming the printhead
The printhead needs to be cleaned and primed before printing. Not printing for a longer period of time, or the bracket that comes with the printhead to protect the nozzles can clog the nozzles. An inkjet printer has hardware to clean and prime the printhead. Without this hardware, the user needs to start the printheads themselves.
A damp paper towel is usually enough to start a printhead. Take a paper towel and wet it slightly with water. Wipe gently in the direction of the nozzles (the two black lines under the printhead) until black streaks appear on the paper towel. After the streaks appear, repeat the wiping for several more times to make sure every nozzle is started.
If the printhead does print, but after every minor pause the first few millimeters do not print, the nozzles are clogged deeper. To clean this, use a paper towel soaked (not damp with, soaked) in Isopropyl Alcohol (IPA). Wipe the head for at least 30 seconds. This ensures the IPA wicks into the nozzles and dissolves the ink. After this, wipe with a damp paper towel until the black streaks appear. Be careful with the Alcohol soaked paper towel. IPA is flammable.
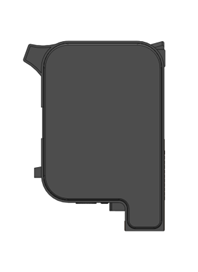
printhead orientations
The printhead is a fluid filled device. Because of this, there is only a limited range of orientations shown below. The nozzles need to be the lowest point of the printhead. This way, the ink will always keep flowing to the nozzles. Letting the nozzles fire without ink may result in permanent damage to the printhead.
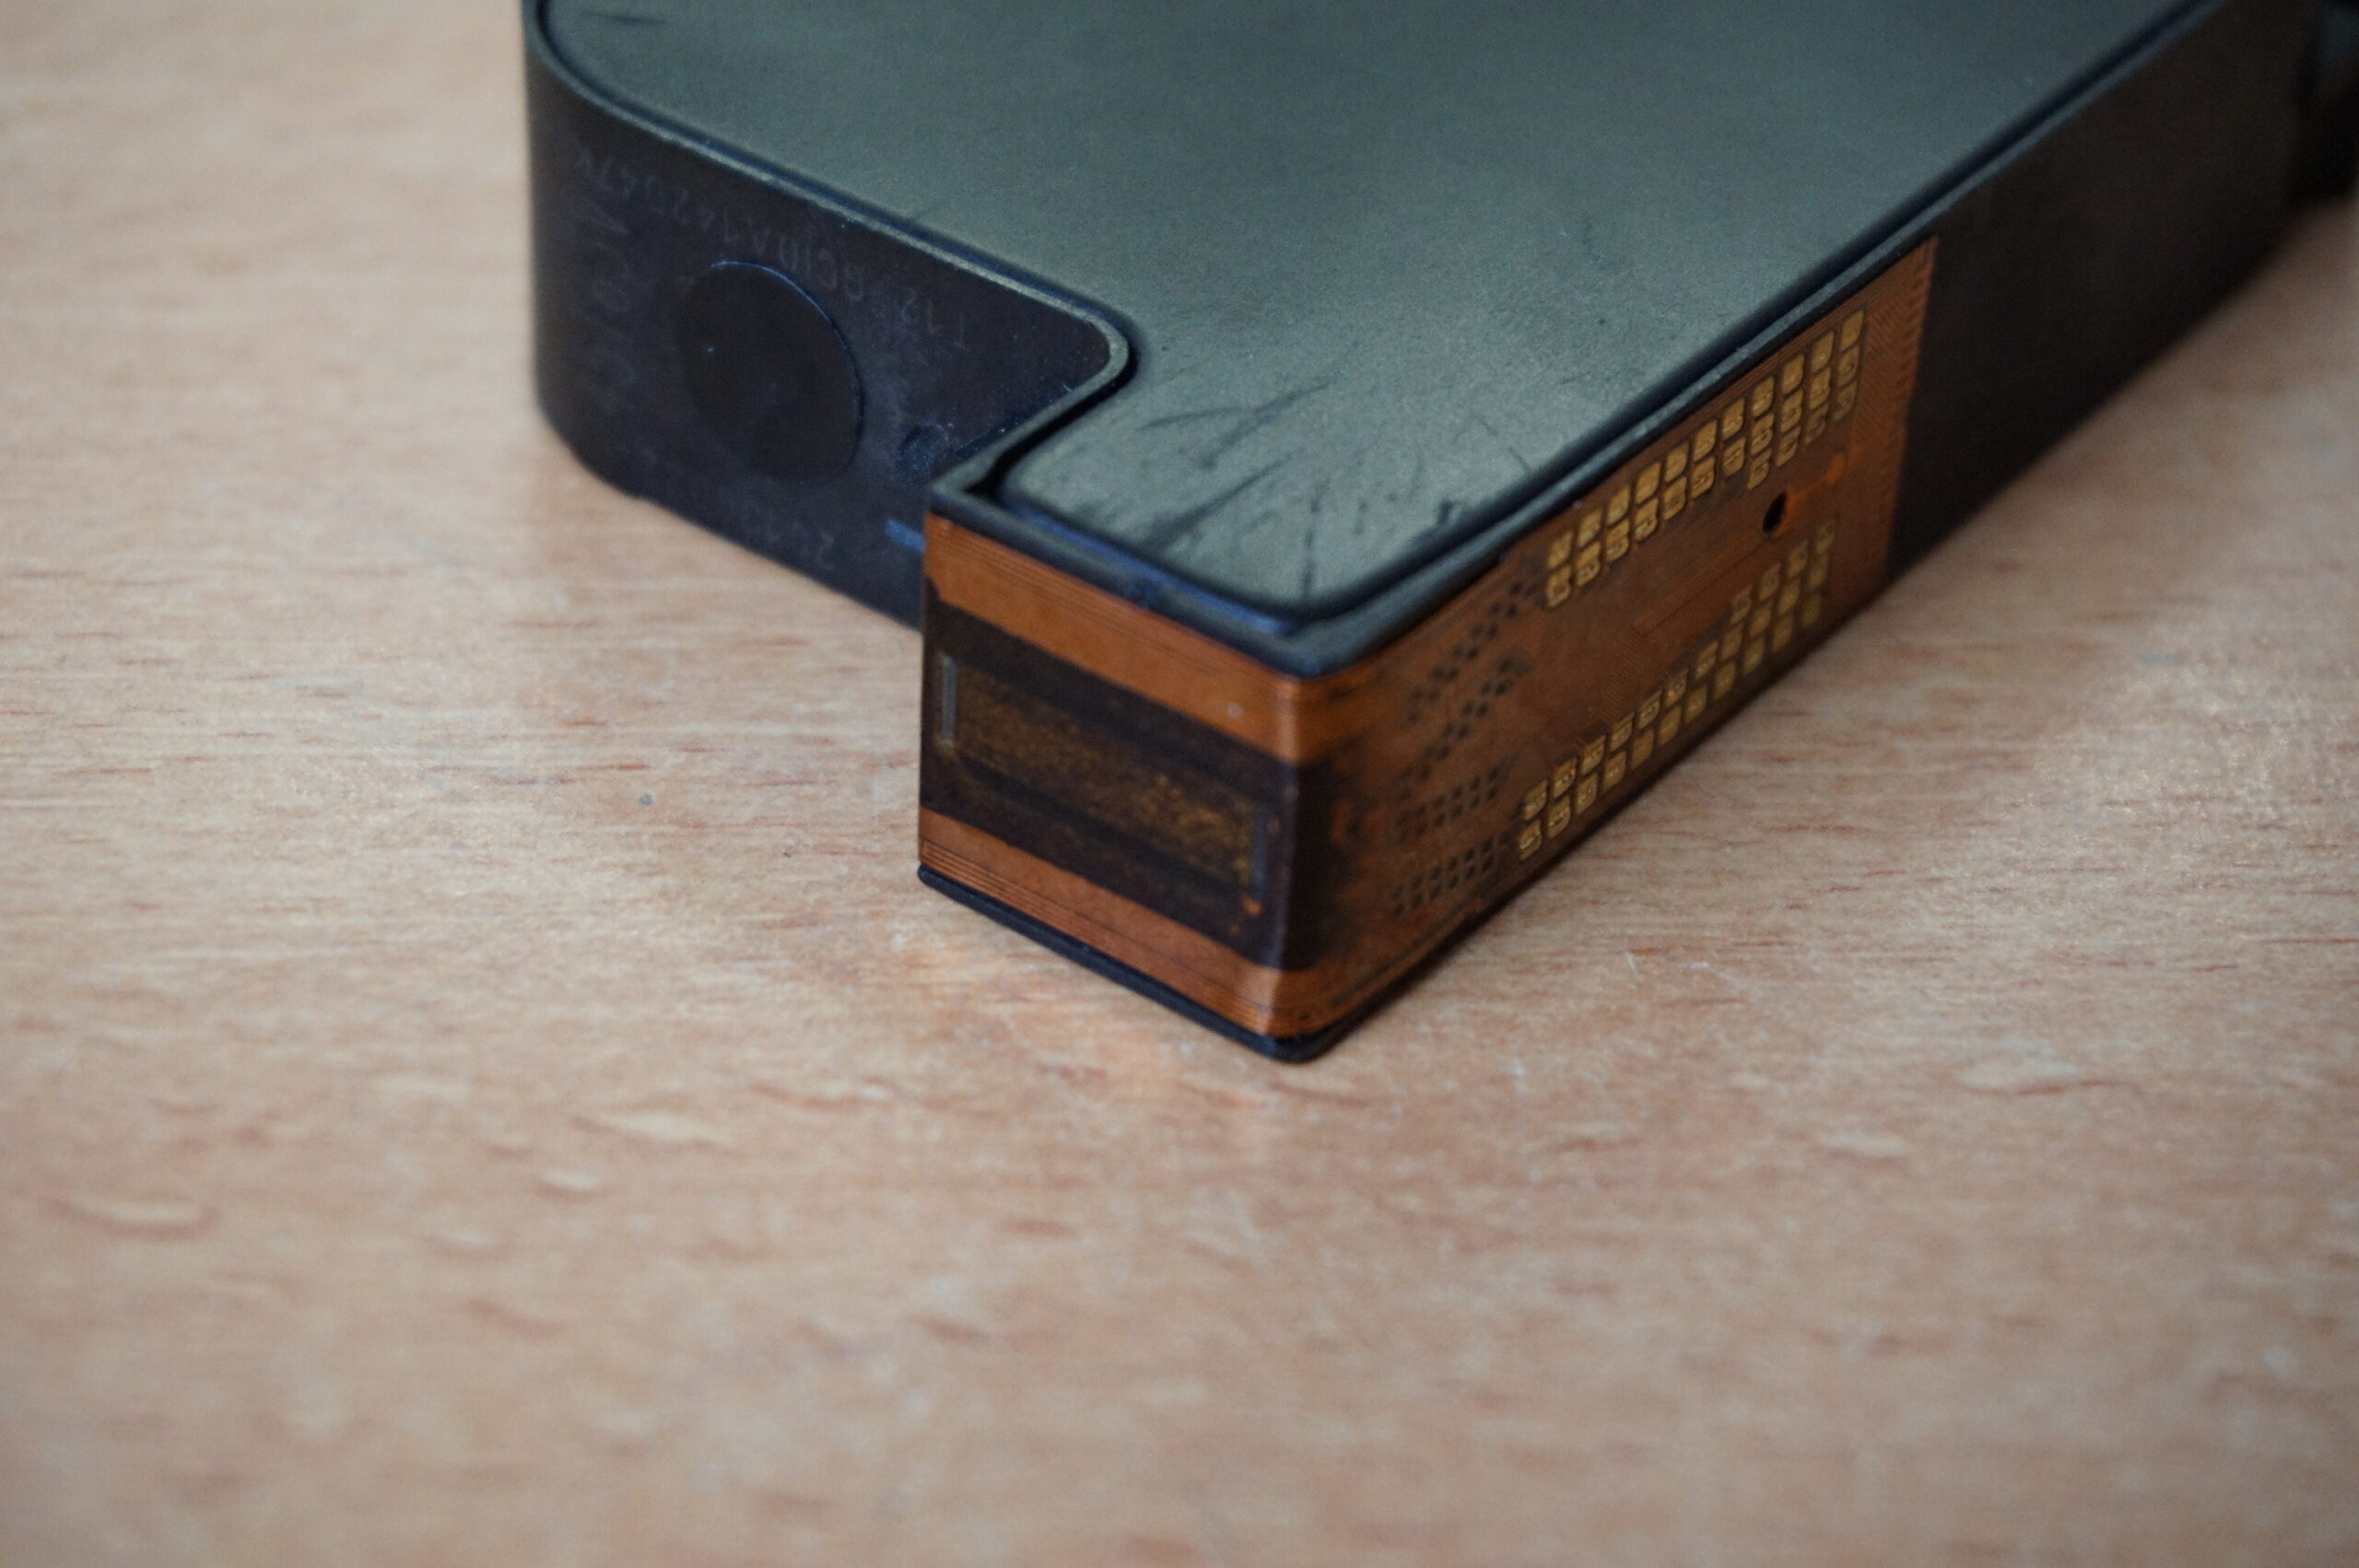
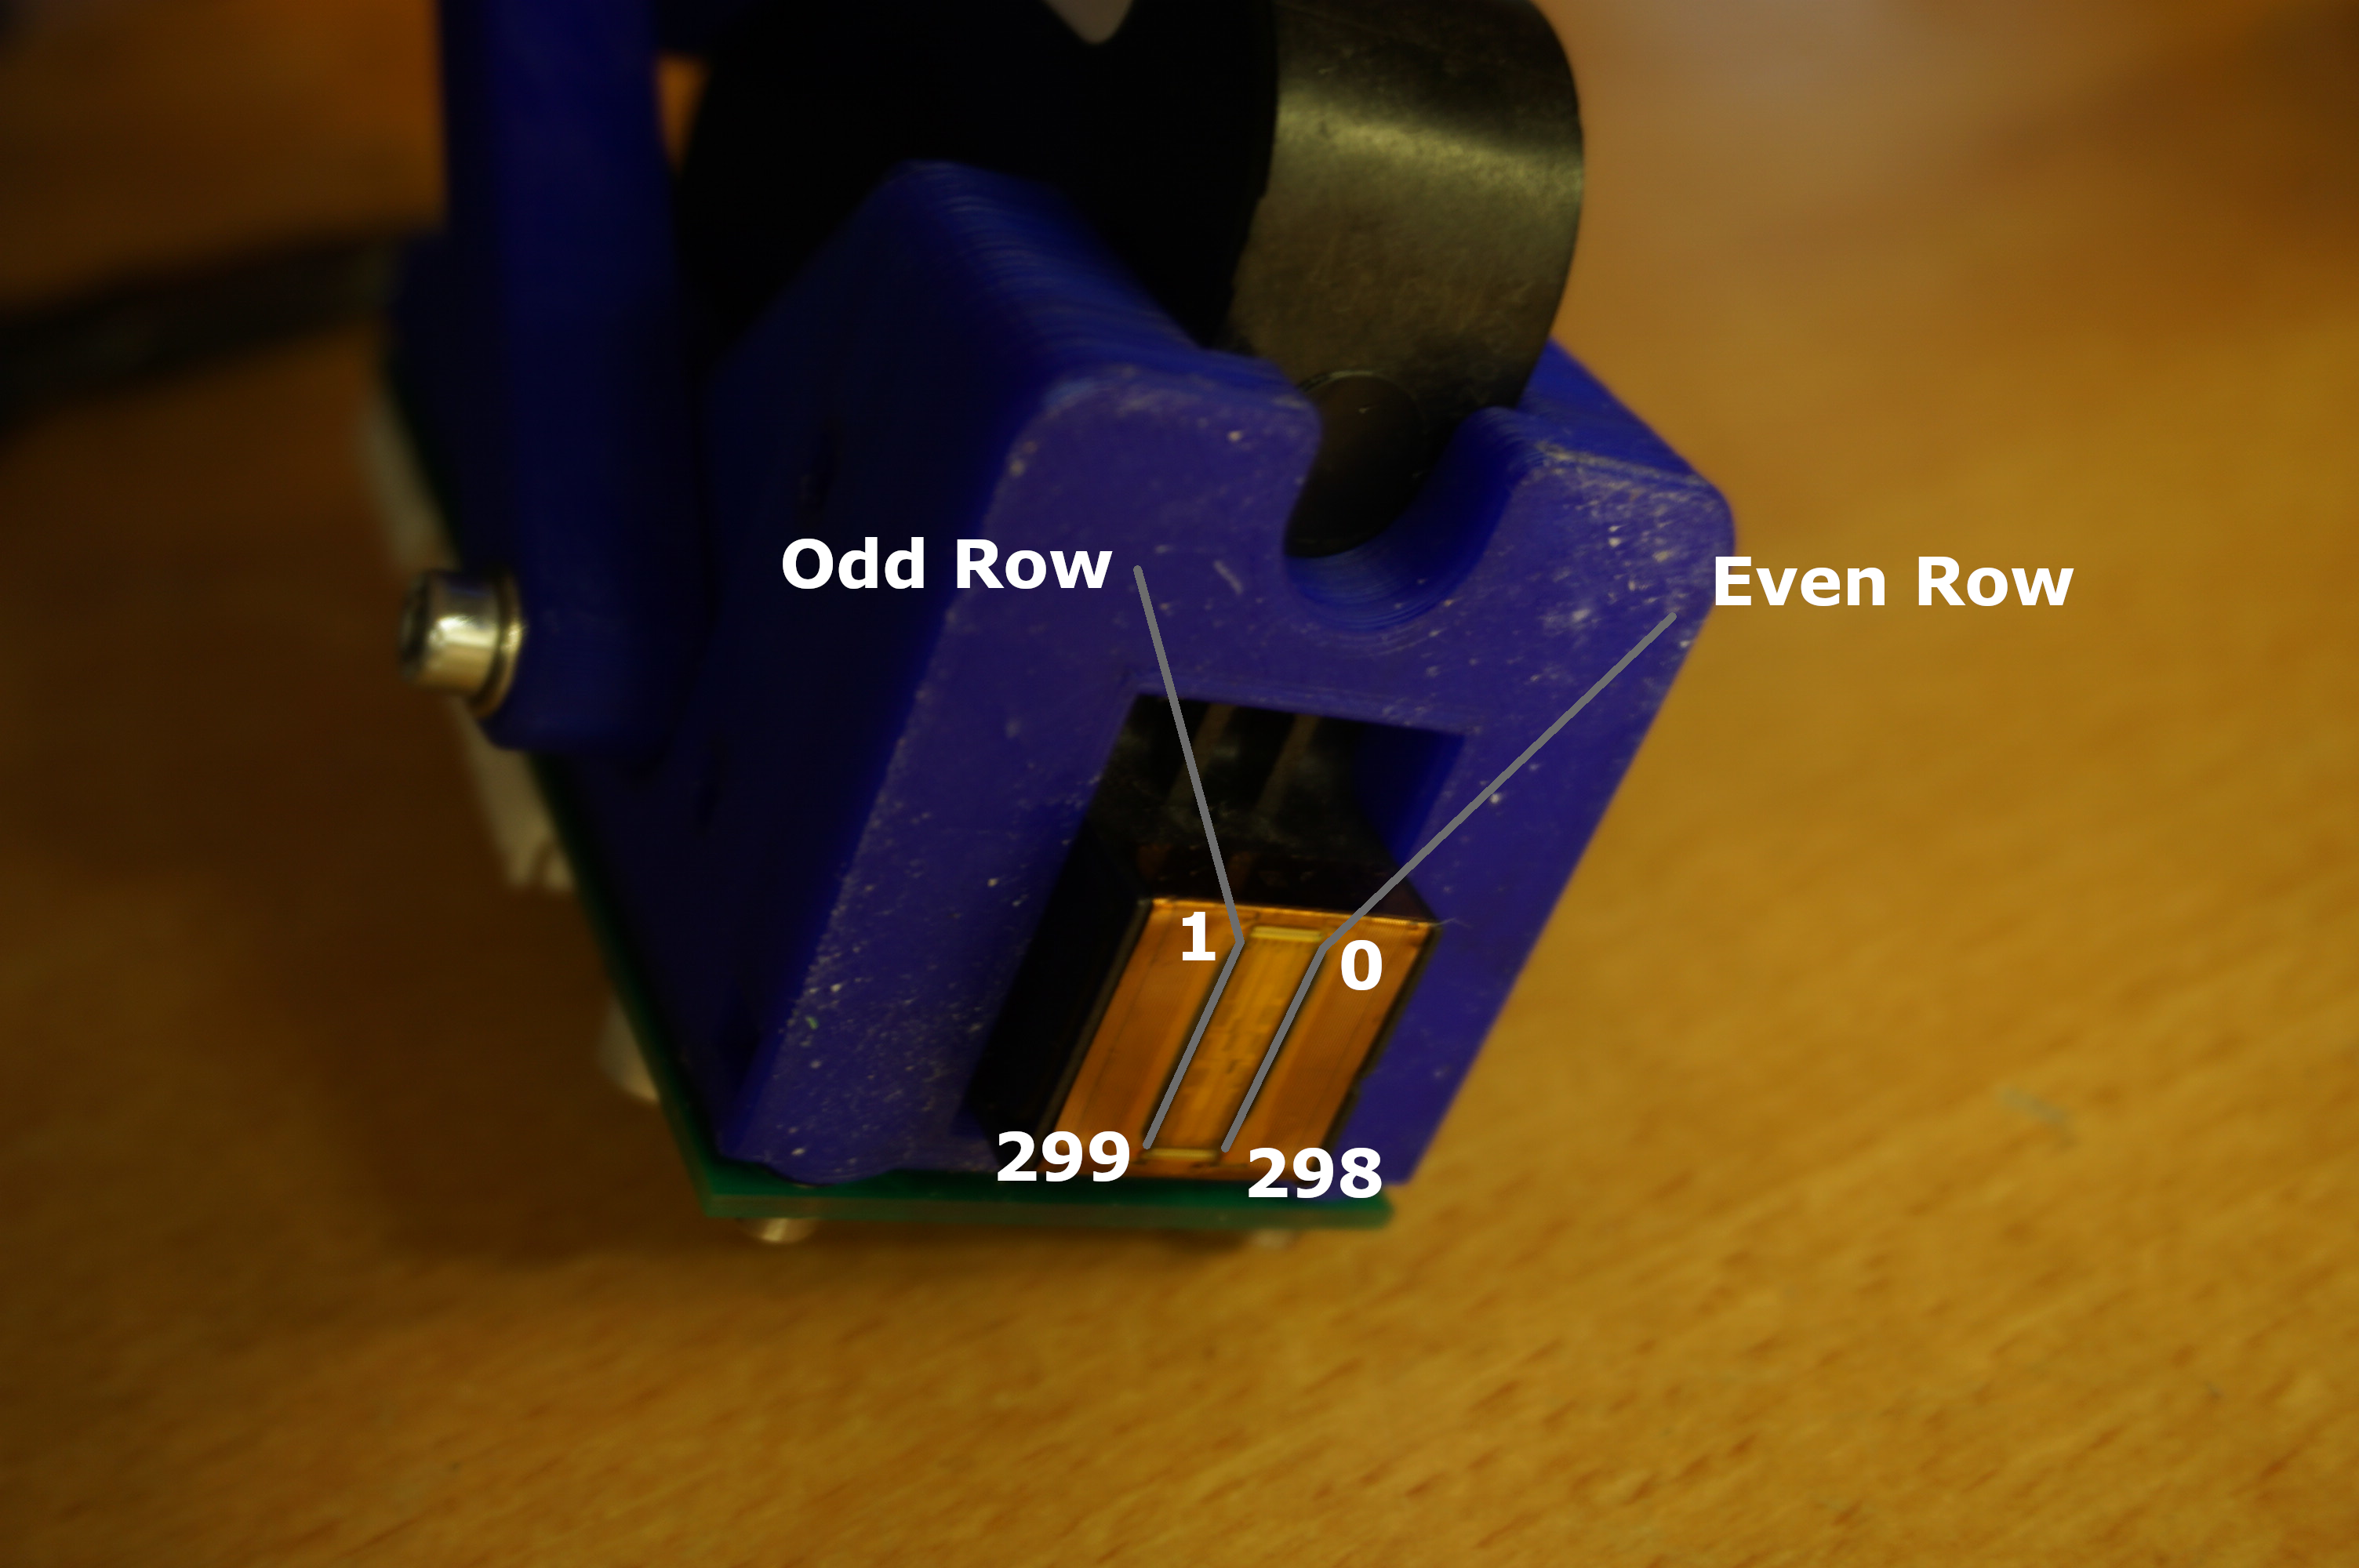
Nozzle orientation on the printhead
There are 300 nozzles in total under the printhead. These are divided into 2 lines of 150 nozzles each. The image below explains which row is odd and even, and where the nozzles start and end.
Example projects
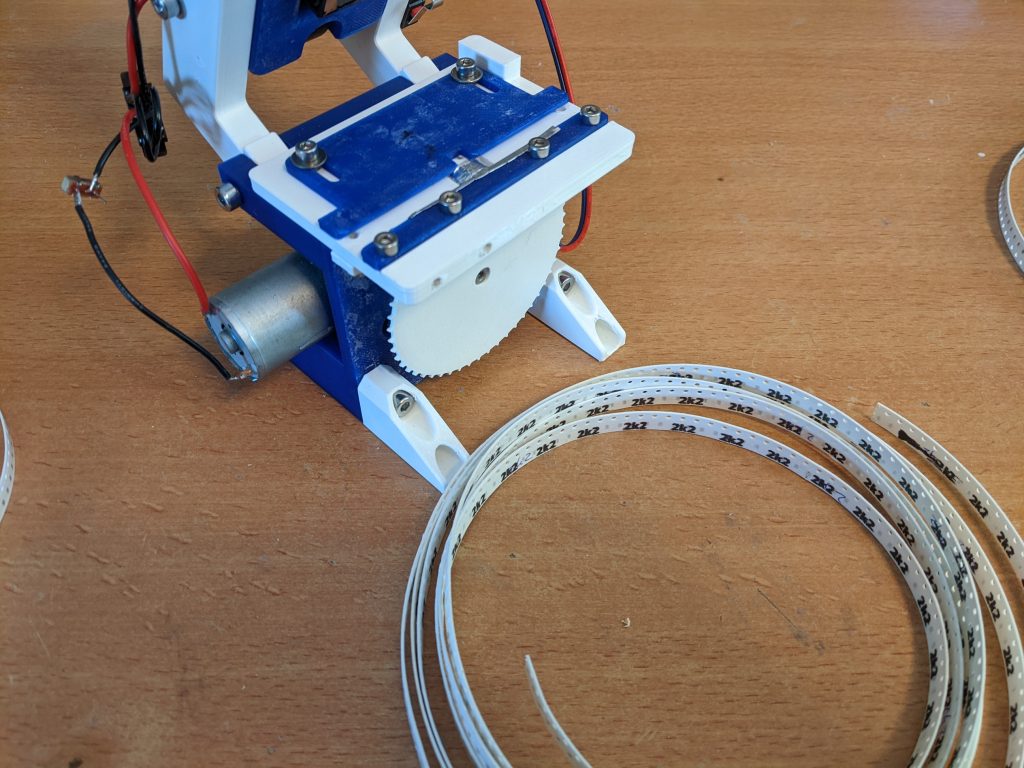
SMD tape printer
The SMD tape printer is used to print the value on SMD tape containing components. It uses a motor to constantly feed the tape under a printhead. A switch determines whether the printhead needs to print or not. The printer prints the same image over and over as long as the tape is under the printhead.
Additional information
HP45 General information
Full list of HP45 controller commands
Refilling the HP45
HP45 anatomy
Firmware
Firmware was moved to github to better share development. The github page is: https://github.com/yvodehaas/HP45-standalone-V4
The firmware is the part that runs on the HP45 controller on the Teensy 3.5. It can be opened in Arduino and compiled for the Teensy 3.5 if you have Arduino installed (see software requirements). No additional libraries should be required to compile the firmware. The firmware can be flashed on the Teensy 3.5 by connecting a usb cable to the Teensy 3.5, selecting the right port and clicking ‘Upload’.
Download
Older versions
Revision history
| Version | Changes |
| V4.01.02 | Initial Release |
| V4.01.06 | While high and low printing added Trigger debounce added Changed buffer read left to return highest, not lowest |
PCB
PCB files are uploaded to Github:
https://github.com/yvodehaas/HP45-standalone-controller-V4.02
To do list
No ongoing project is complete without a list of remaining functions to add. As per 17-09-2021, this is the list of features still to add to the HP45 controller. This is by no means a complete list. Items can be added when they are found or requested.
| Task | Priority |
| Fix an issue where several nozzles (4 or 6 nozzles) still seem to be swapped | 1 |
| Printing in positive and negative direction, and in both | 1 |
| Add EEPROM saving and loading of settings | 1 |
| Place the image converter in a separate thread so the software remains responsive | 1 |
| Print ascii with different fonts | 1 |
| Implement SD card | 1 |
| Load settings from SD card (auto load and manual load) | 1 |
| Load image from SD card (auto load and manual load) | 1 |
| Buffer image to SD card | 1 |
| Advanced test report on the controller (what part is not working) | 2 |
| Test inkjet commander on Raspberry pi | 2 |
| Fix it that the software crashes when you unplug the controller during a connection | 2 |
| Send Asap functions (print when the data arrives) | 3 |
| Stagger image printing to lessen the impact of inaccurate motion | 3 |
| Drag file in window for inkjet commander | 3 |
| Add toggle mode data input, a more optimal format for simple images | 3 |
| Scale either image or printhead when selecting DPI | 3 |
Reference
Below are several references for the HP45 controller to give more information to understand or help integrate the controller.
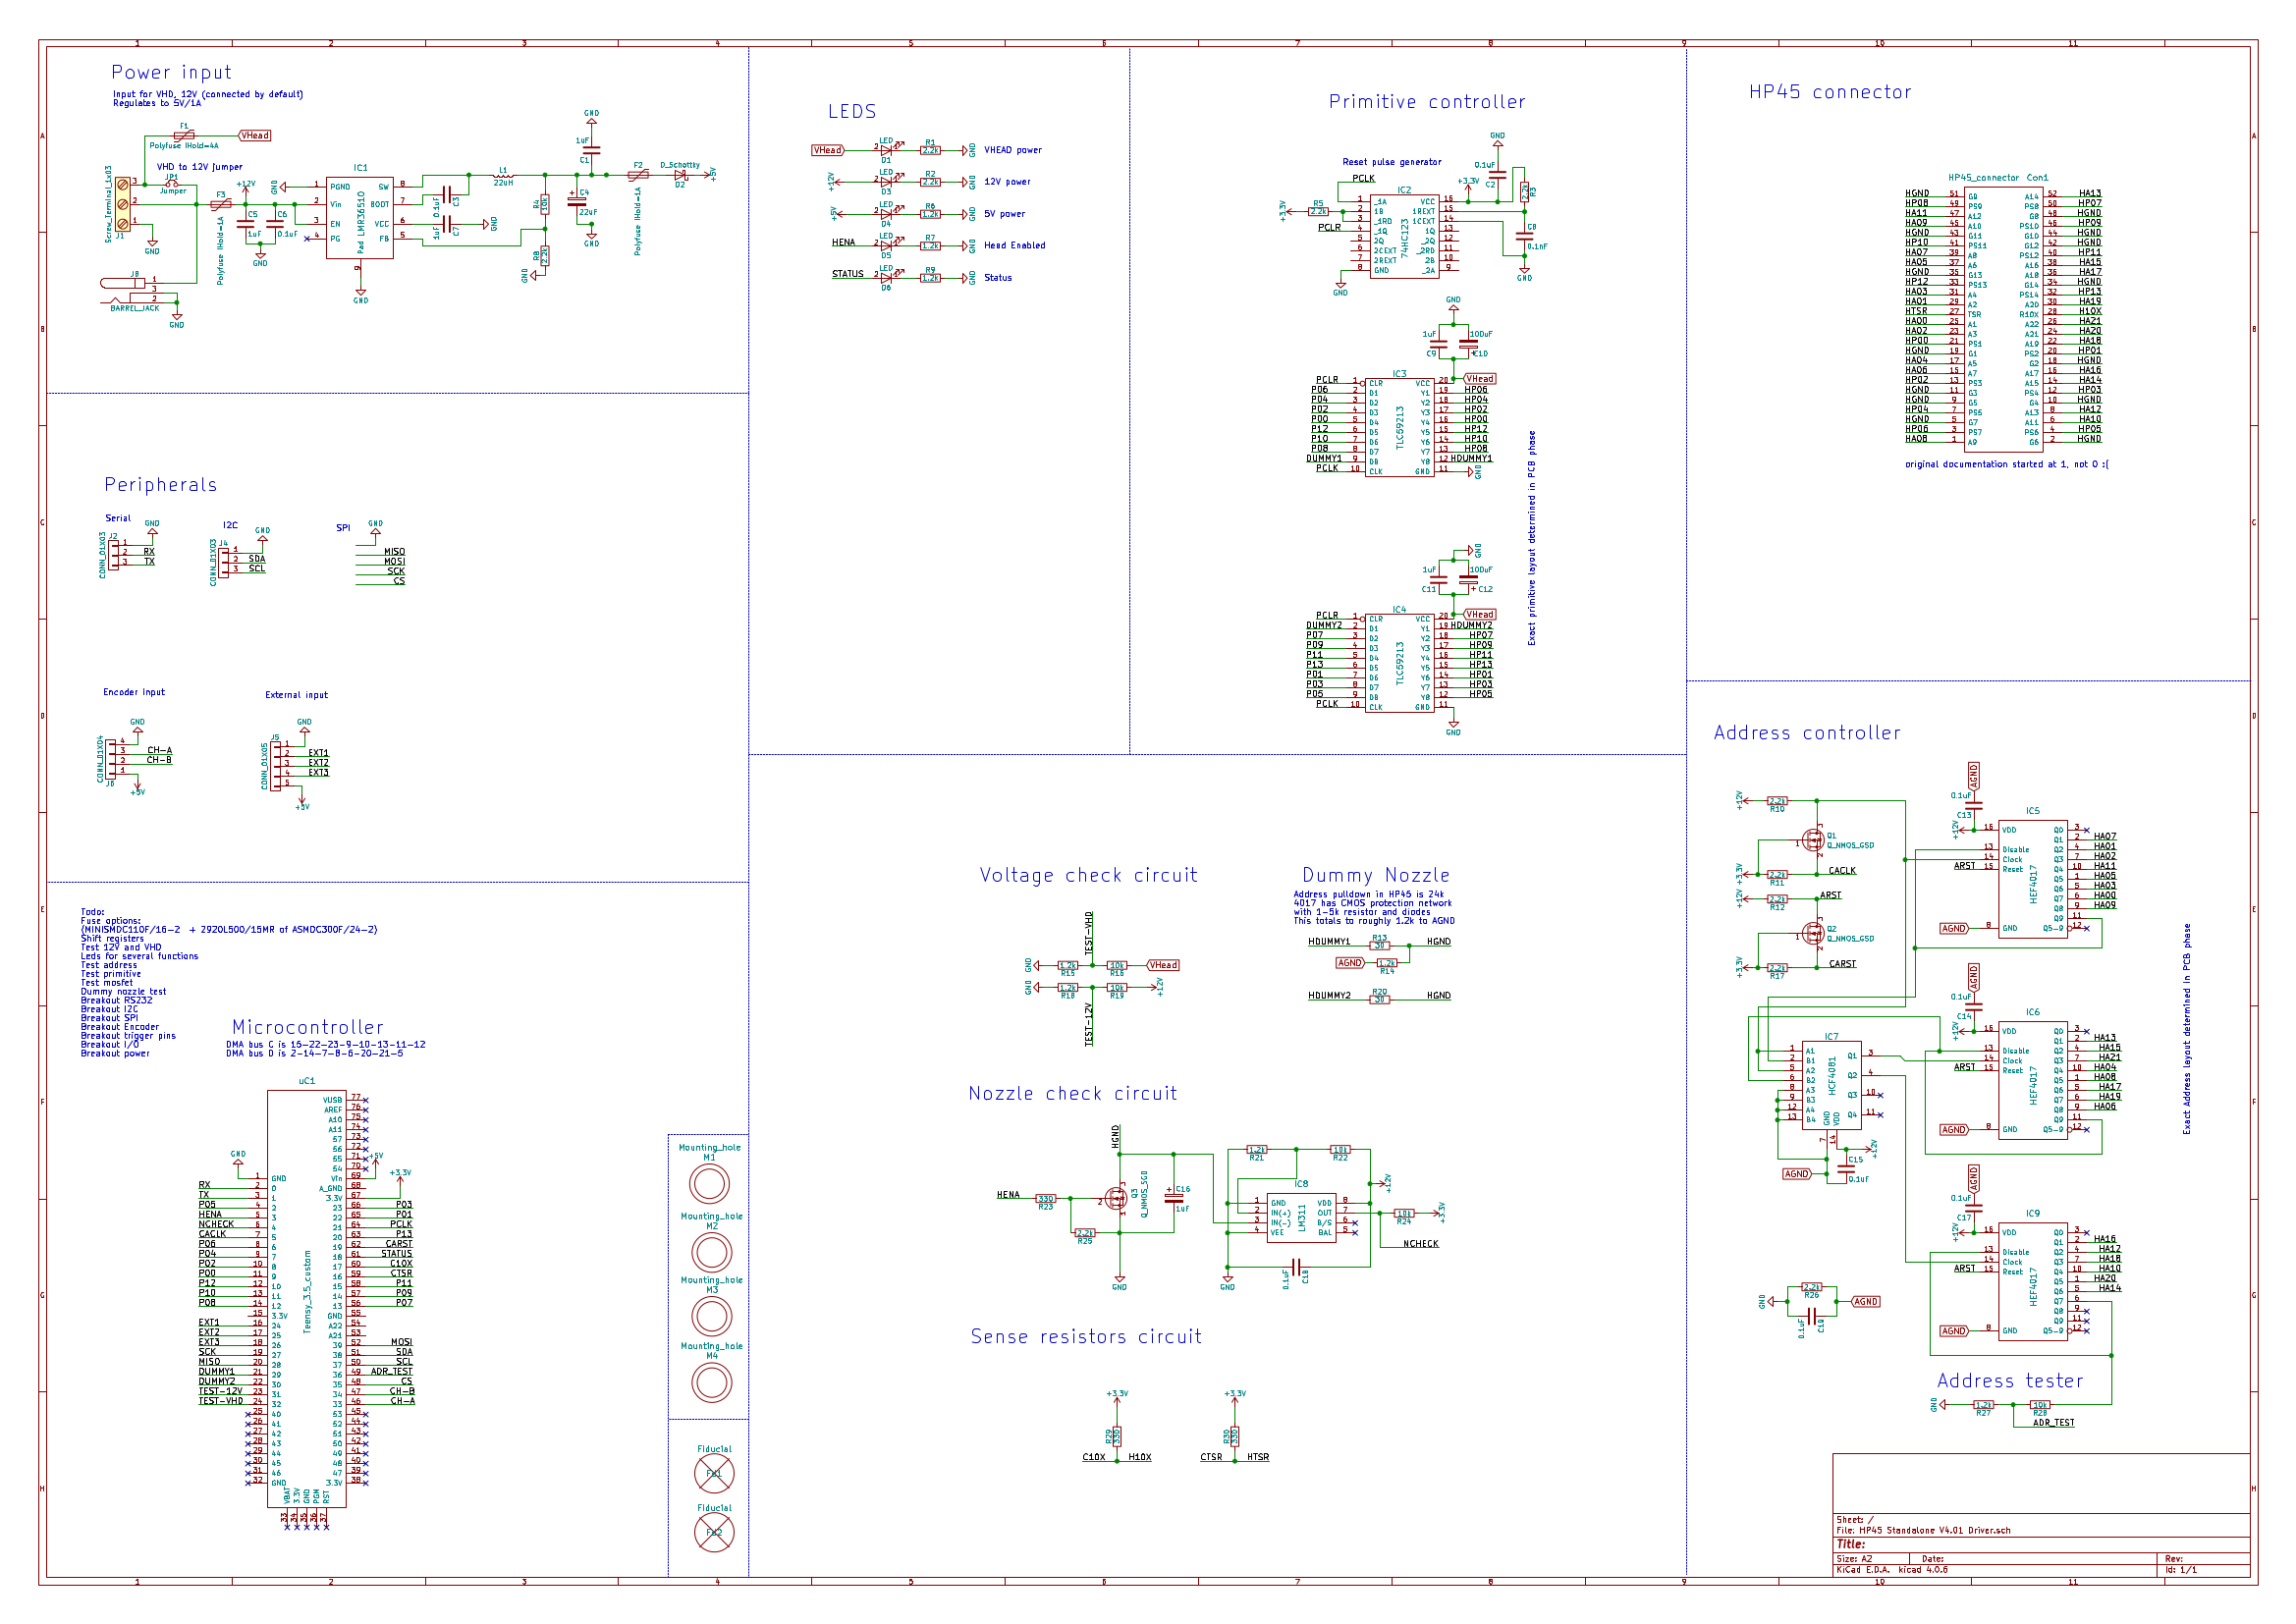
Schematics and drawings
The schematic of the latest controller (V4.01, 2021-09-06) is shown below (open in new tab for full size).
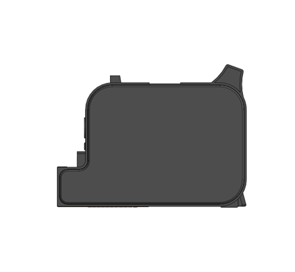
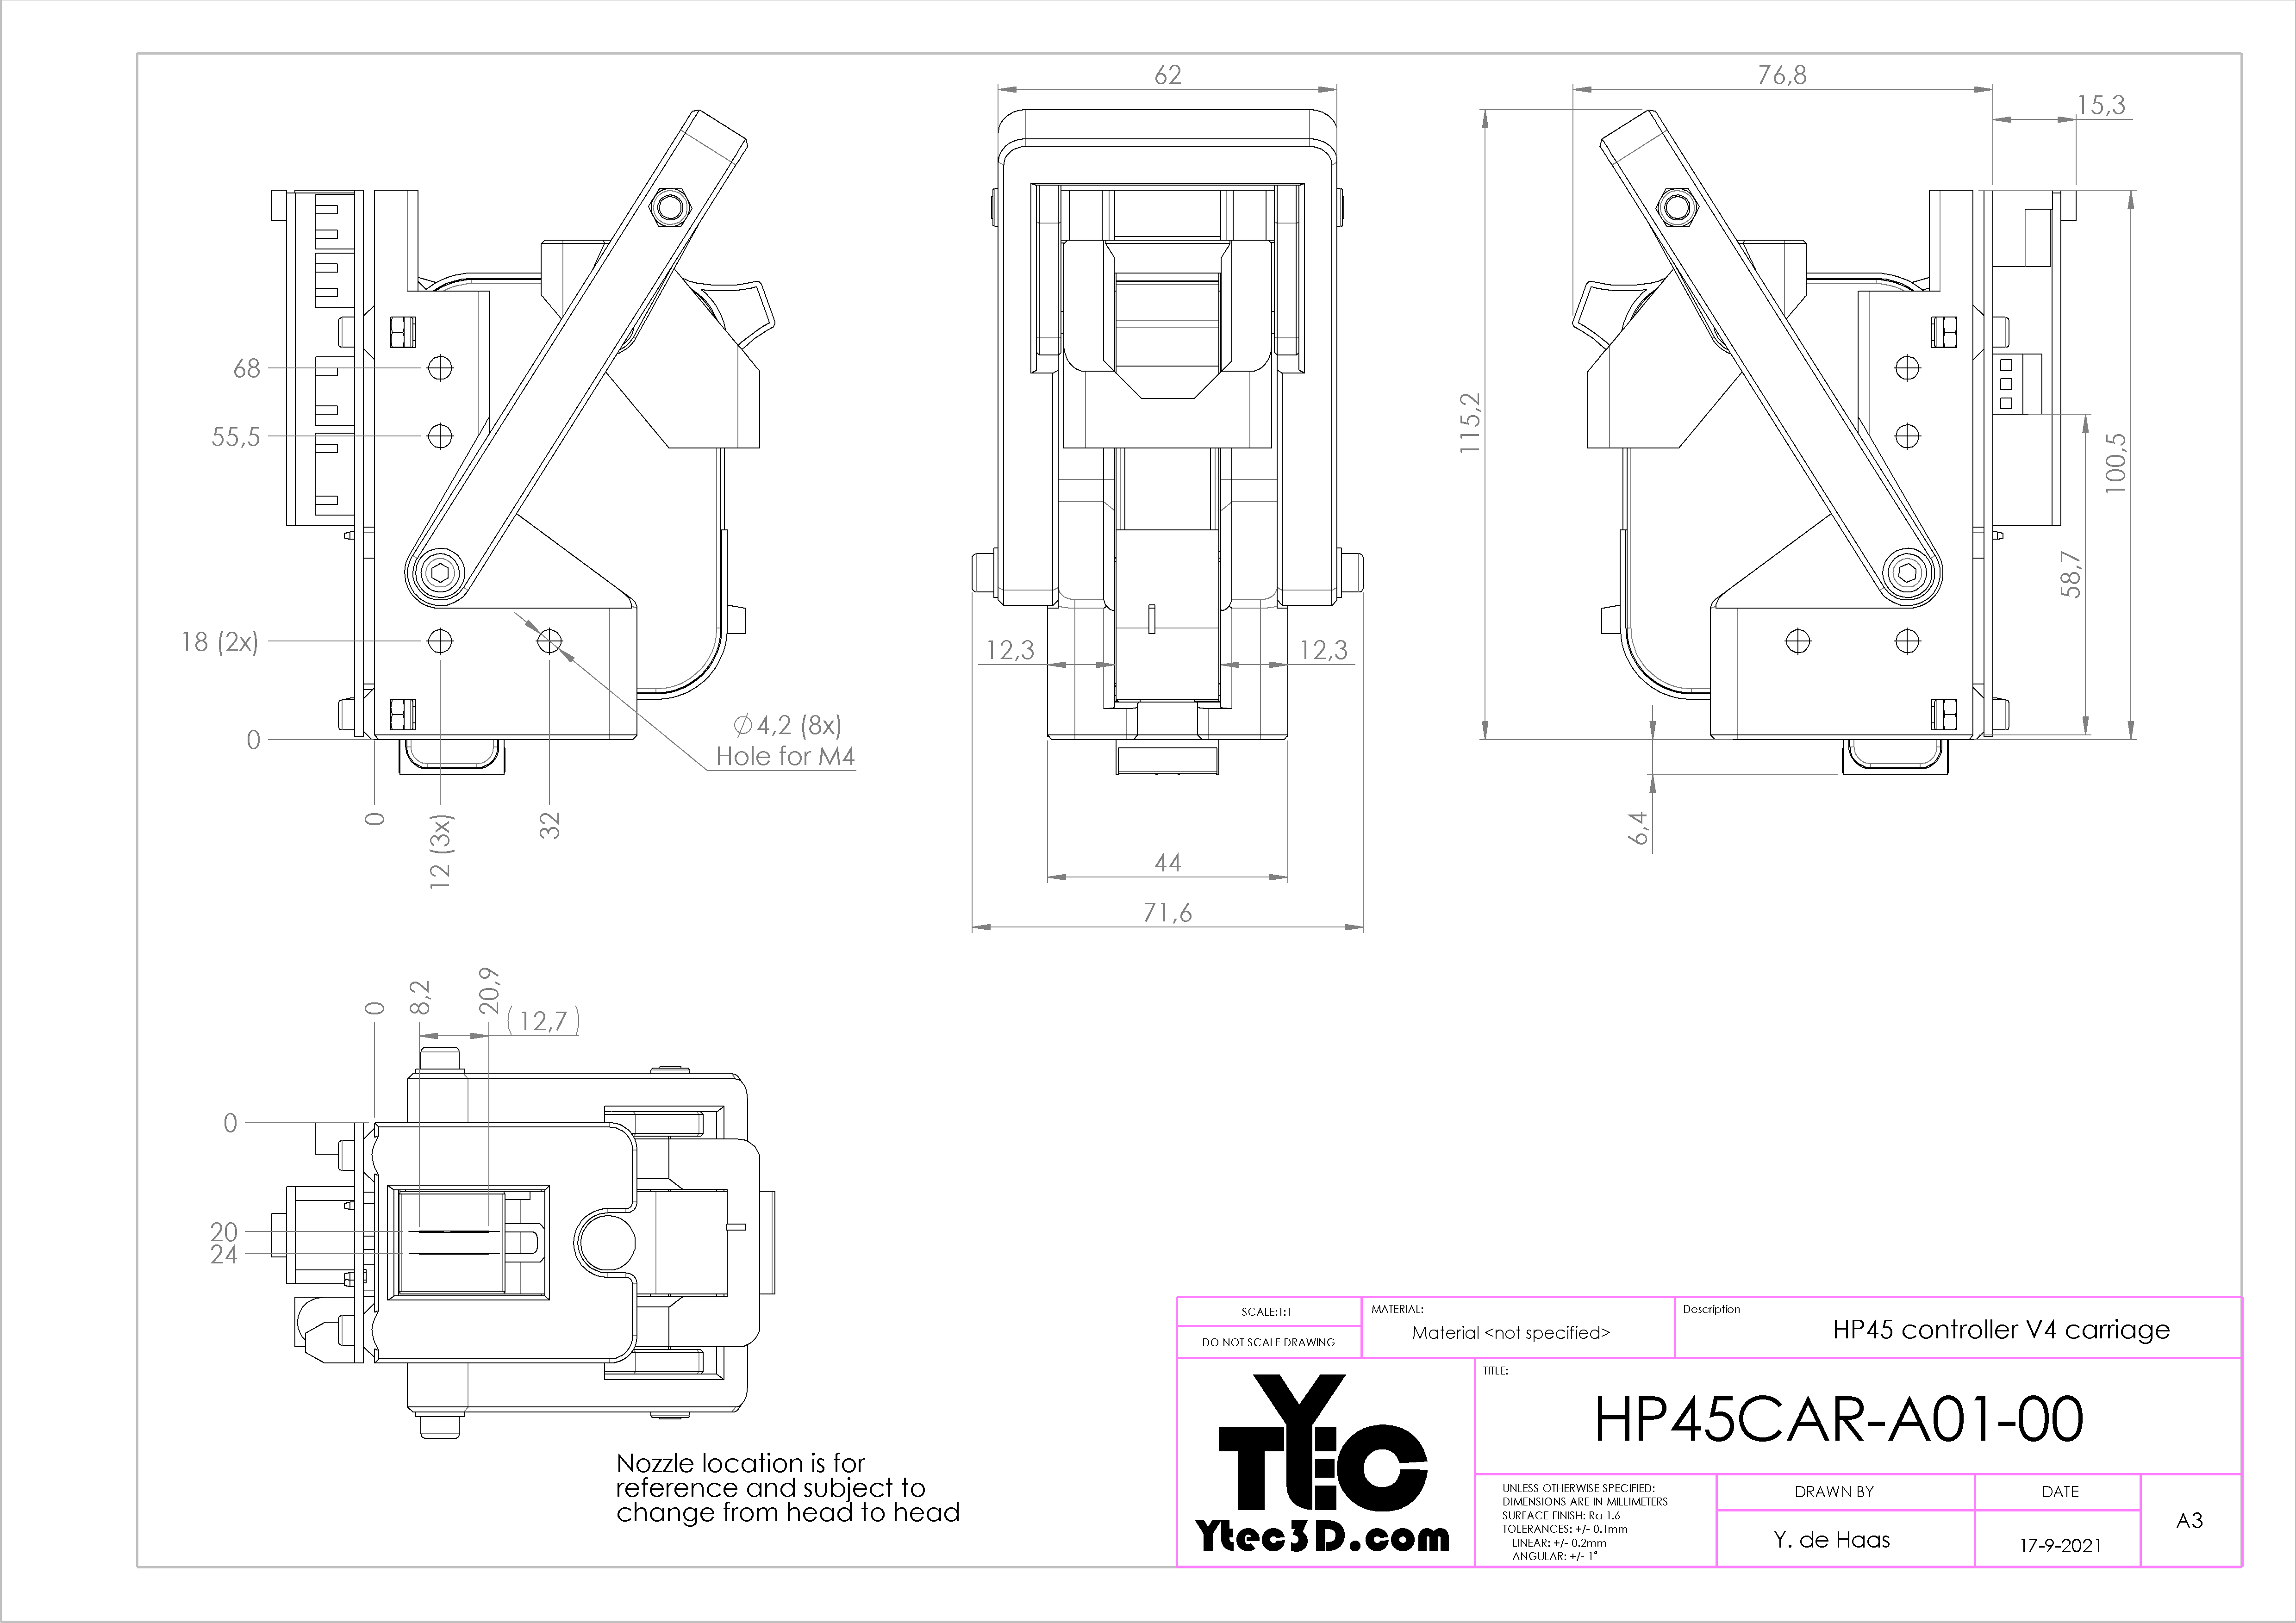
The carrier can be mounted to hardware with M4 screws. Provided below is a drawing of the mounting holes of the HP45 controller V4, rough nozzle locations in relation to the mounting holes and outside dimensions. In the downloads below is also a STEP file for integration with a 3D design.
Forum
The forum holds the development of the controller and some of the design requirements. It is also be the best place to ask any questions about the HP45 controller.
Assembly guide
The assembly guide to V4.01 is in the link below. It provides a bill of materials and placement of all components for the PCB. Also provided is a full guide on assembling the carriage. If you get an assembled and tested controller these steps are not required.
Assembly guide for PCB V4.01
Assembly guide for the mechanics
Revision history
The controller has gone through several iterations. The table below shows roughly the changes between each version.
| Version | Changes |
| V4.00 | Initial release |
| V4.01 | Fixed mistake where IC9 disable was not connected to IC9 Q7. Encoder port power pins swapped to match the V3 encoder port. |
| V4.02 | Changed the power regulator and added to option of an external DC-DC converter and 7805 (thanks 2022) |
License

The project described on this page is licensed under the Attribution-NonCommercial 4.0 International (CC BY-NC 4.0) license.