Table of content:
- Part 1: The beginning
- Part 2: Electric overhaul
- Part 3: PC power
- Part 4: (you are already here)
- Part 5: INK!
- Part 6: Leaky pistons
- Part 7: Making printheads
- Part 8: Printing in powder
Serial connection
Before getting to work, it would be nice to know if I can actually talk to the printer. It starts, sure, but can I send commands to it. The machine talks Serial (it is old), so I will need a USB to serial converter.
In comes, the PL2303, which is in this store bought USB to serial converter I have had for a over a decade. Also, it does not work, giving me the yellow triangle of complaining. Store bought converter is a fake, and it will need a hack. Luckily, it exists.
I also need to put the serial port on COM1-4, else the software doesn’t want to talk to it. Yay old machines. The good news, the machine talks back. I can toggle some of the hardware, and I can get information back.
Greasing the works
Before doing anything serious I thought it was wise to give all the motion a check, and if it needs it, some oil or grease. Standing still is generally not good for machines. The belts seem absolutely fine. Still at a decent amount of tension, and no odd cracks.
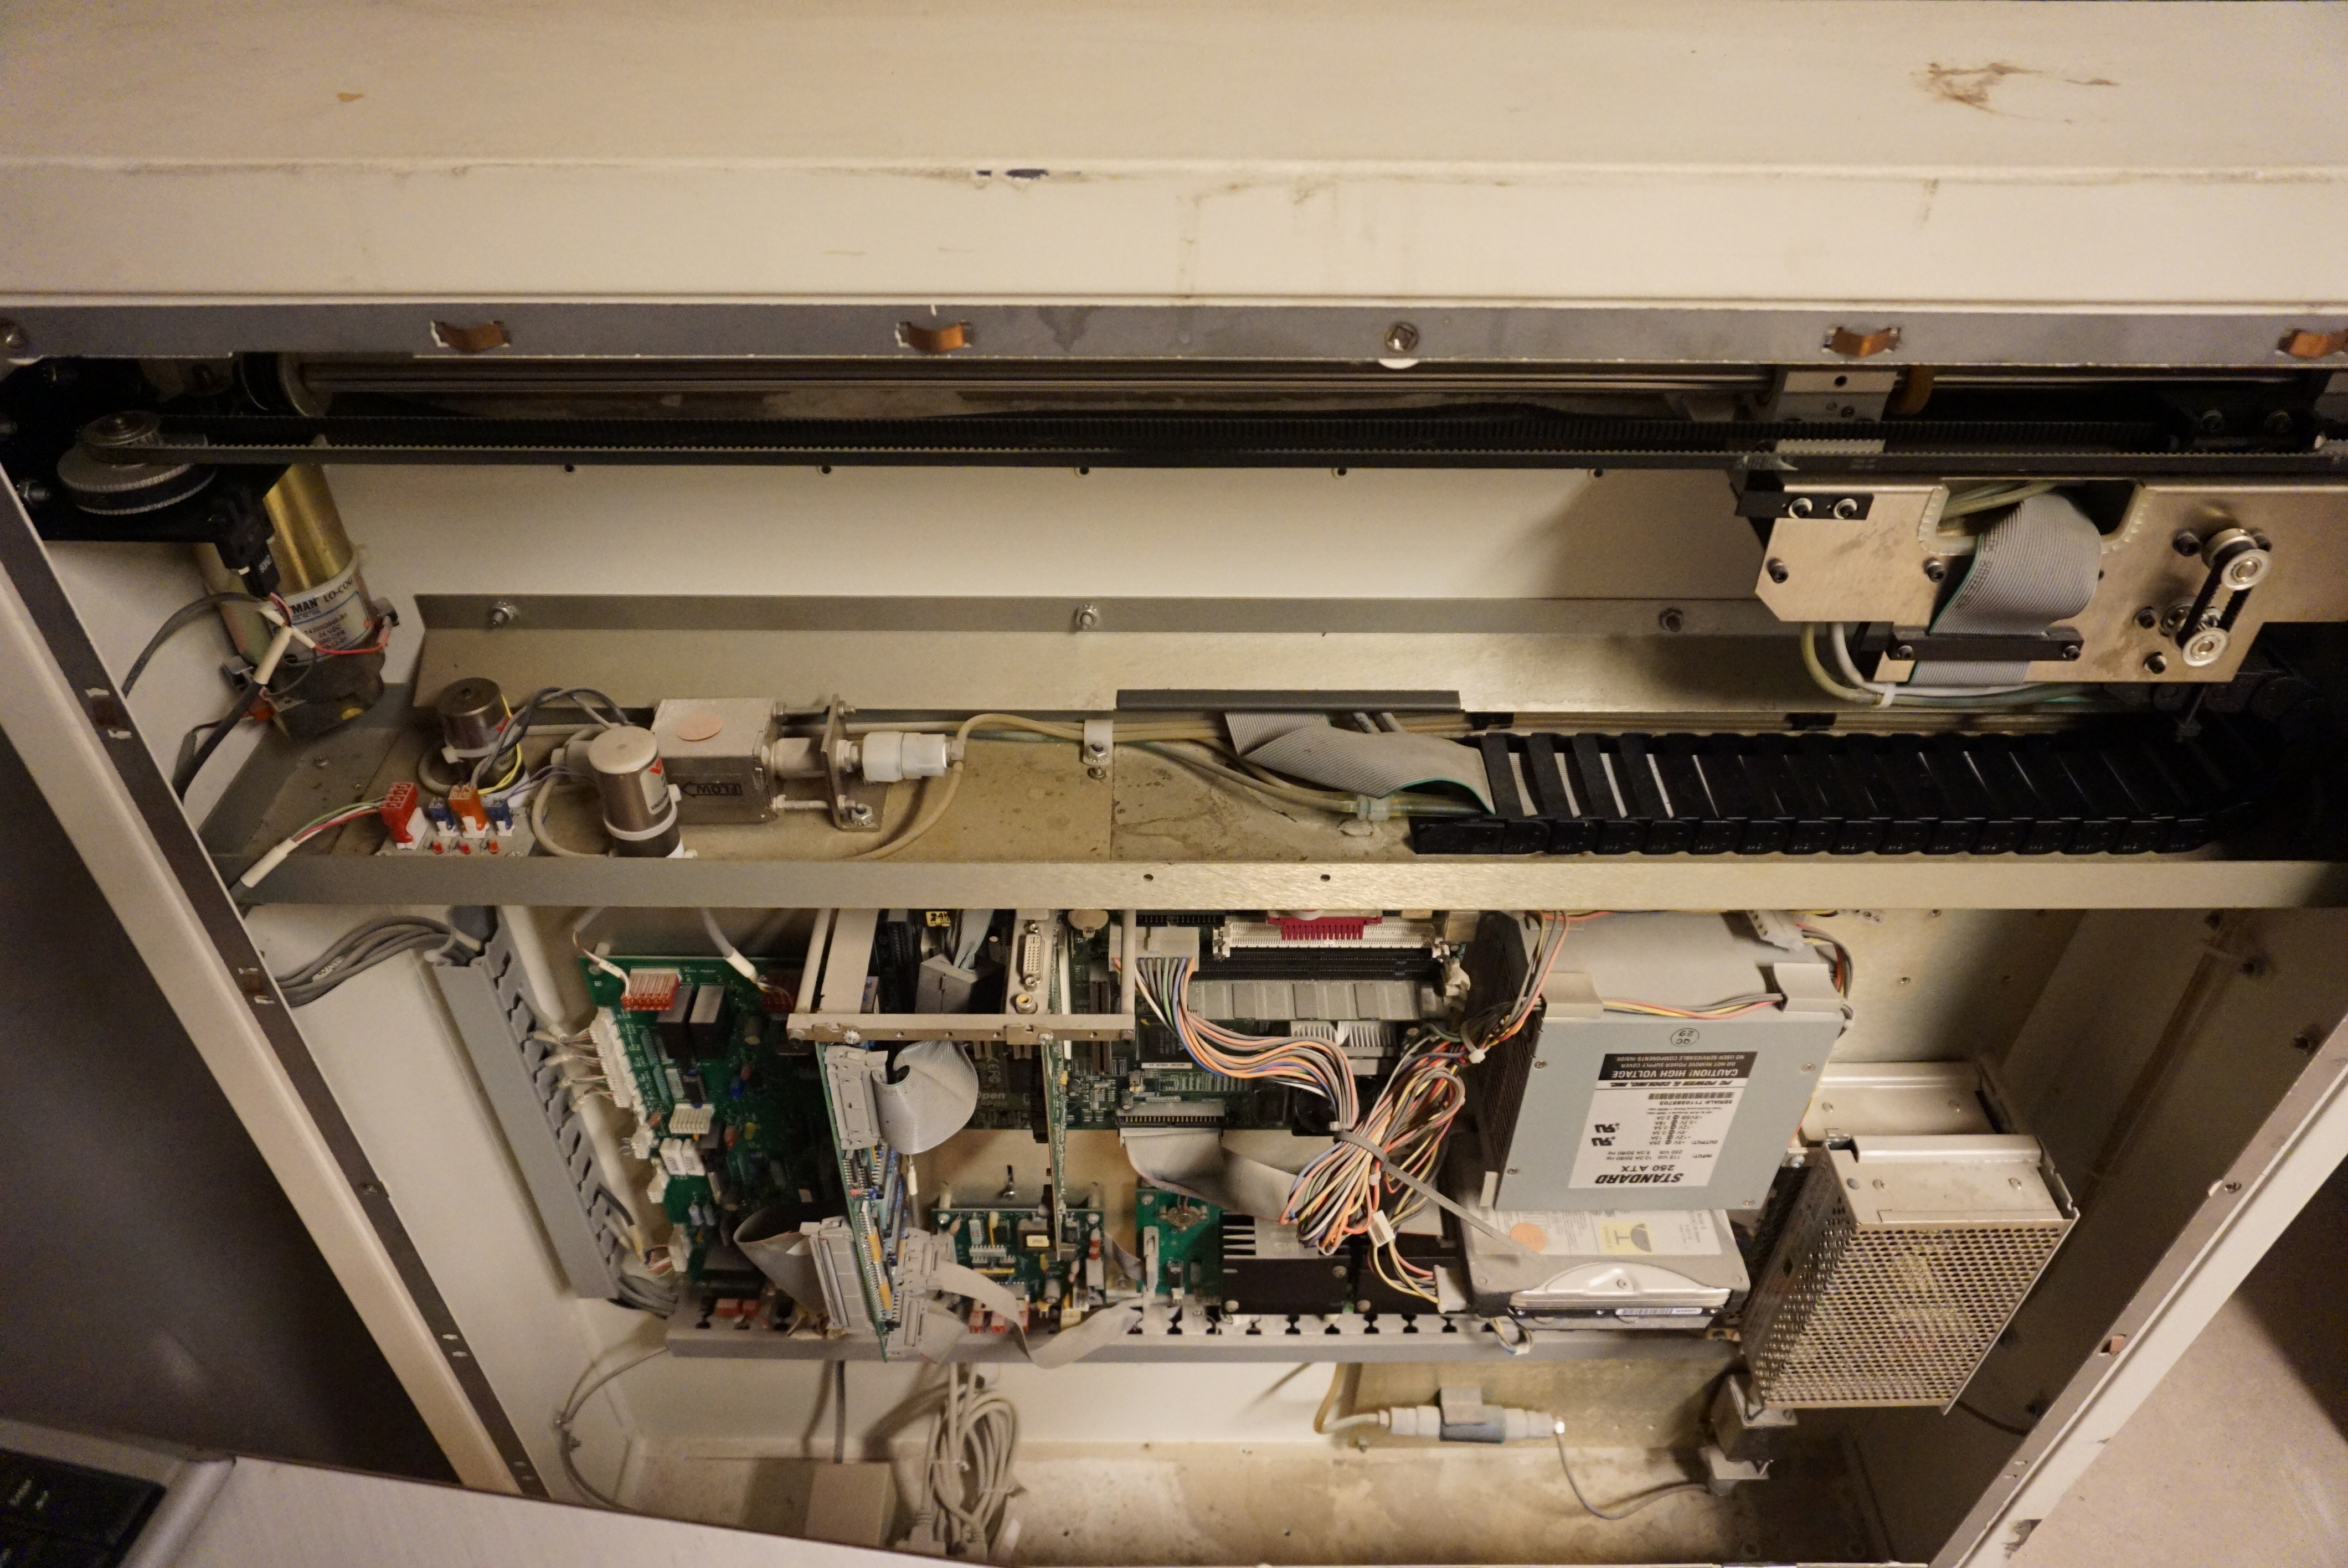

With the manual in hand, I went and greased the fast axis and oiled the snow plow. The ‘snow plows’ are plain bearing blocks that slide on either side of the piston, on the actual top surface. They need to be oiled before every print. Greasing the slow axis shaft was something that I was not allowed to do according to the manual :(, but I did it anyway. It has a grease port, but the bearings have no proper wipers, so I just greased the shaft itself. Pistons will be for a future post, first I want to see ink.
Also, not many photo’s. A greased axle looks the same as a dry one.
Binder lines
The current bottle of binder is this odd blue color. I have no idea if this is still usable, but it is in the binder lines, and I do not want it there. The manual states flushing the lines with demineralized water if the machine will not print for extended amounts of time. This is what I will do. The software has a nice function that allows you to flush the lines. Simply add a bottle of water at the input, and then hold the ‘Feed up’ button until you are done flushing. ‘This may take 5 minutes’.
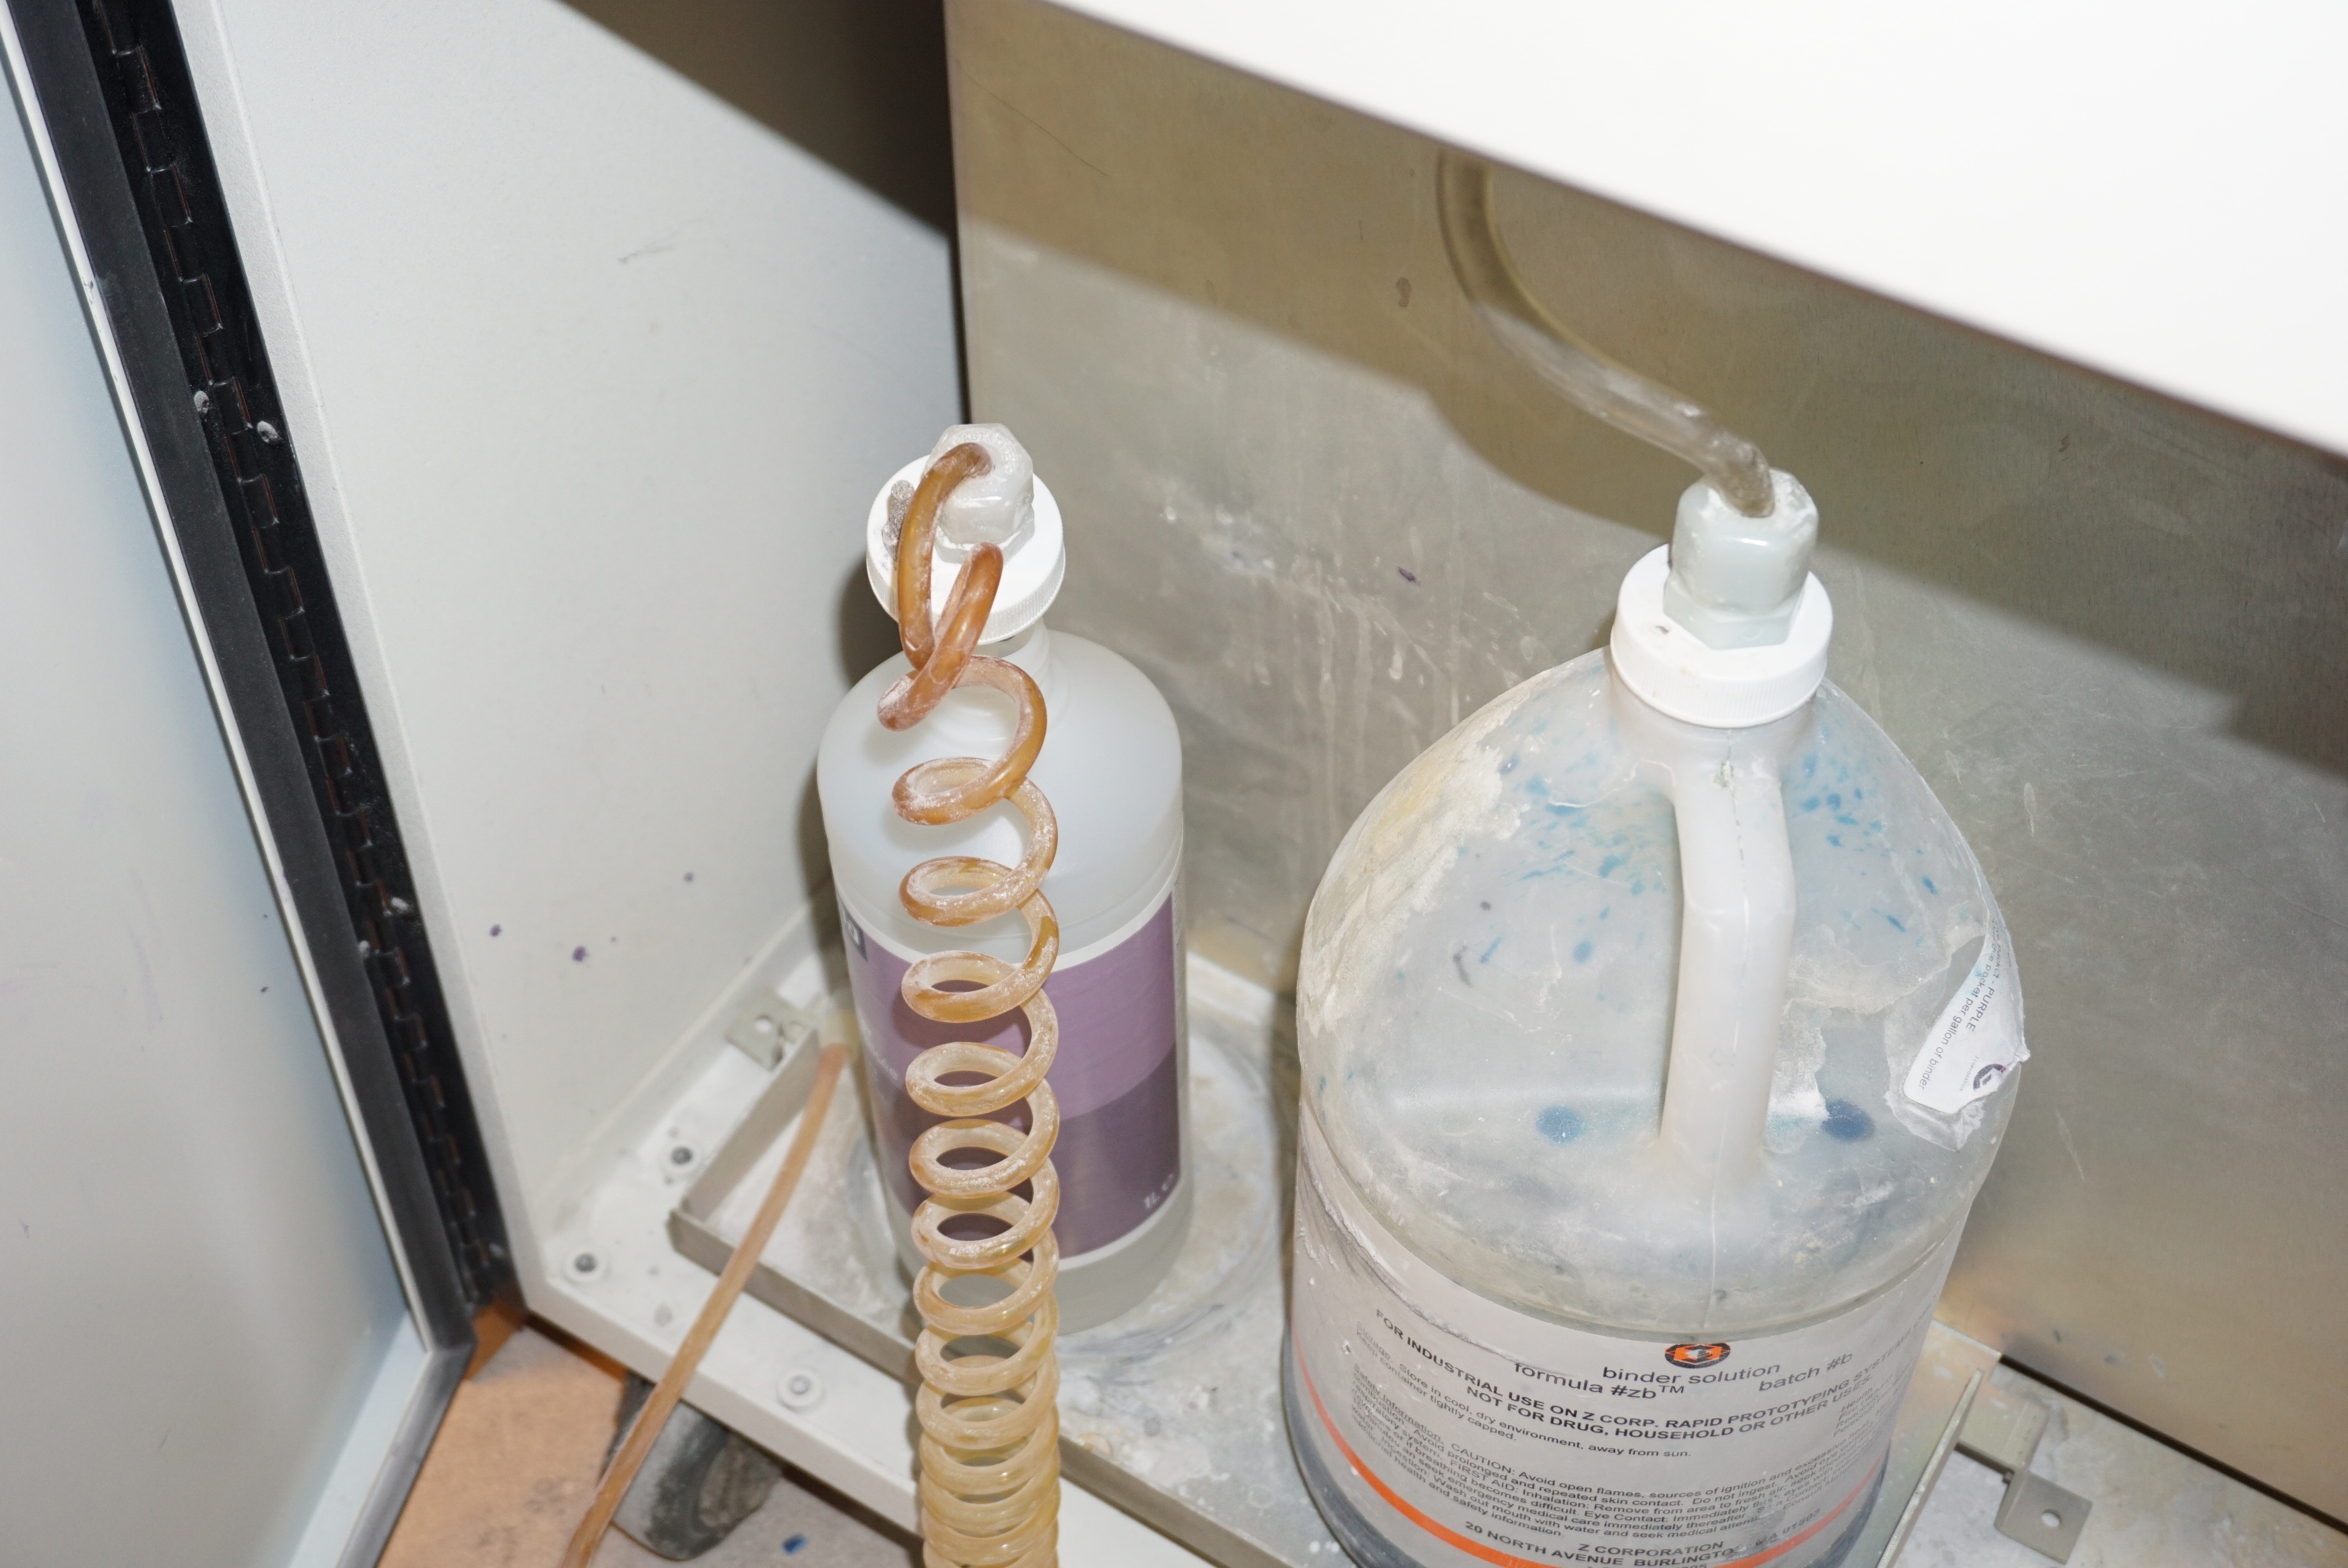

Wait, 5 minutes, while holding the button, a dinky dome cap button, the whole time!? Yes, the machine does not flush for 5 minutes, it flushes until you release the button. While I am happy that it lets you chose how long to flush, you stand there for 5 minutes holding a crappy button.
Also consider this thought. The binder (and powder) that this machine uses is ludicrously expensive. Current estimate is €100-500. Holding the button for 5 minutes cost around 100-200ml of binder. This is at least €10, at the most €100 in binder, just flushed out of the system. Running this machine was not cheap. Now I am not going to be using original materials, but still.
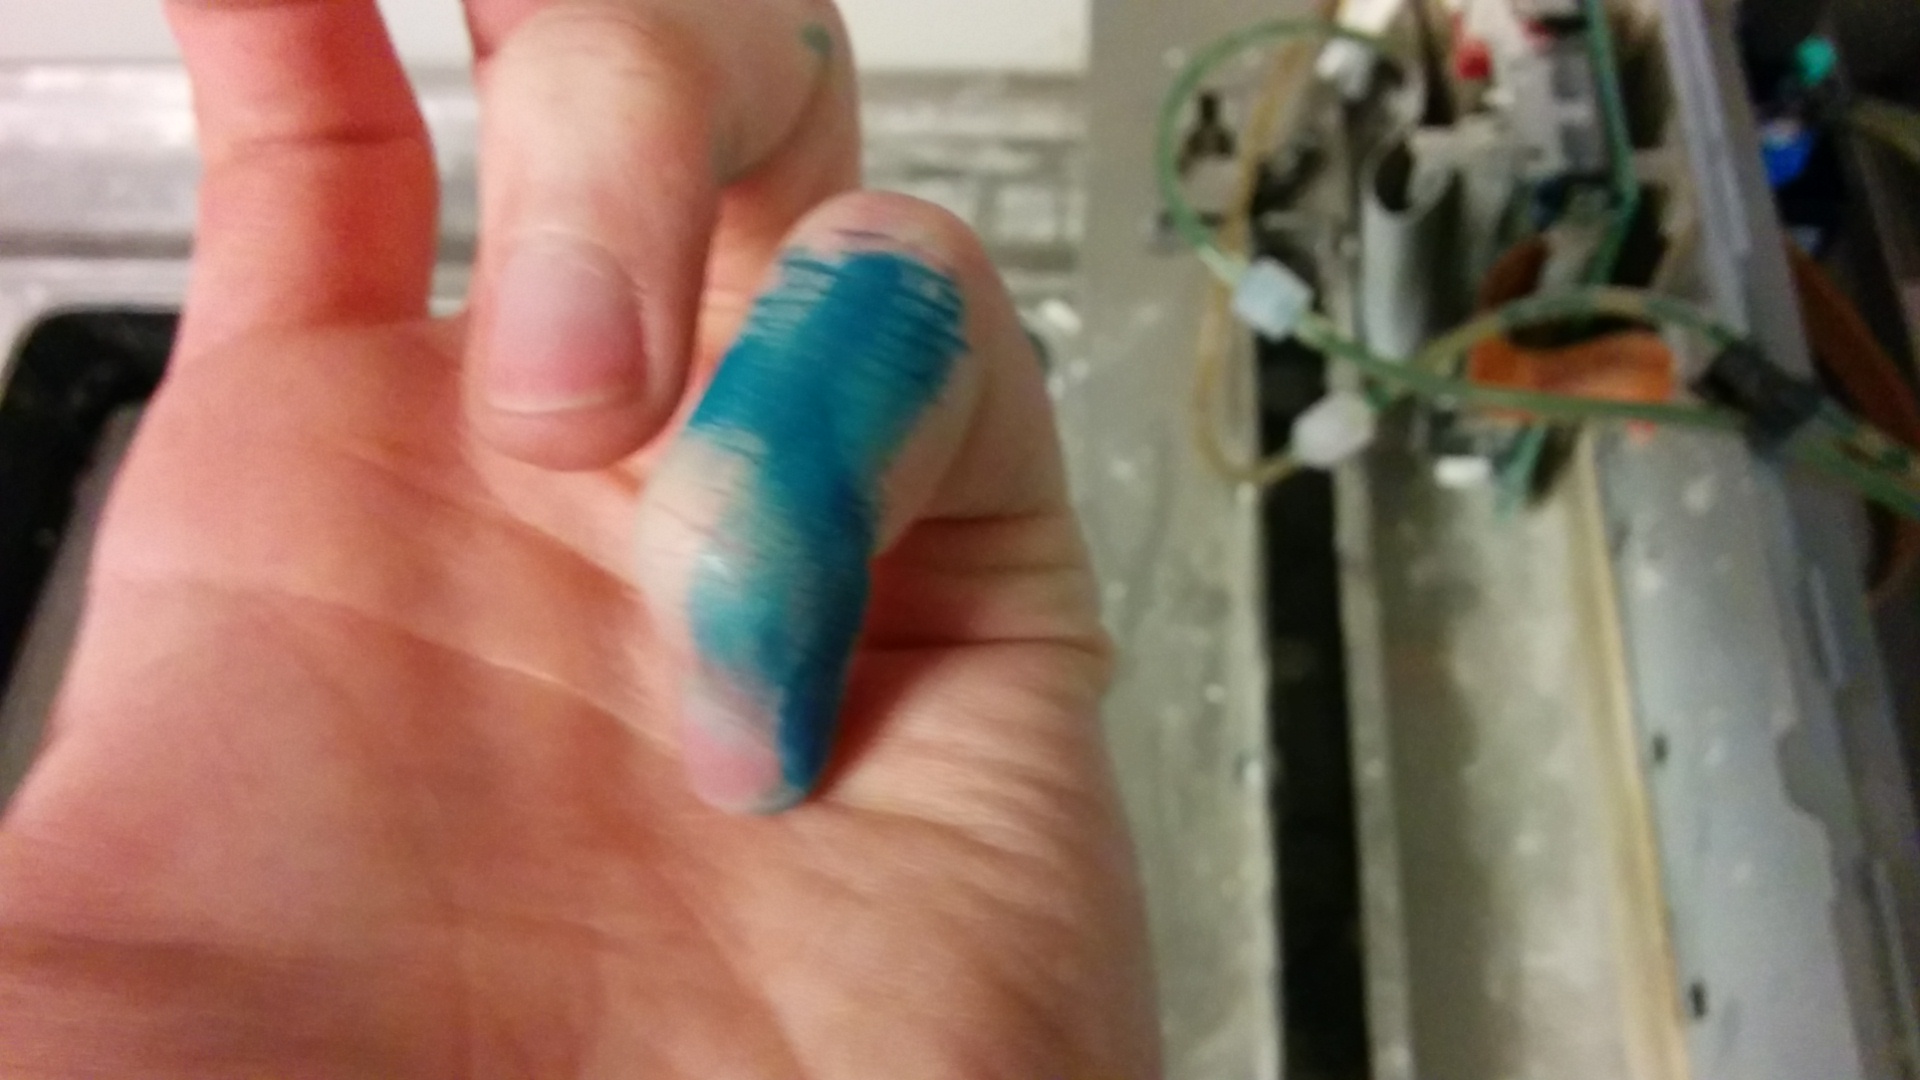
Also, while reconnecting some things during the flushing, I got some of the binder on my hand. I am happy to report that I am now 1% smurf, this stuff does not come off.
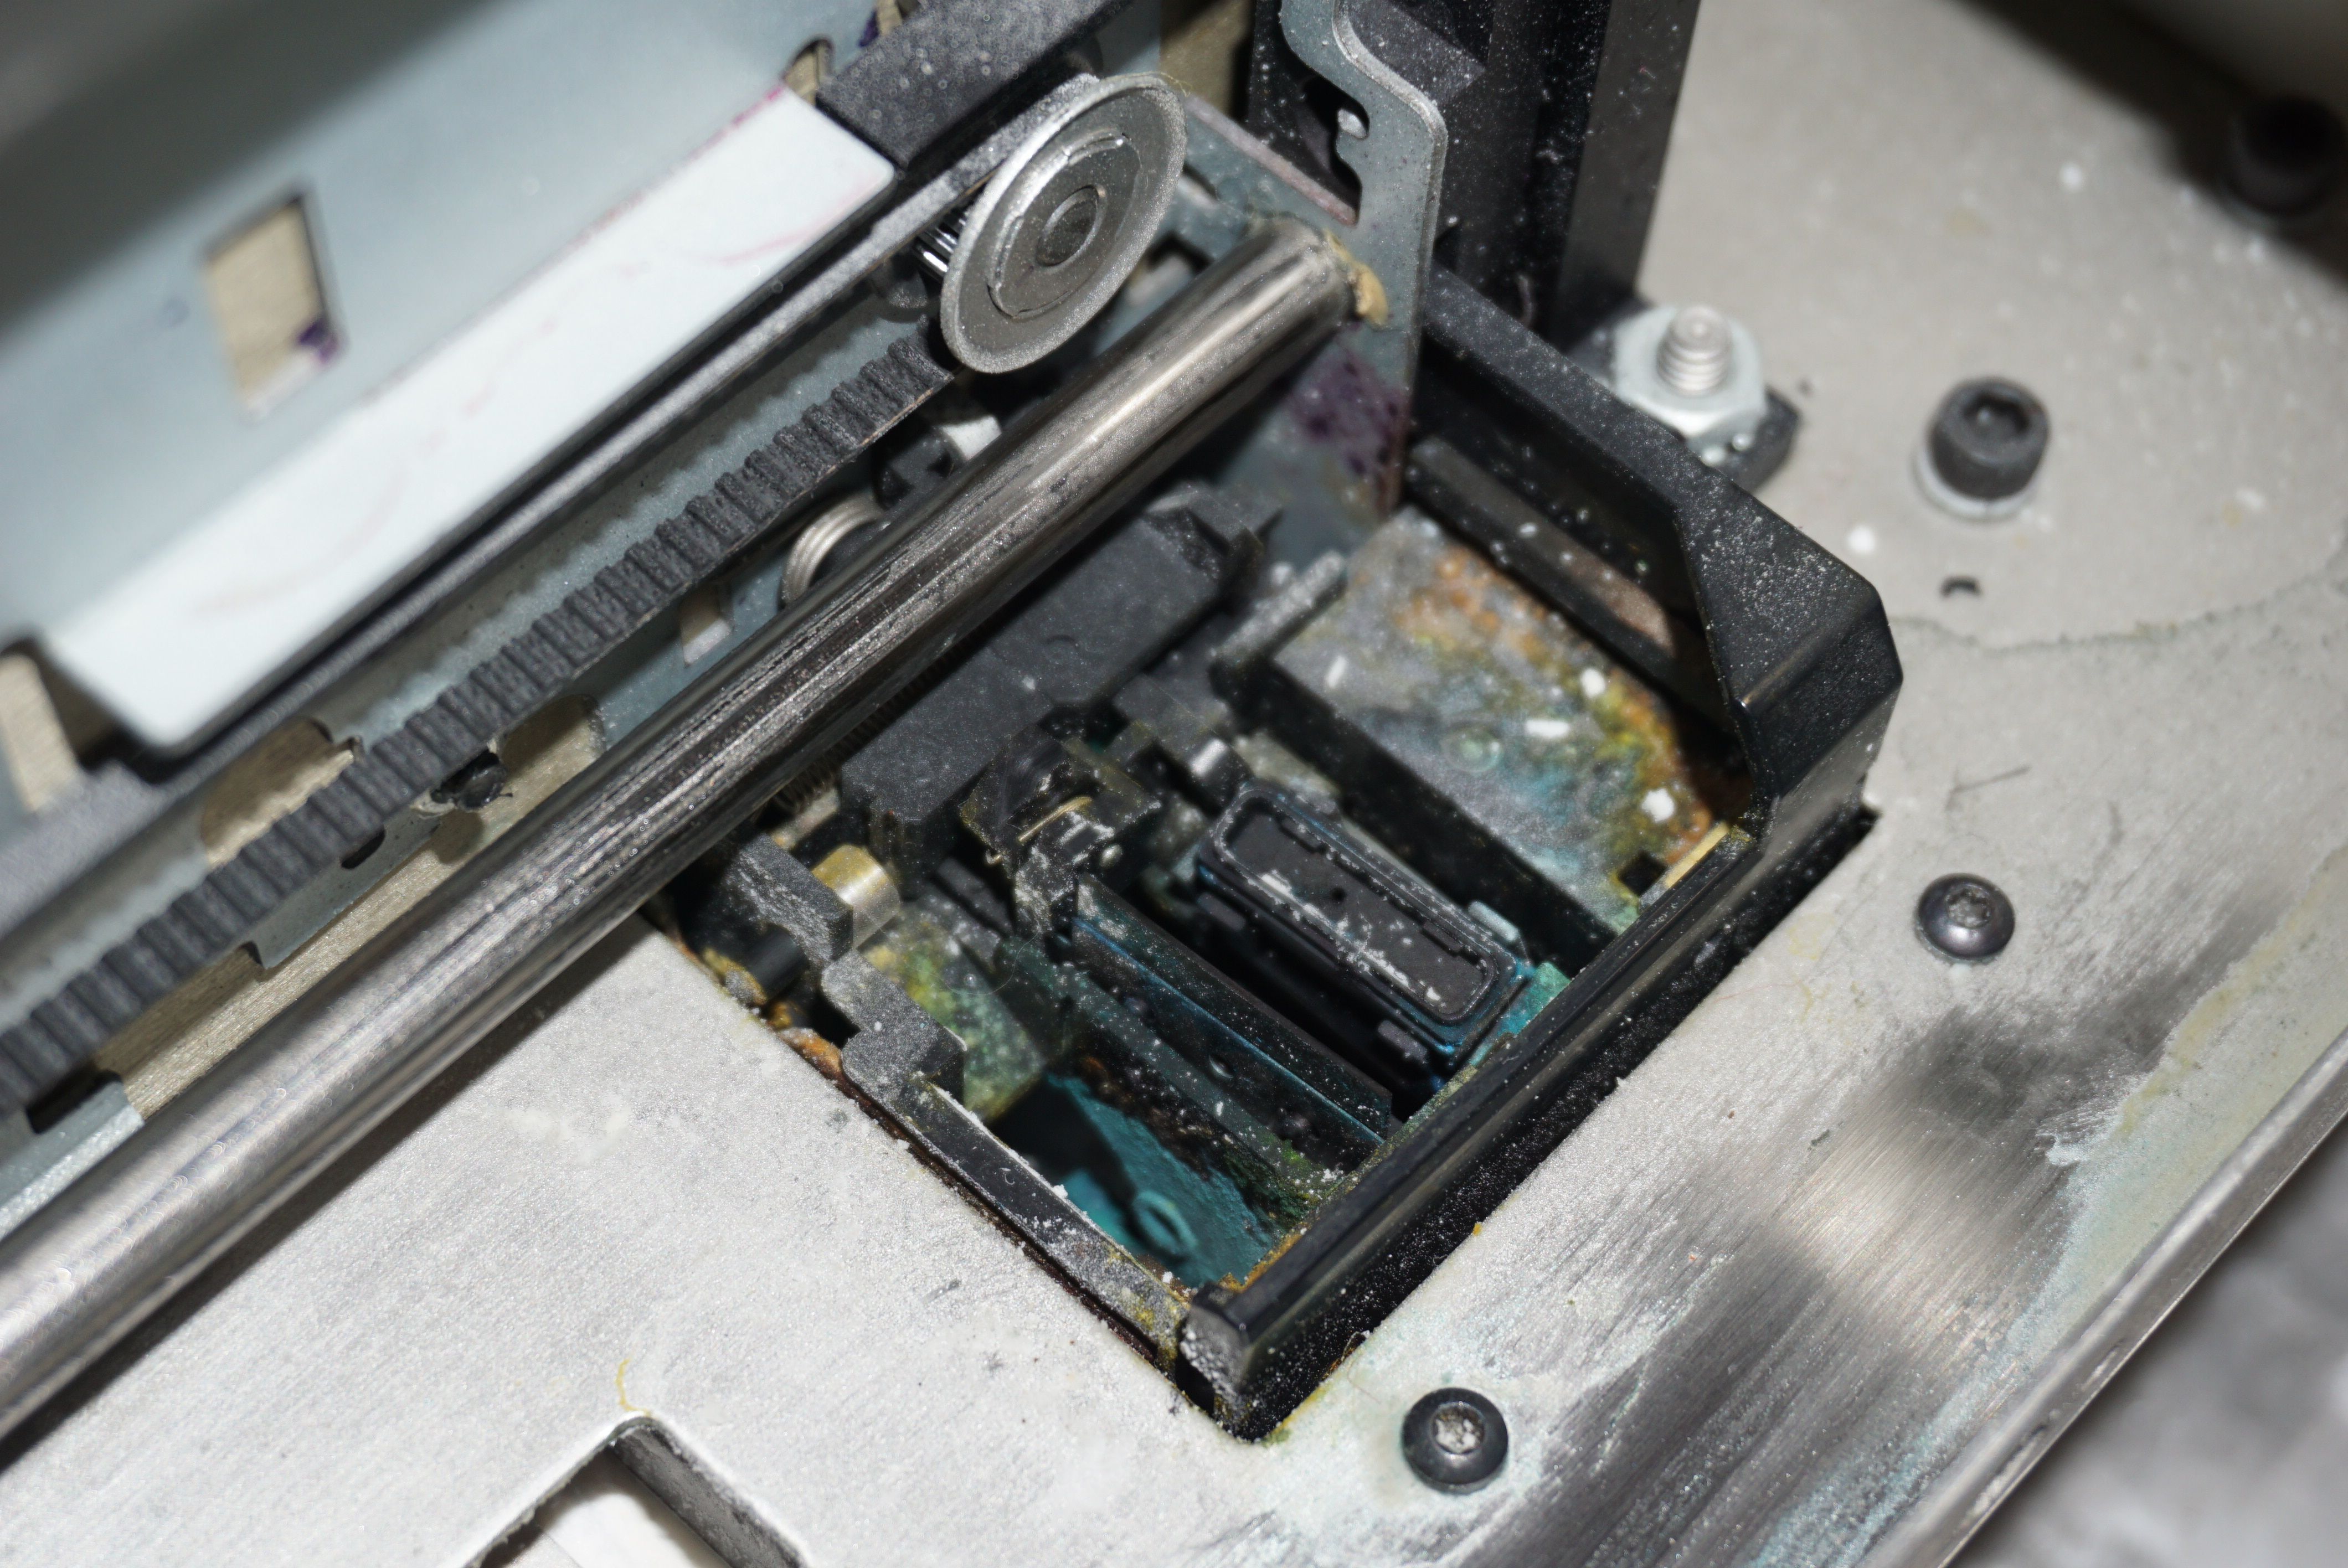
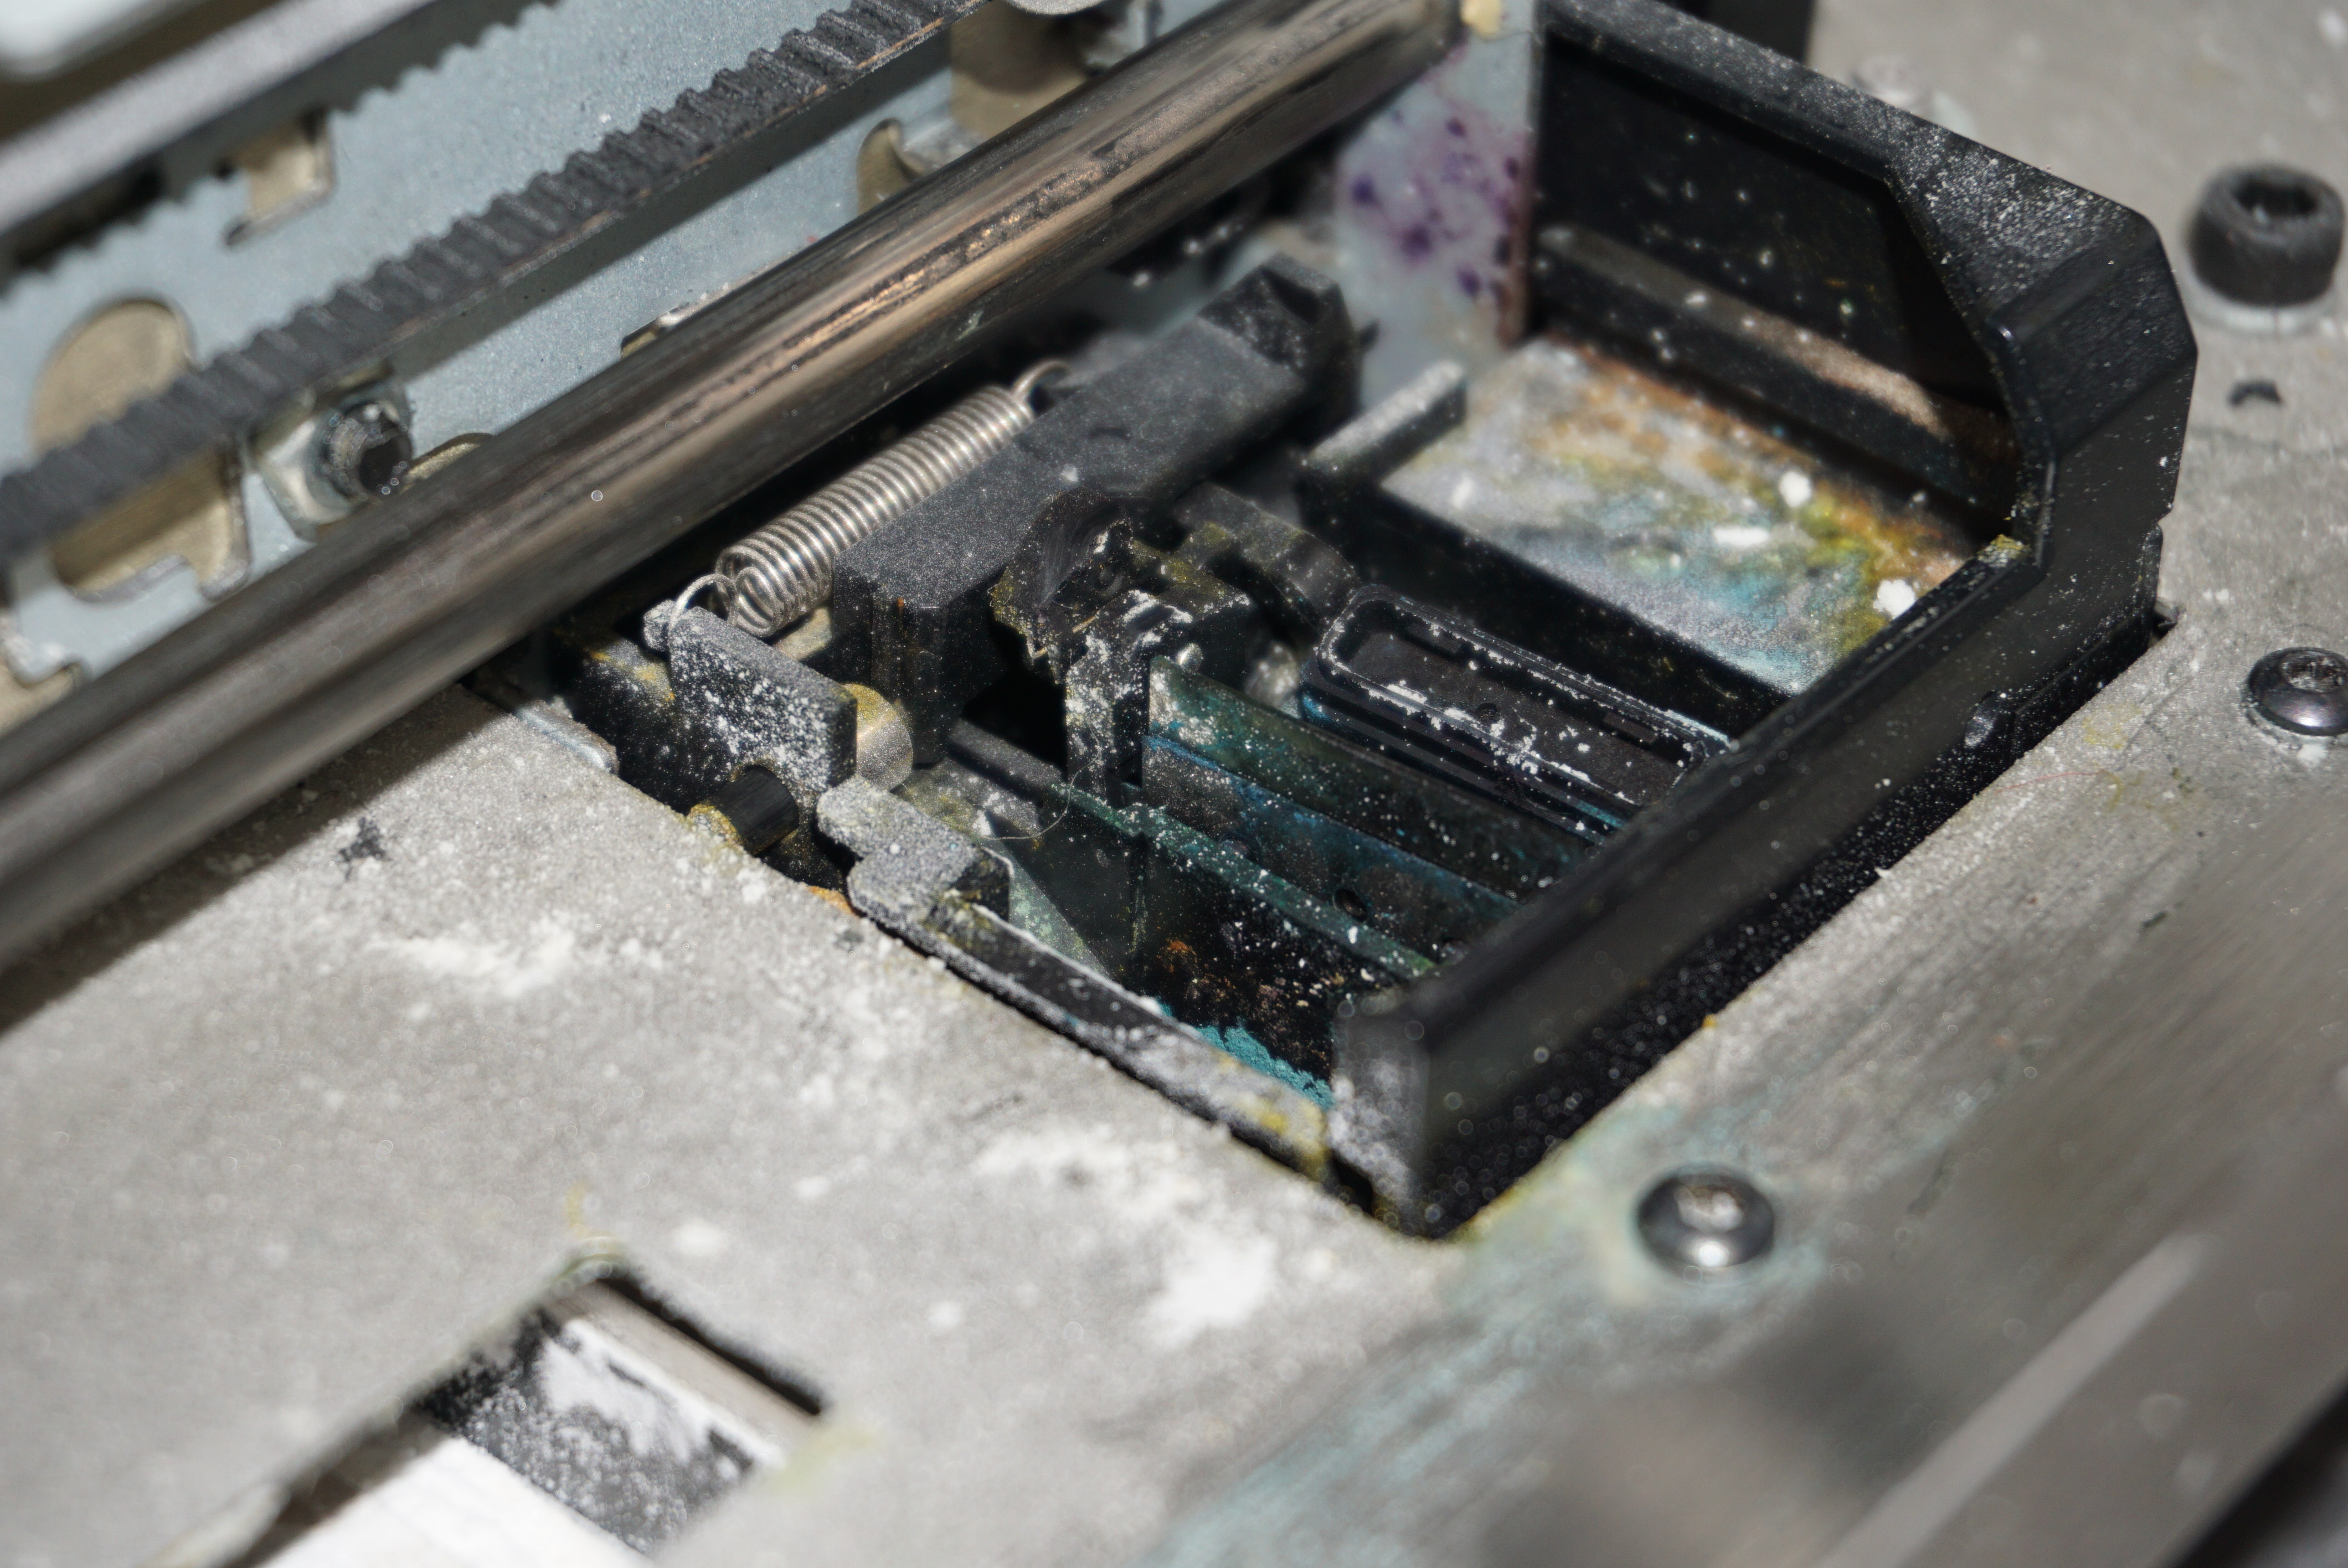
Printhead dock
The dock is where the printhead spends most of it’s time. It consists of a squeegee (I really like that word) and a suction/capping port. All is made of rubber, and though it has been sitting still for a while, it does still feel decent. I cannot really see if it makes proper contact, since the printhead obscures it most of the time, but for sake of argument, lets assume it works.
Printhead
The final piece of the puzzle for today is the printhead connector. The Z400 uses a CISS (continuous Ink Supply System) printhead, and the BC-20 is definitely not a CISS printhead. It was cut open by Zcorp and a special adapter was added to the printhead. A special connector is used to make contact with the printhead. This connector is a medical plastic container of some sort.
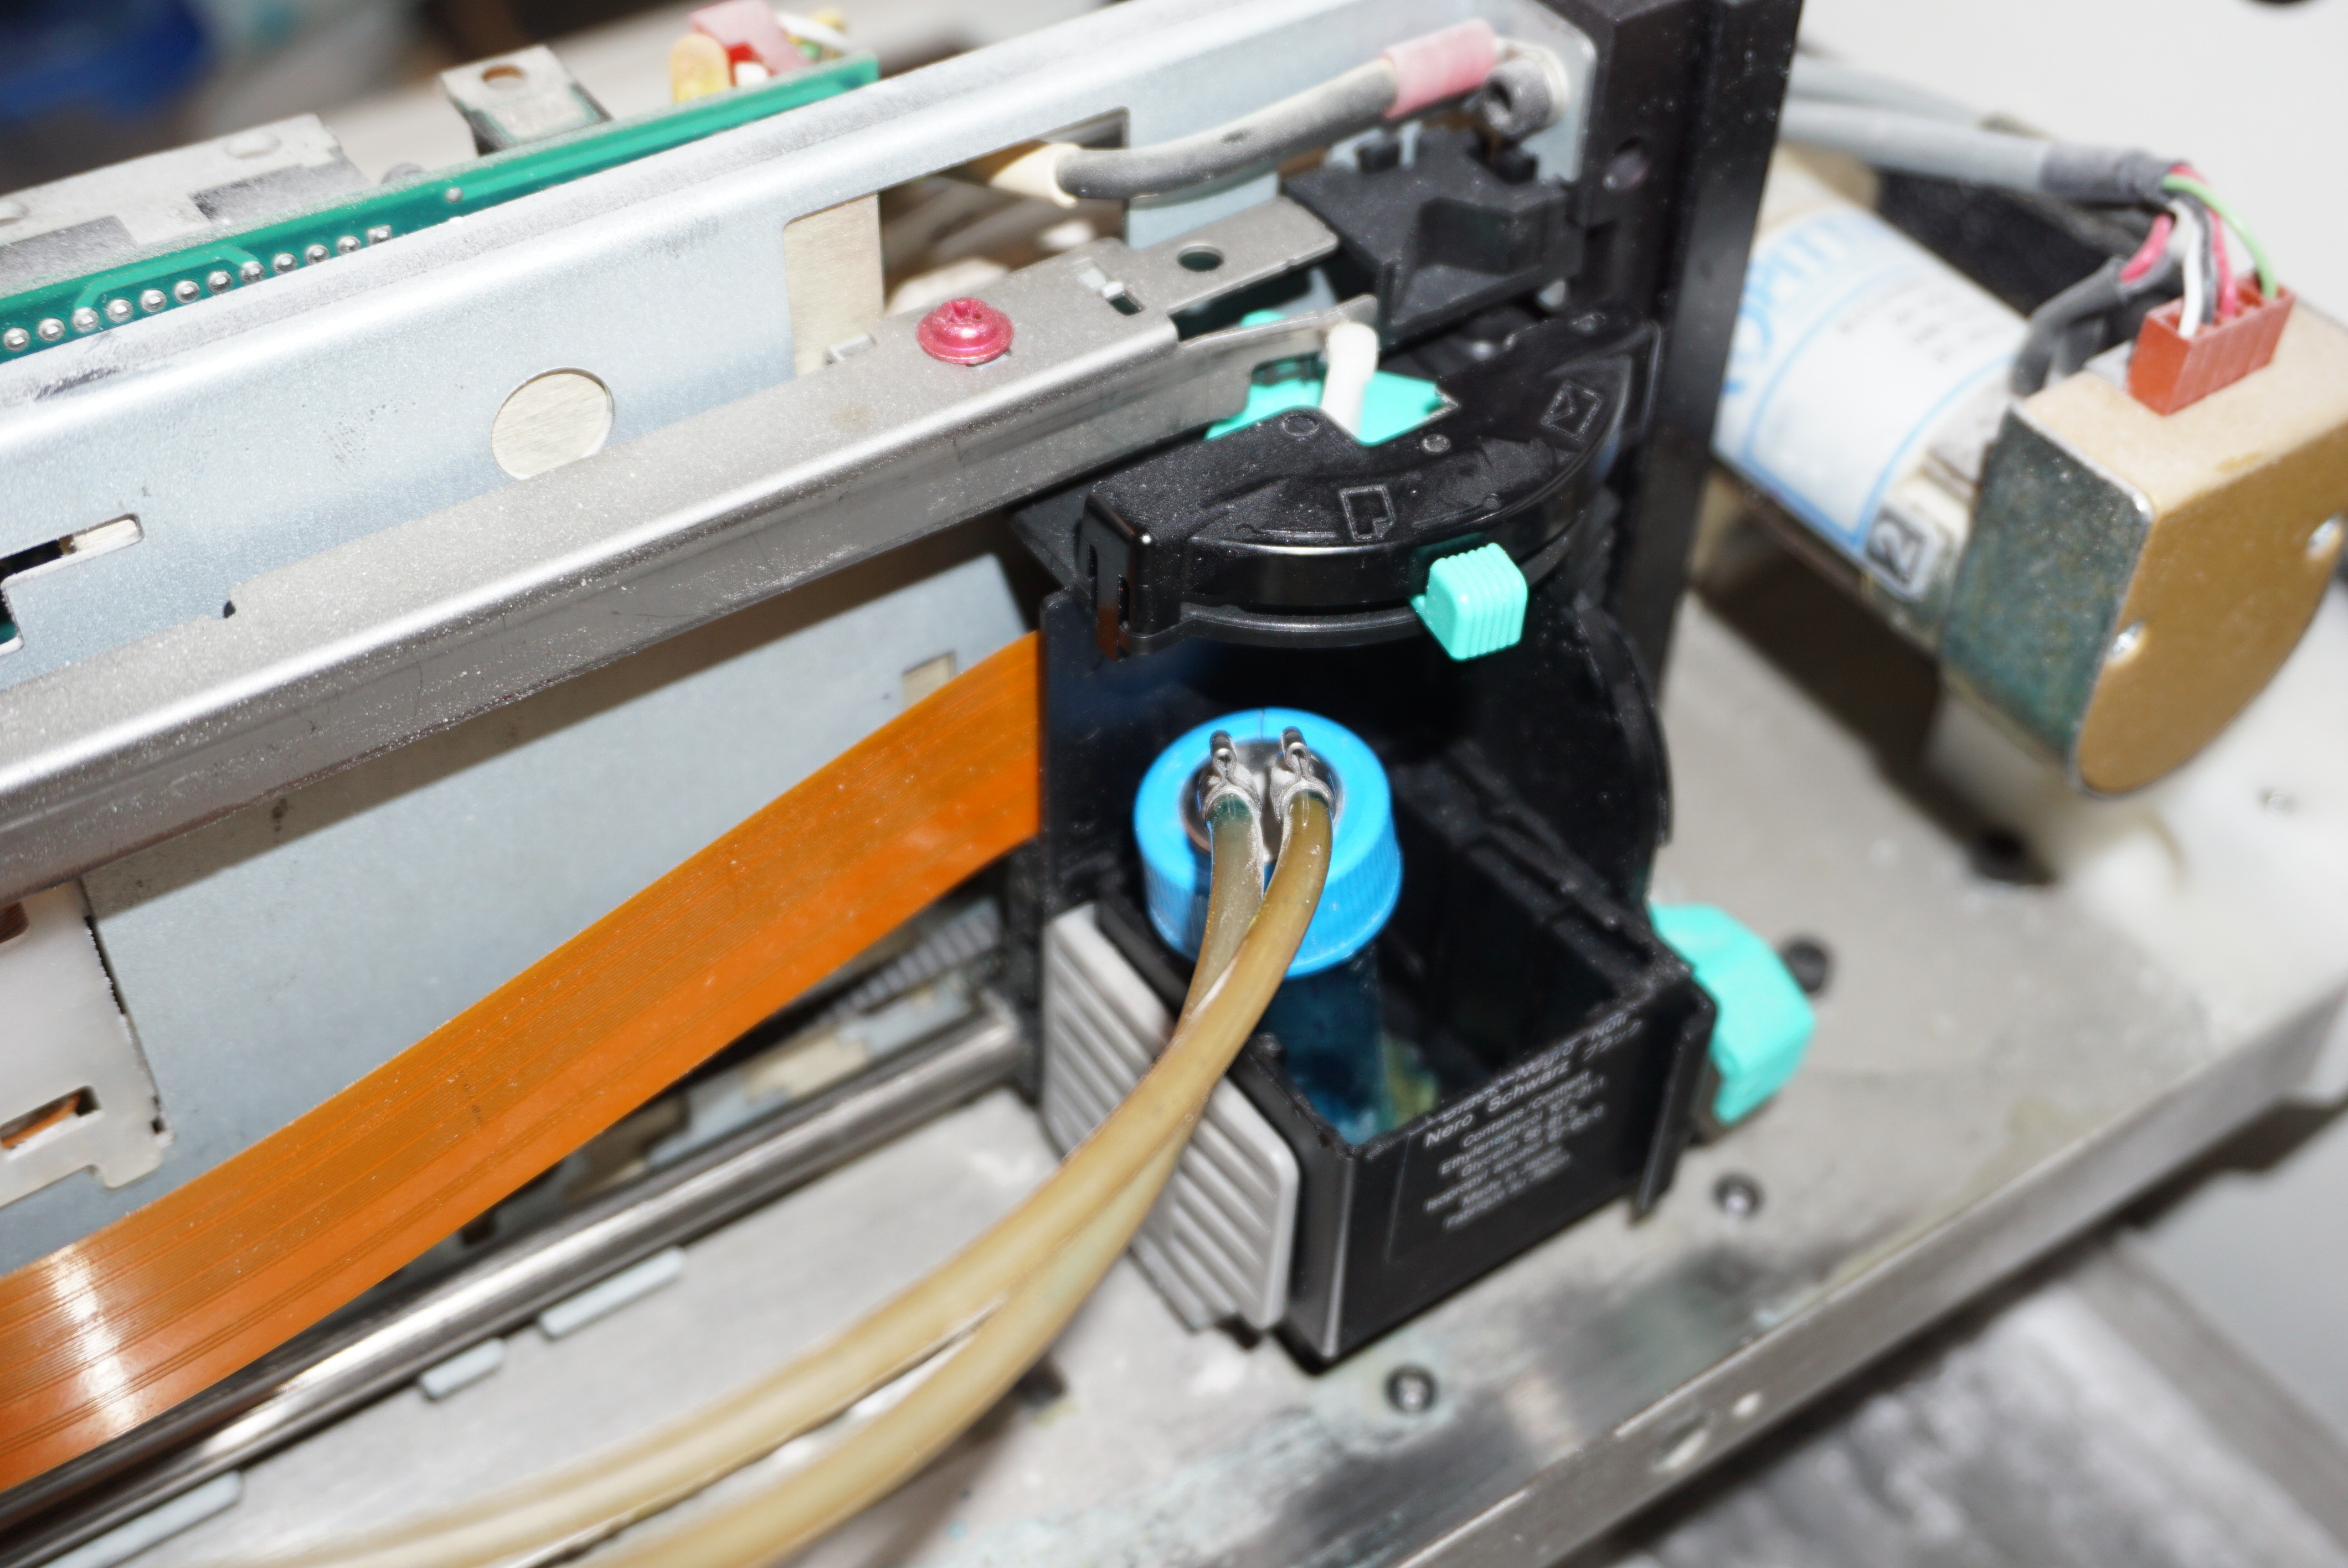
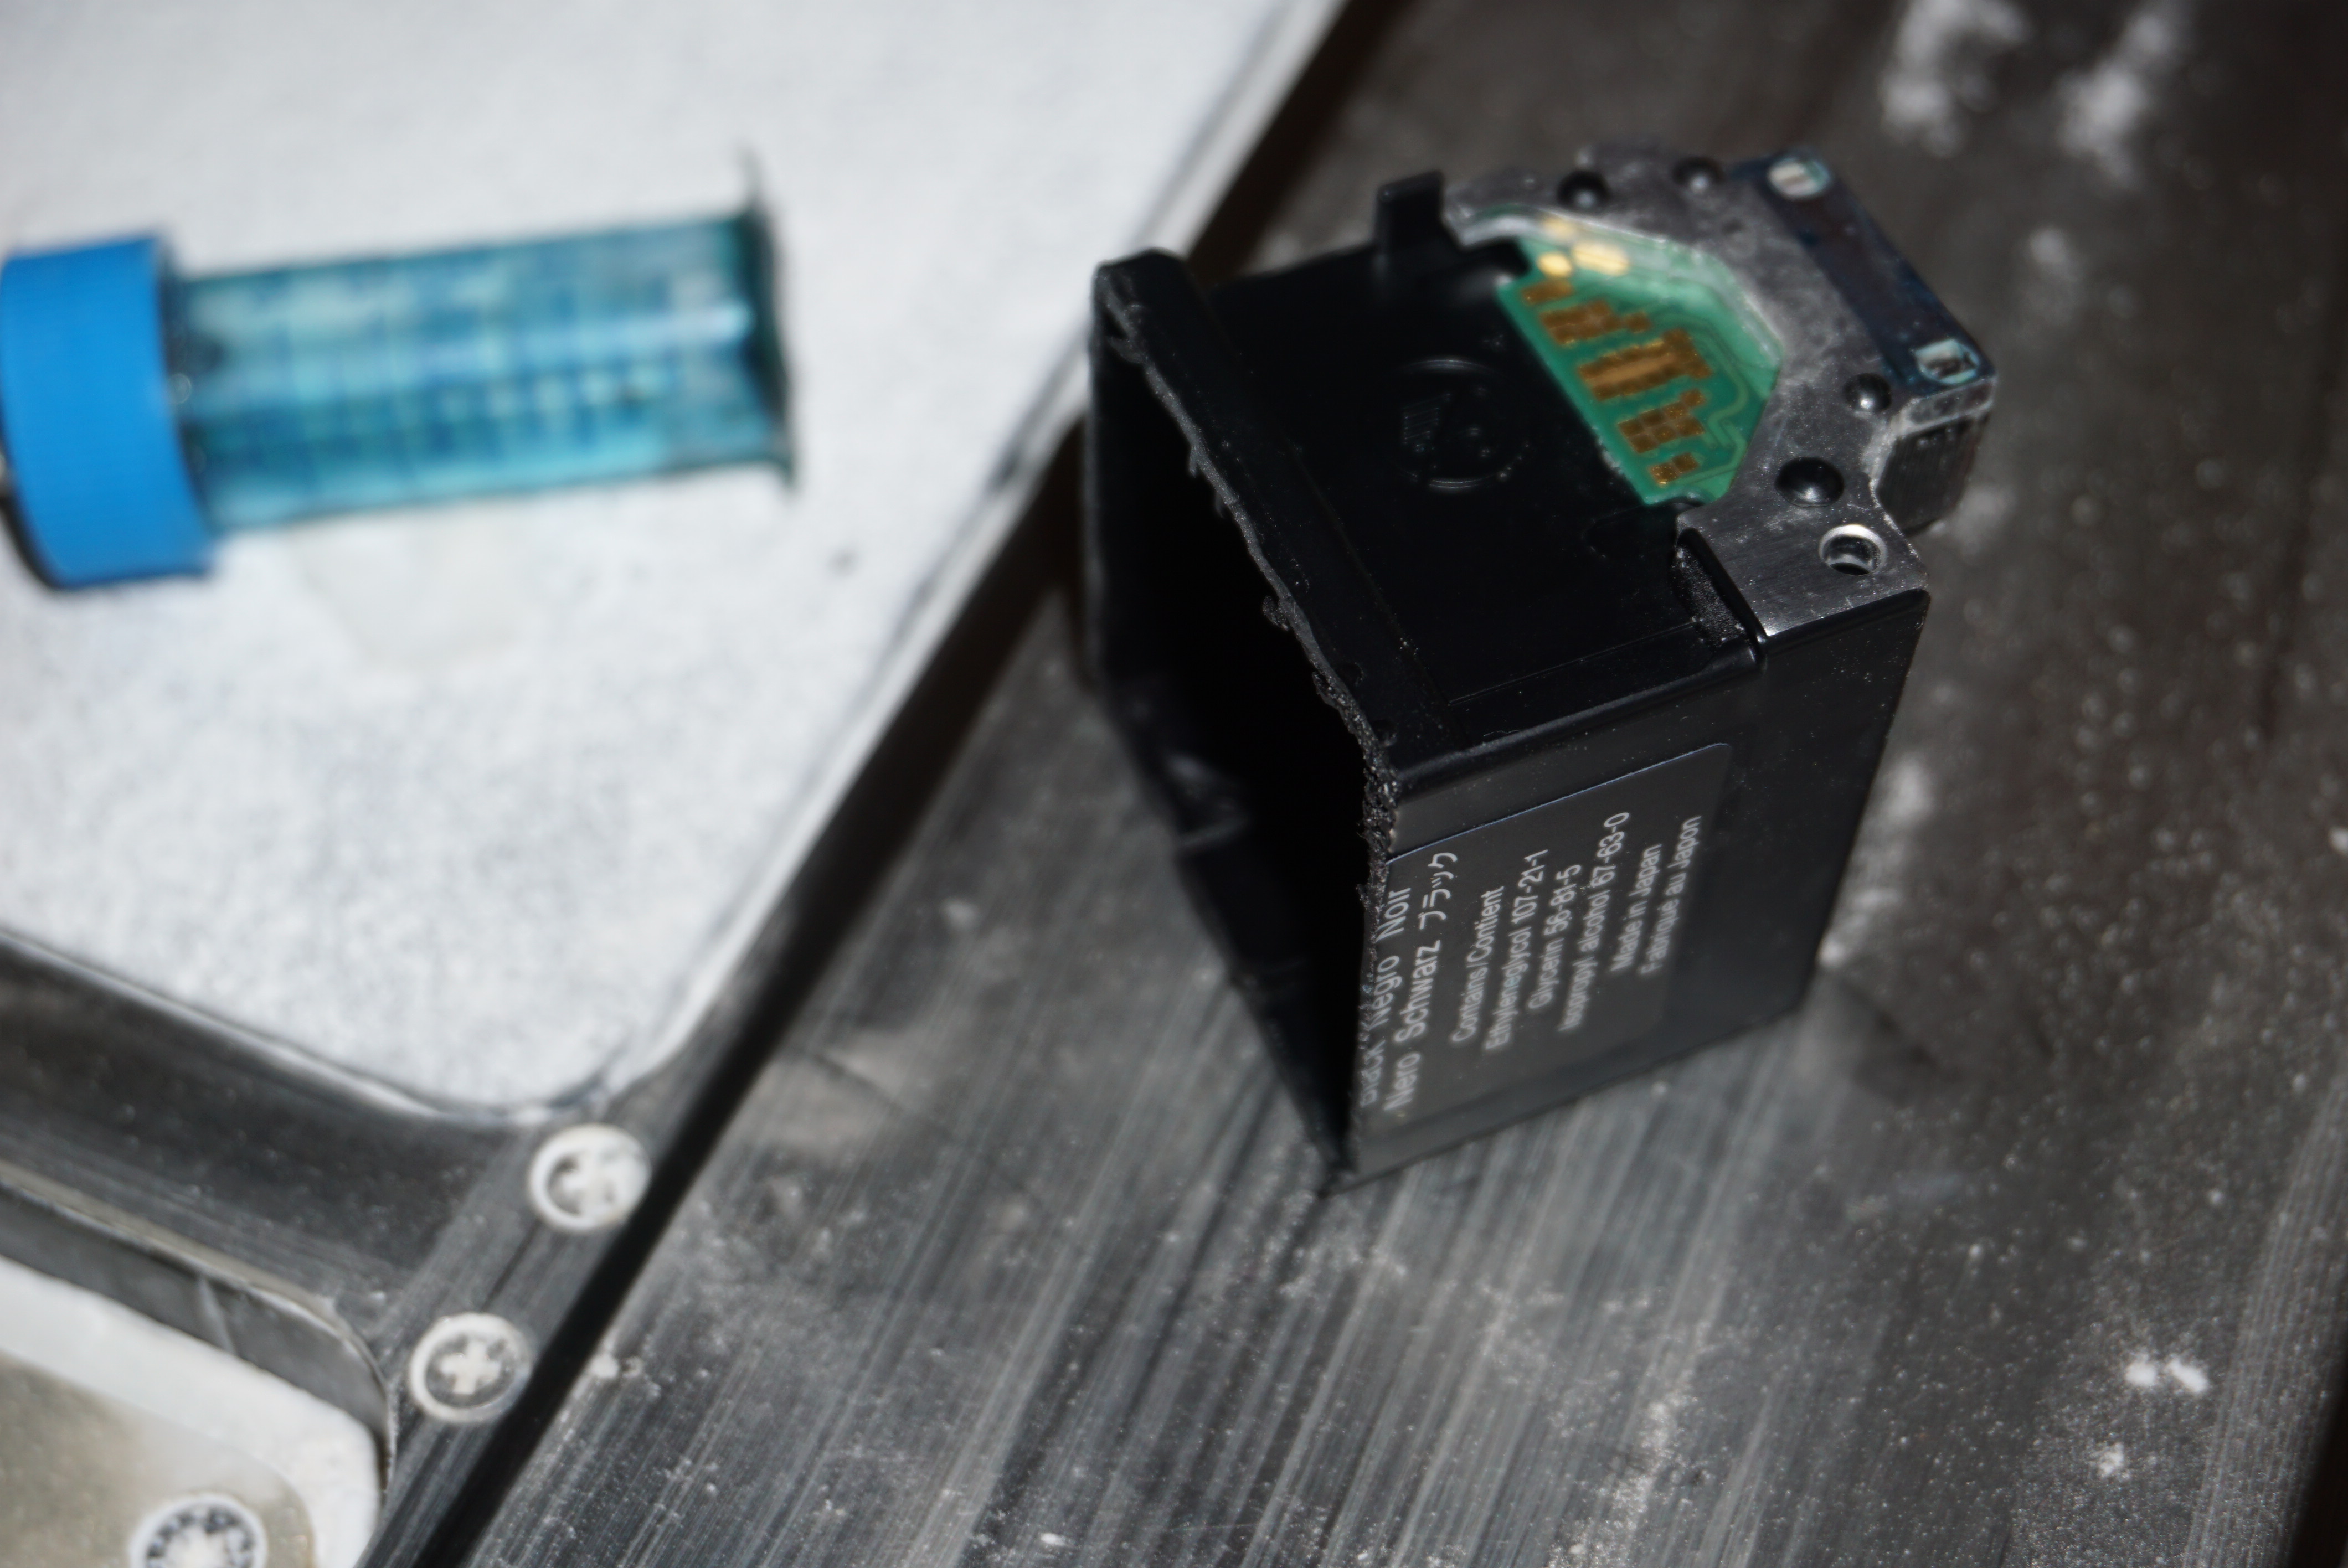

There are several ways of making a BC-20 a zcorp head. There is simply gluing on hose glands to the printhead, Cutting the top of the printhead of and gluing a in special adapter (no link). There is also what my Z400 has, which is an odd hack, but a seemingly functional one.
The connector seems to be the original one, but it has an extra rubber gasket glued to it that interfaces with a boss that is naturally in the printhead. It is a bit weaker of a connection, but it takes much less work to modify the printhead itself. The printhead only needs to be cut open. I will see if I can make this system work.
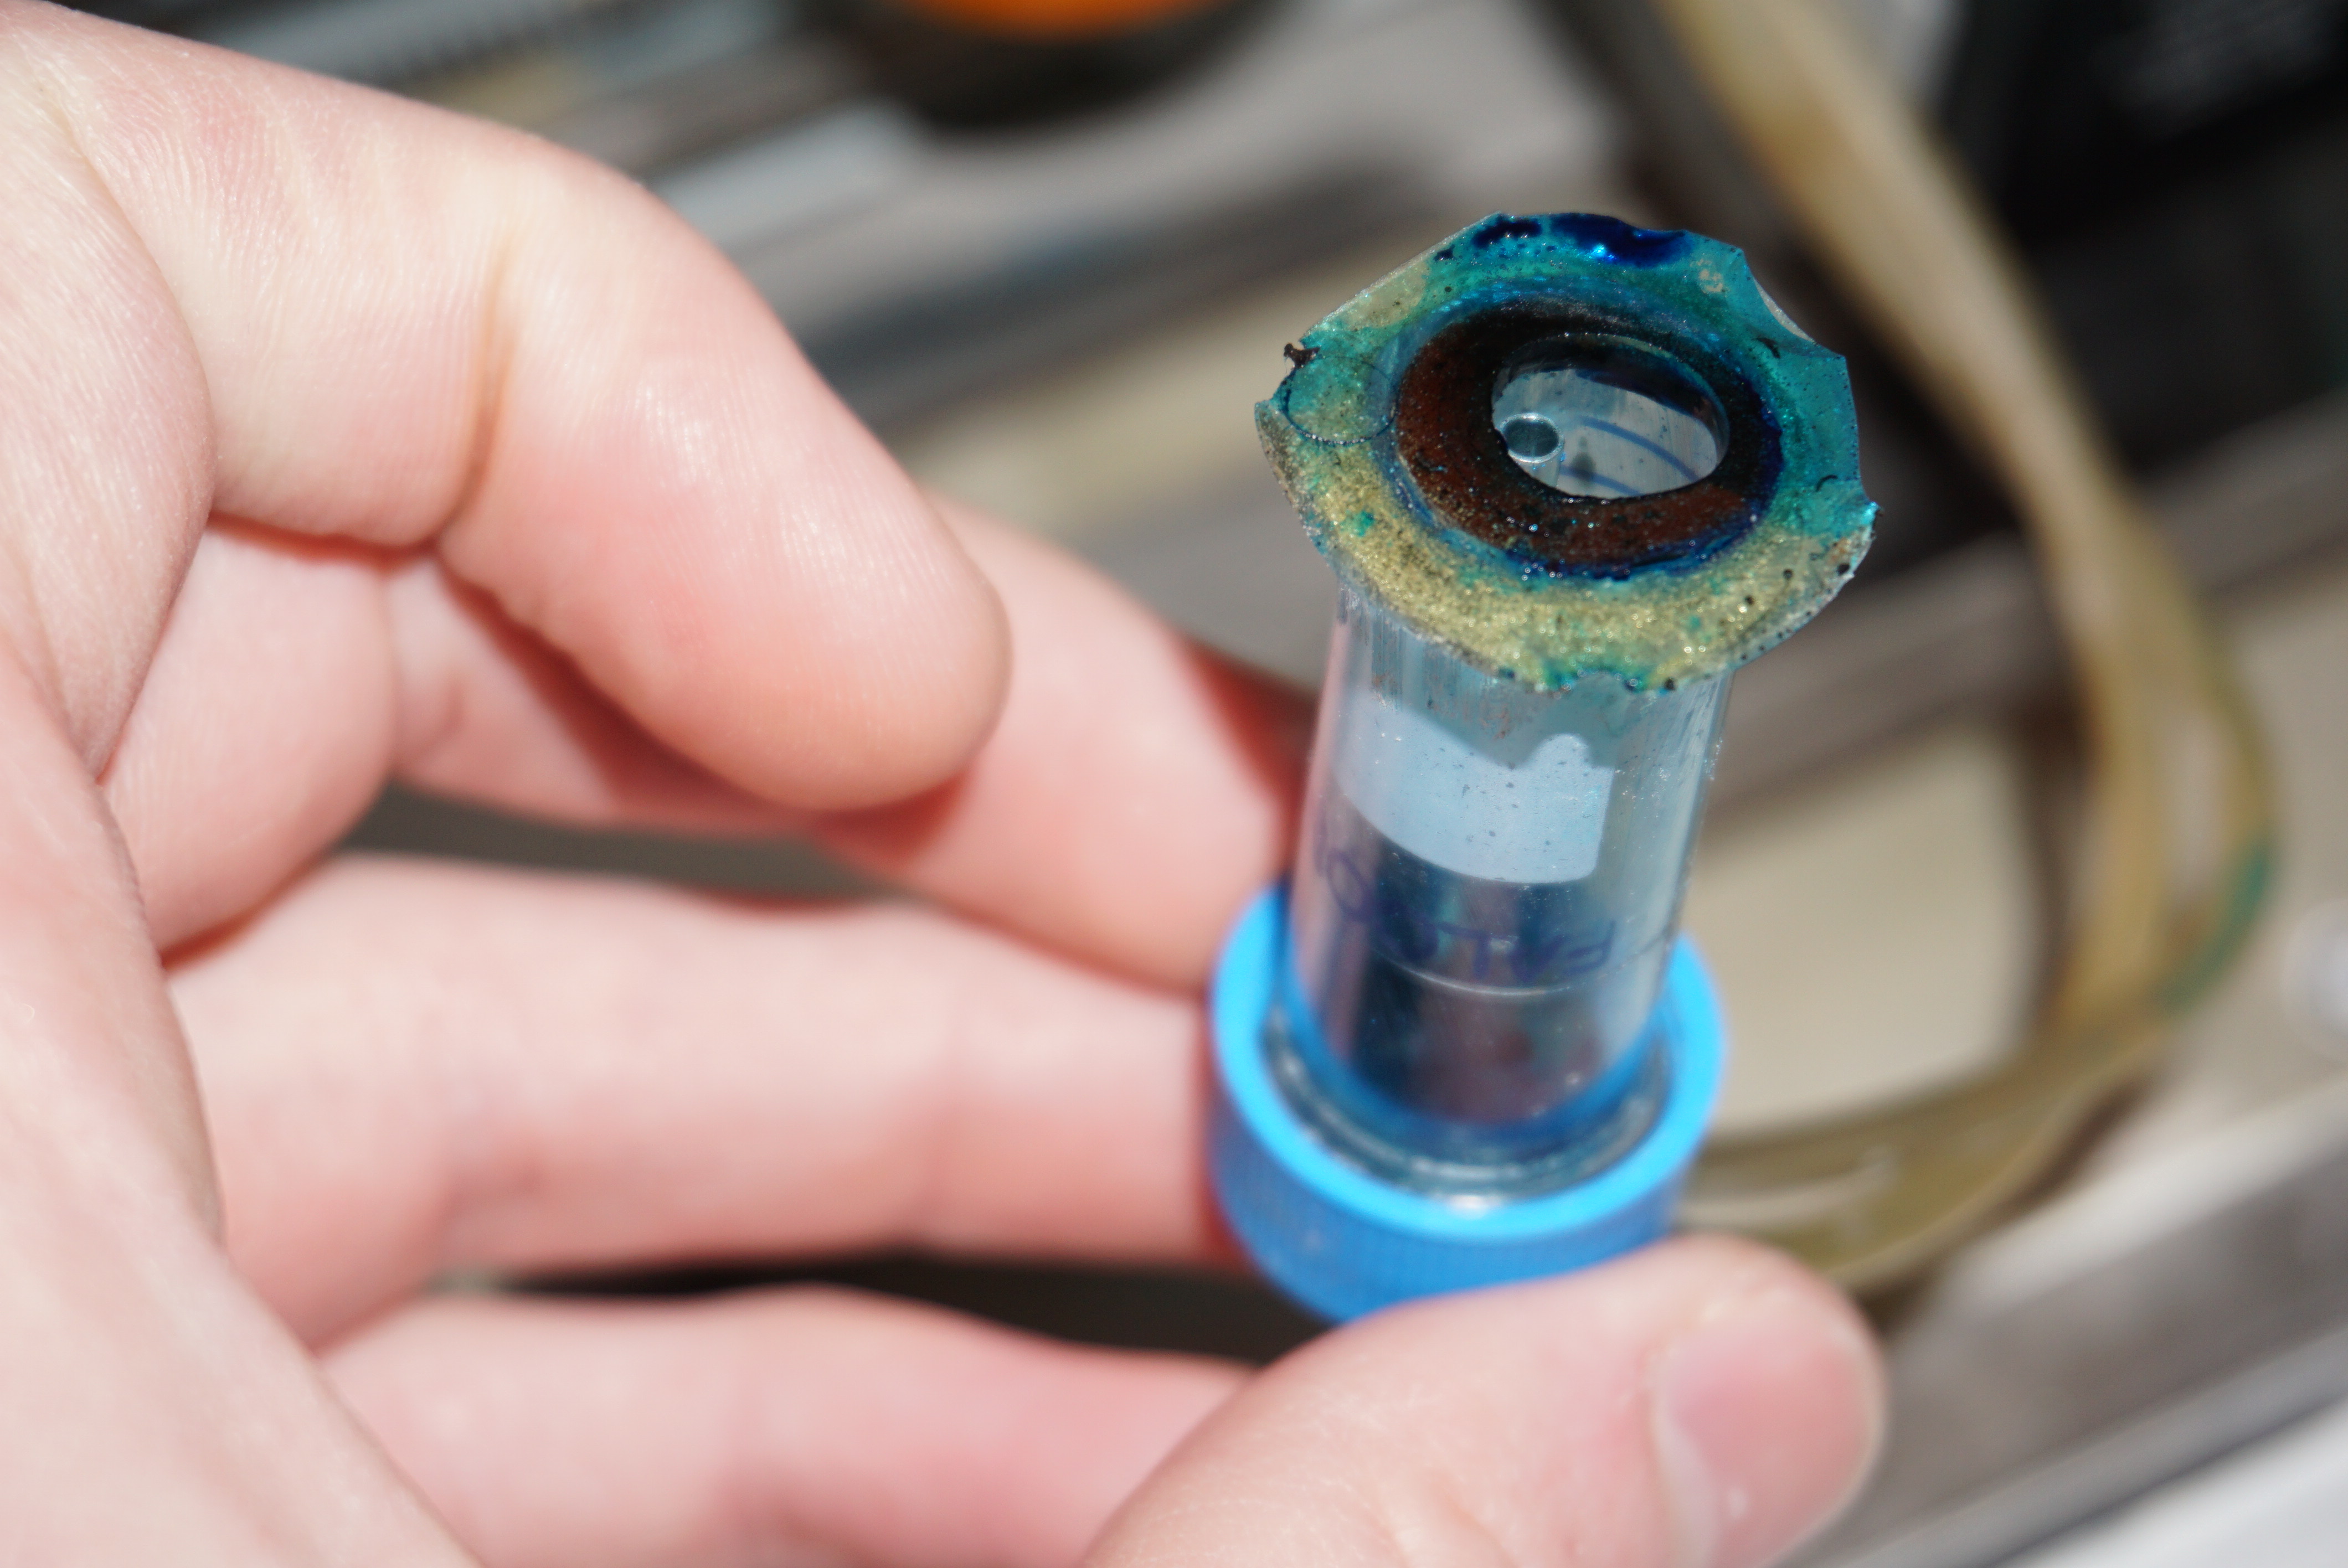
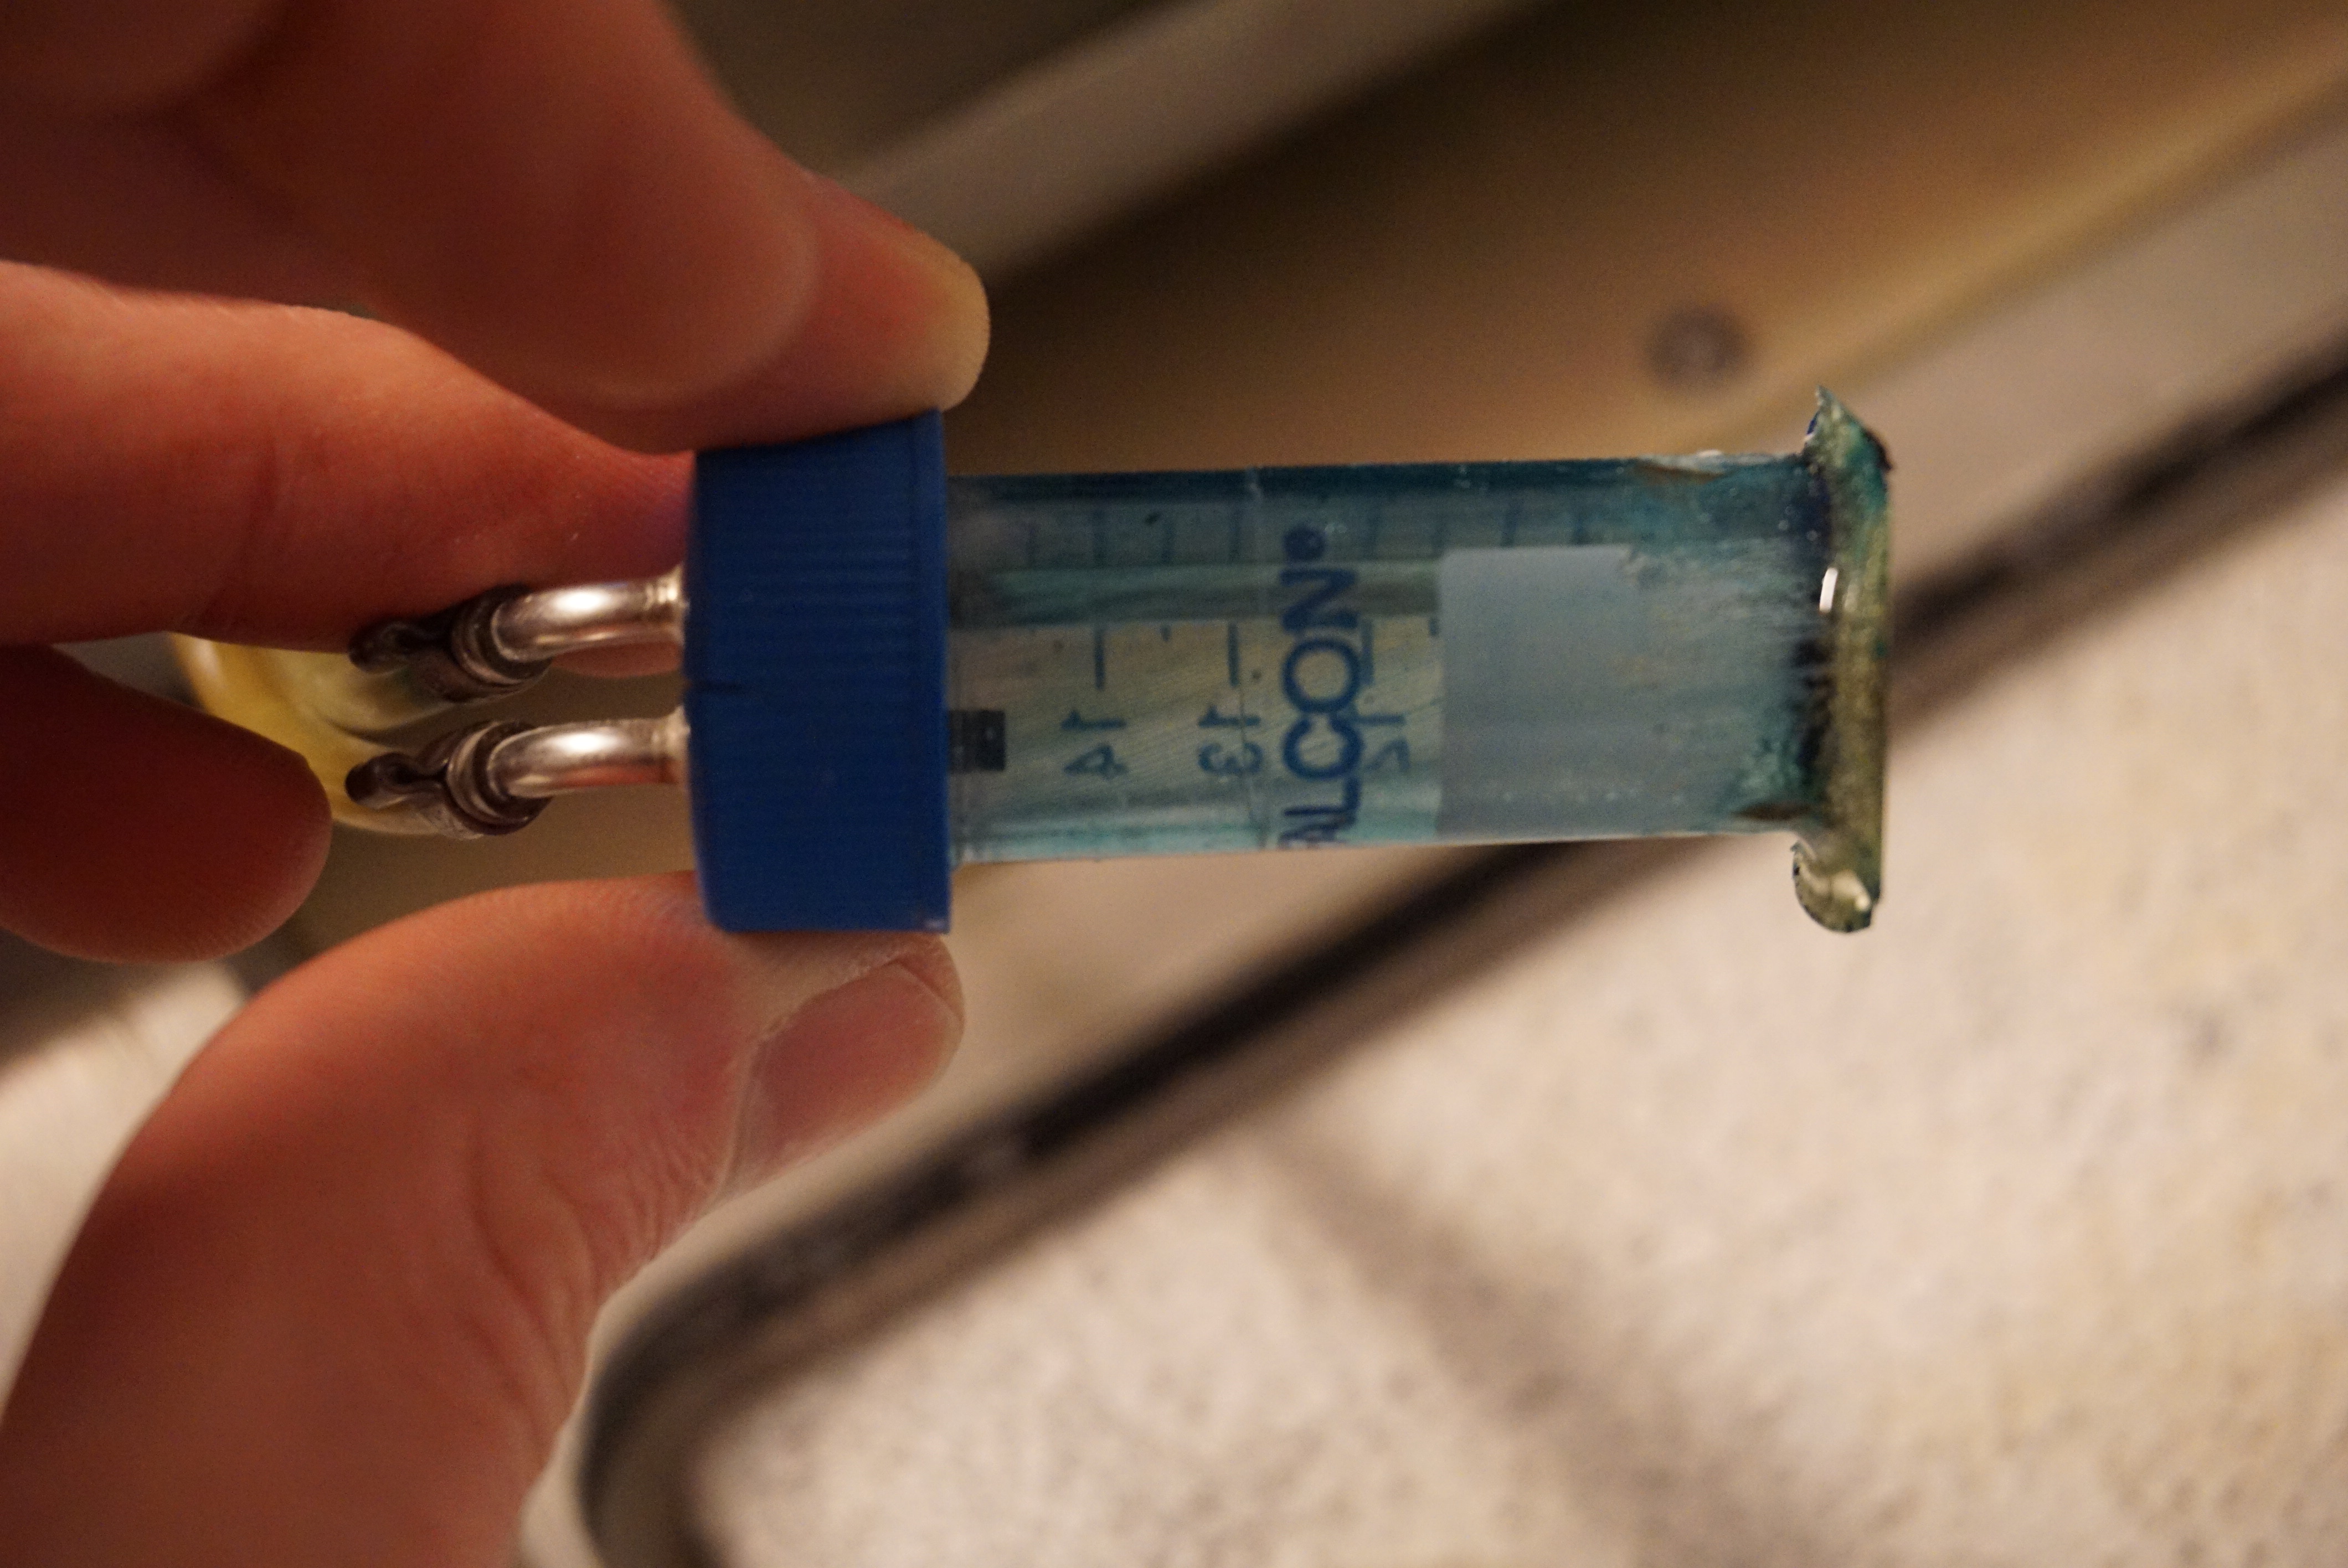
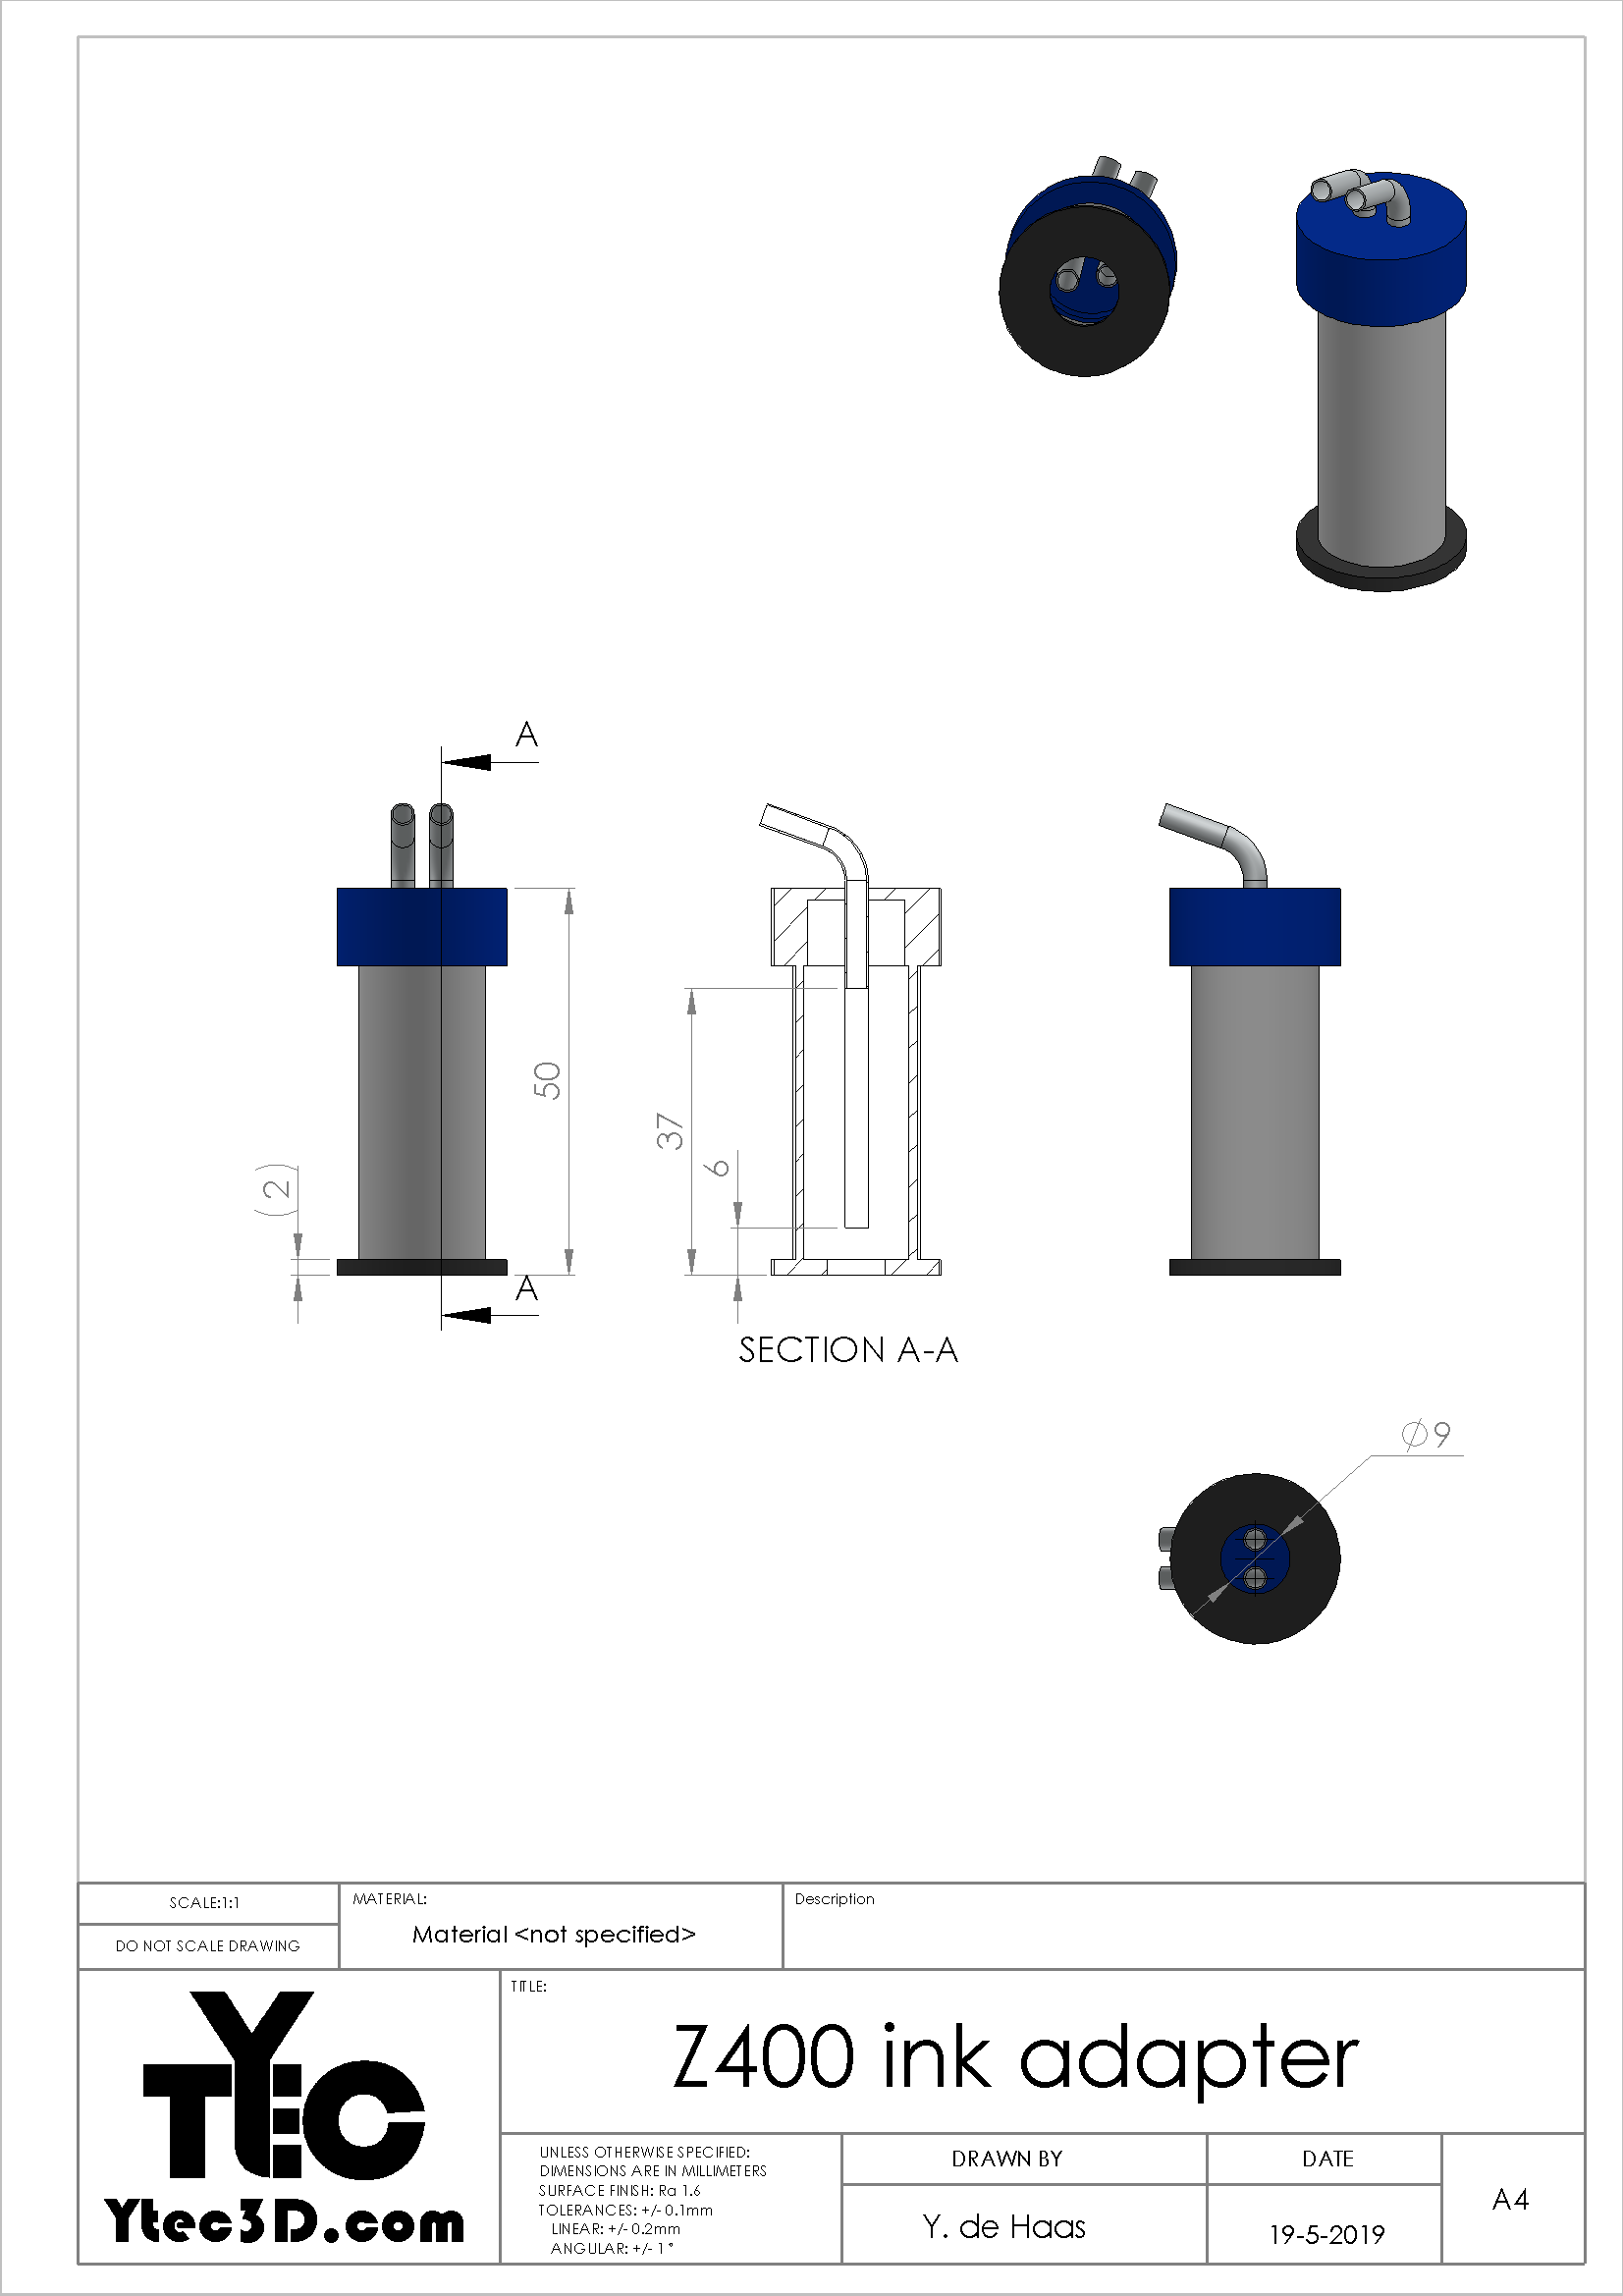
I did some measurements of the connector, and the drawing is below.
Ejecting ink
Enough talk, lets test it. Does the Z400 actually print?
Yes, but not really. It moves and tries to print, but no ink actually comes out. It is convinced it works, the printhead is sensed. When I pull out the printhead on a life machine, it gives all sorts of errors (suggesting it sees something). Somehow, ink is not flowing. A few possible options:
- The dock does not start the printhead properly;
- The printhead freezes too quickly after it was primed;
- Though the printhead is sensed, no full connection to the head is made;
- The machine is so altered that it only prints with modified printheads;
- The printhead I have is a dud (It is a BX-20, though I am told they are the same)
I do not know which issue it is right now, but I will start ruling out the possibilities as soon as possible.