Table of content:
- Part 1: The beginning
- Part 2: Electric overhaul
- Part 3: PC power
- Part 4: Trying to print
- Part 5: INK!
- Part 6: Leaky pistons
- Part 7: (you are already here)
- Part 8: Printing in powder
Unobtainium
Inkjet printers use inkjet printheads, and the Z-corp is basically a glorified inkjet printer. The printheads for essentially all printers ever are still sold, if only as re-manufactured heads. Logic would suggest that there is a place where I can buy Z400 printheads. Well, sadly, no. Z400 printheads are pure unobtainium. Ludicrously expensive while they were still in production, and basically non-existent now.
However, the Z400 are basically modified Canon BC-20 heads, and the Cannon BC-20 heads (or at least the BX-20 heads, which are the same) are still being sold. Original ones are not cheap (€60 per head), but re-manufactured, they can be found for under €15. There are a few options for modification.
You can cut open the head and glue in some part inside the printhead. This way you will have less buffer in the head (and no longer have the annoying sponge) but it requires more parts. The other way is what I am going to use. Most of it is based on this site: http://blog.freesideatlanta.org/2011/07/making-print-cartridges-for-z400z402-3d.html
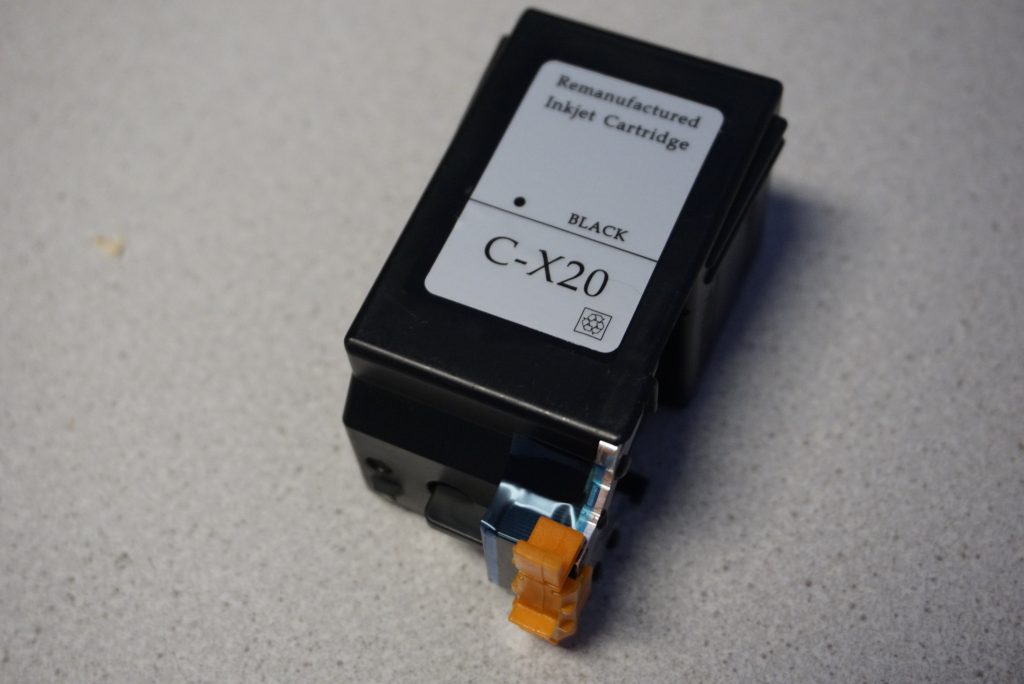
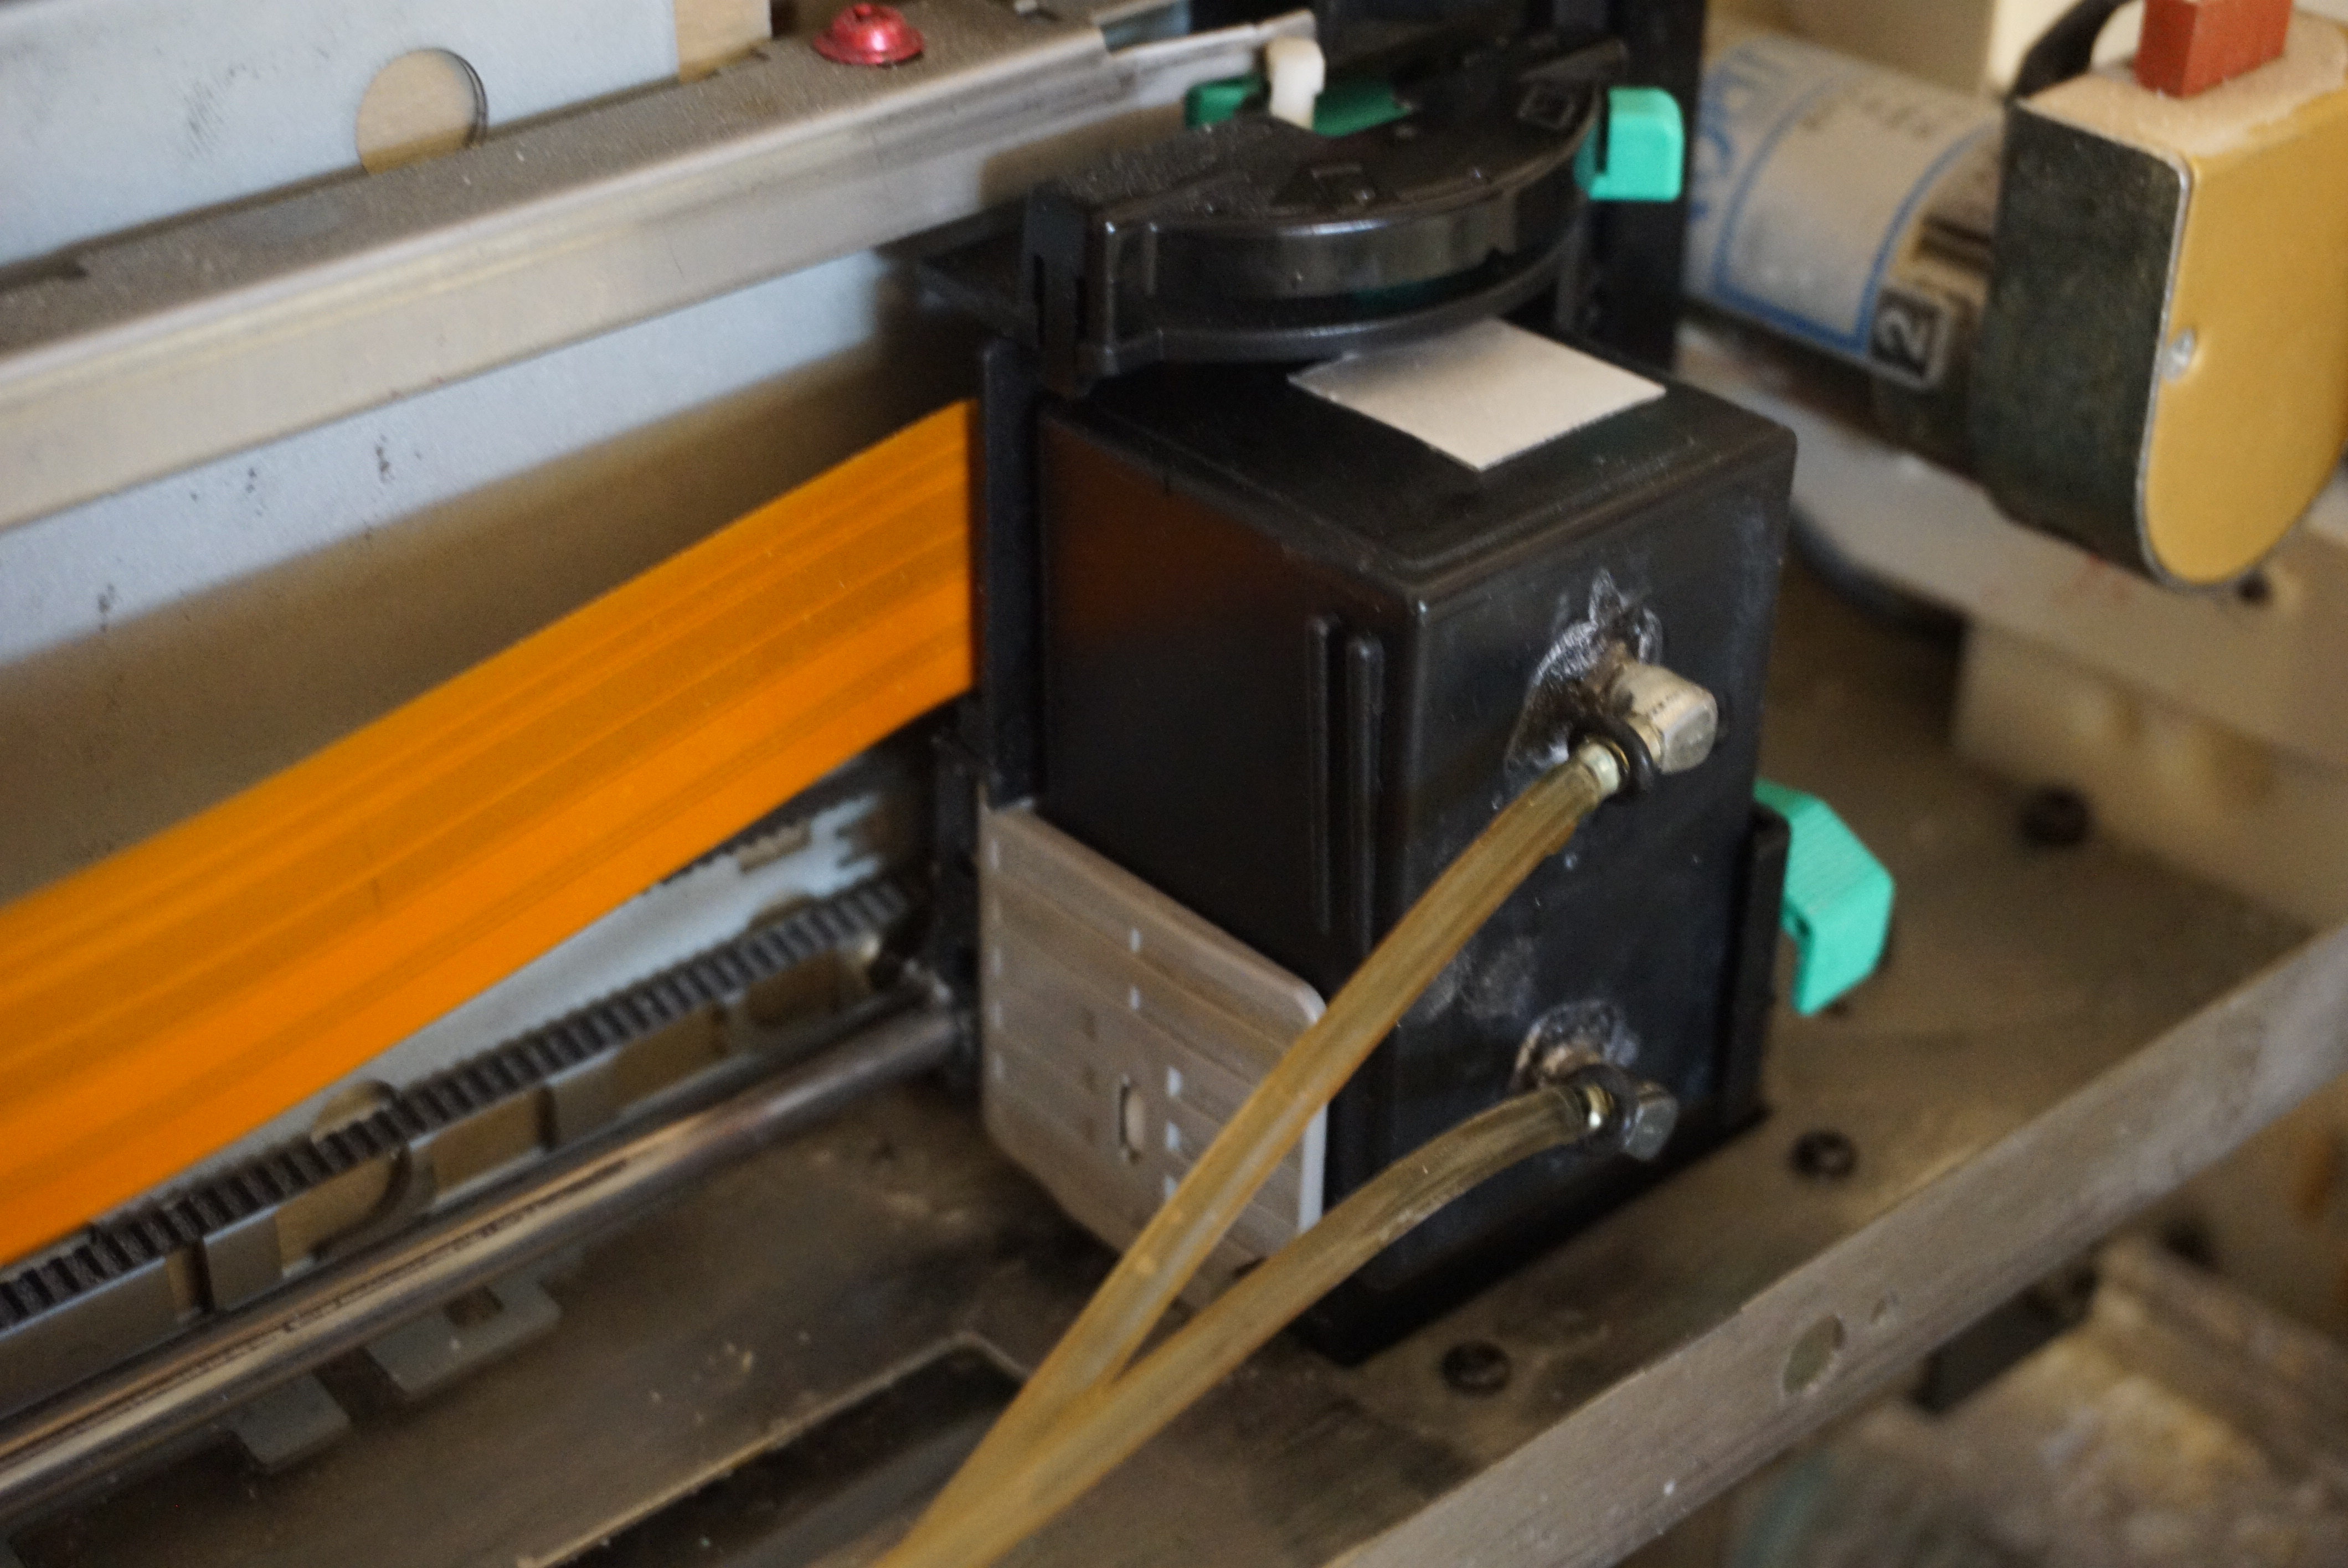
Modifying a printhead
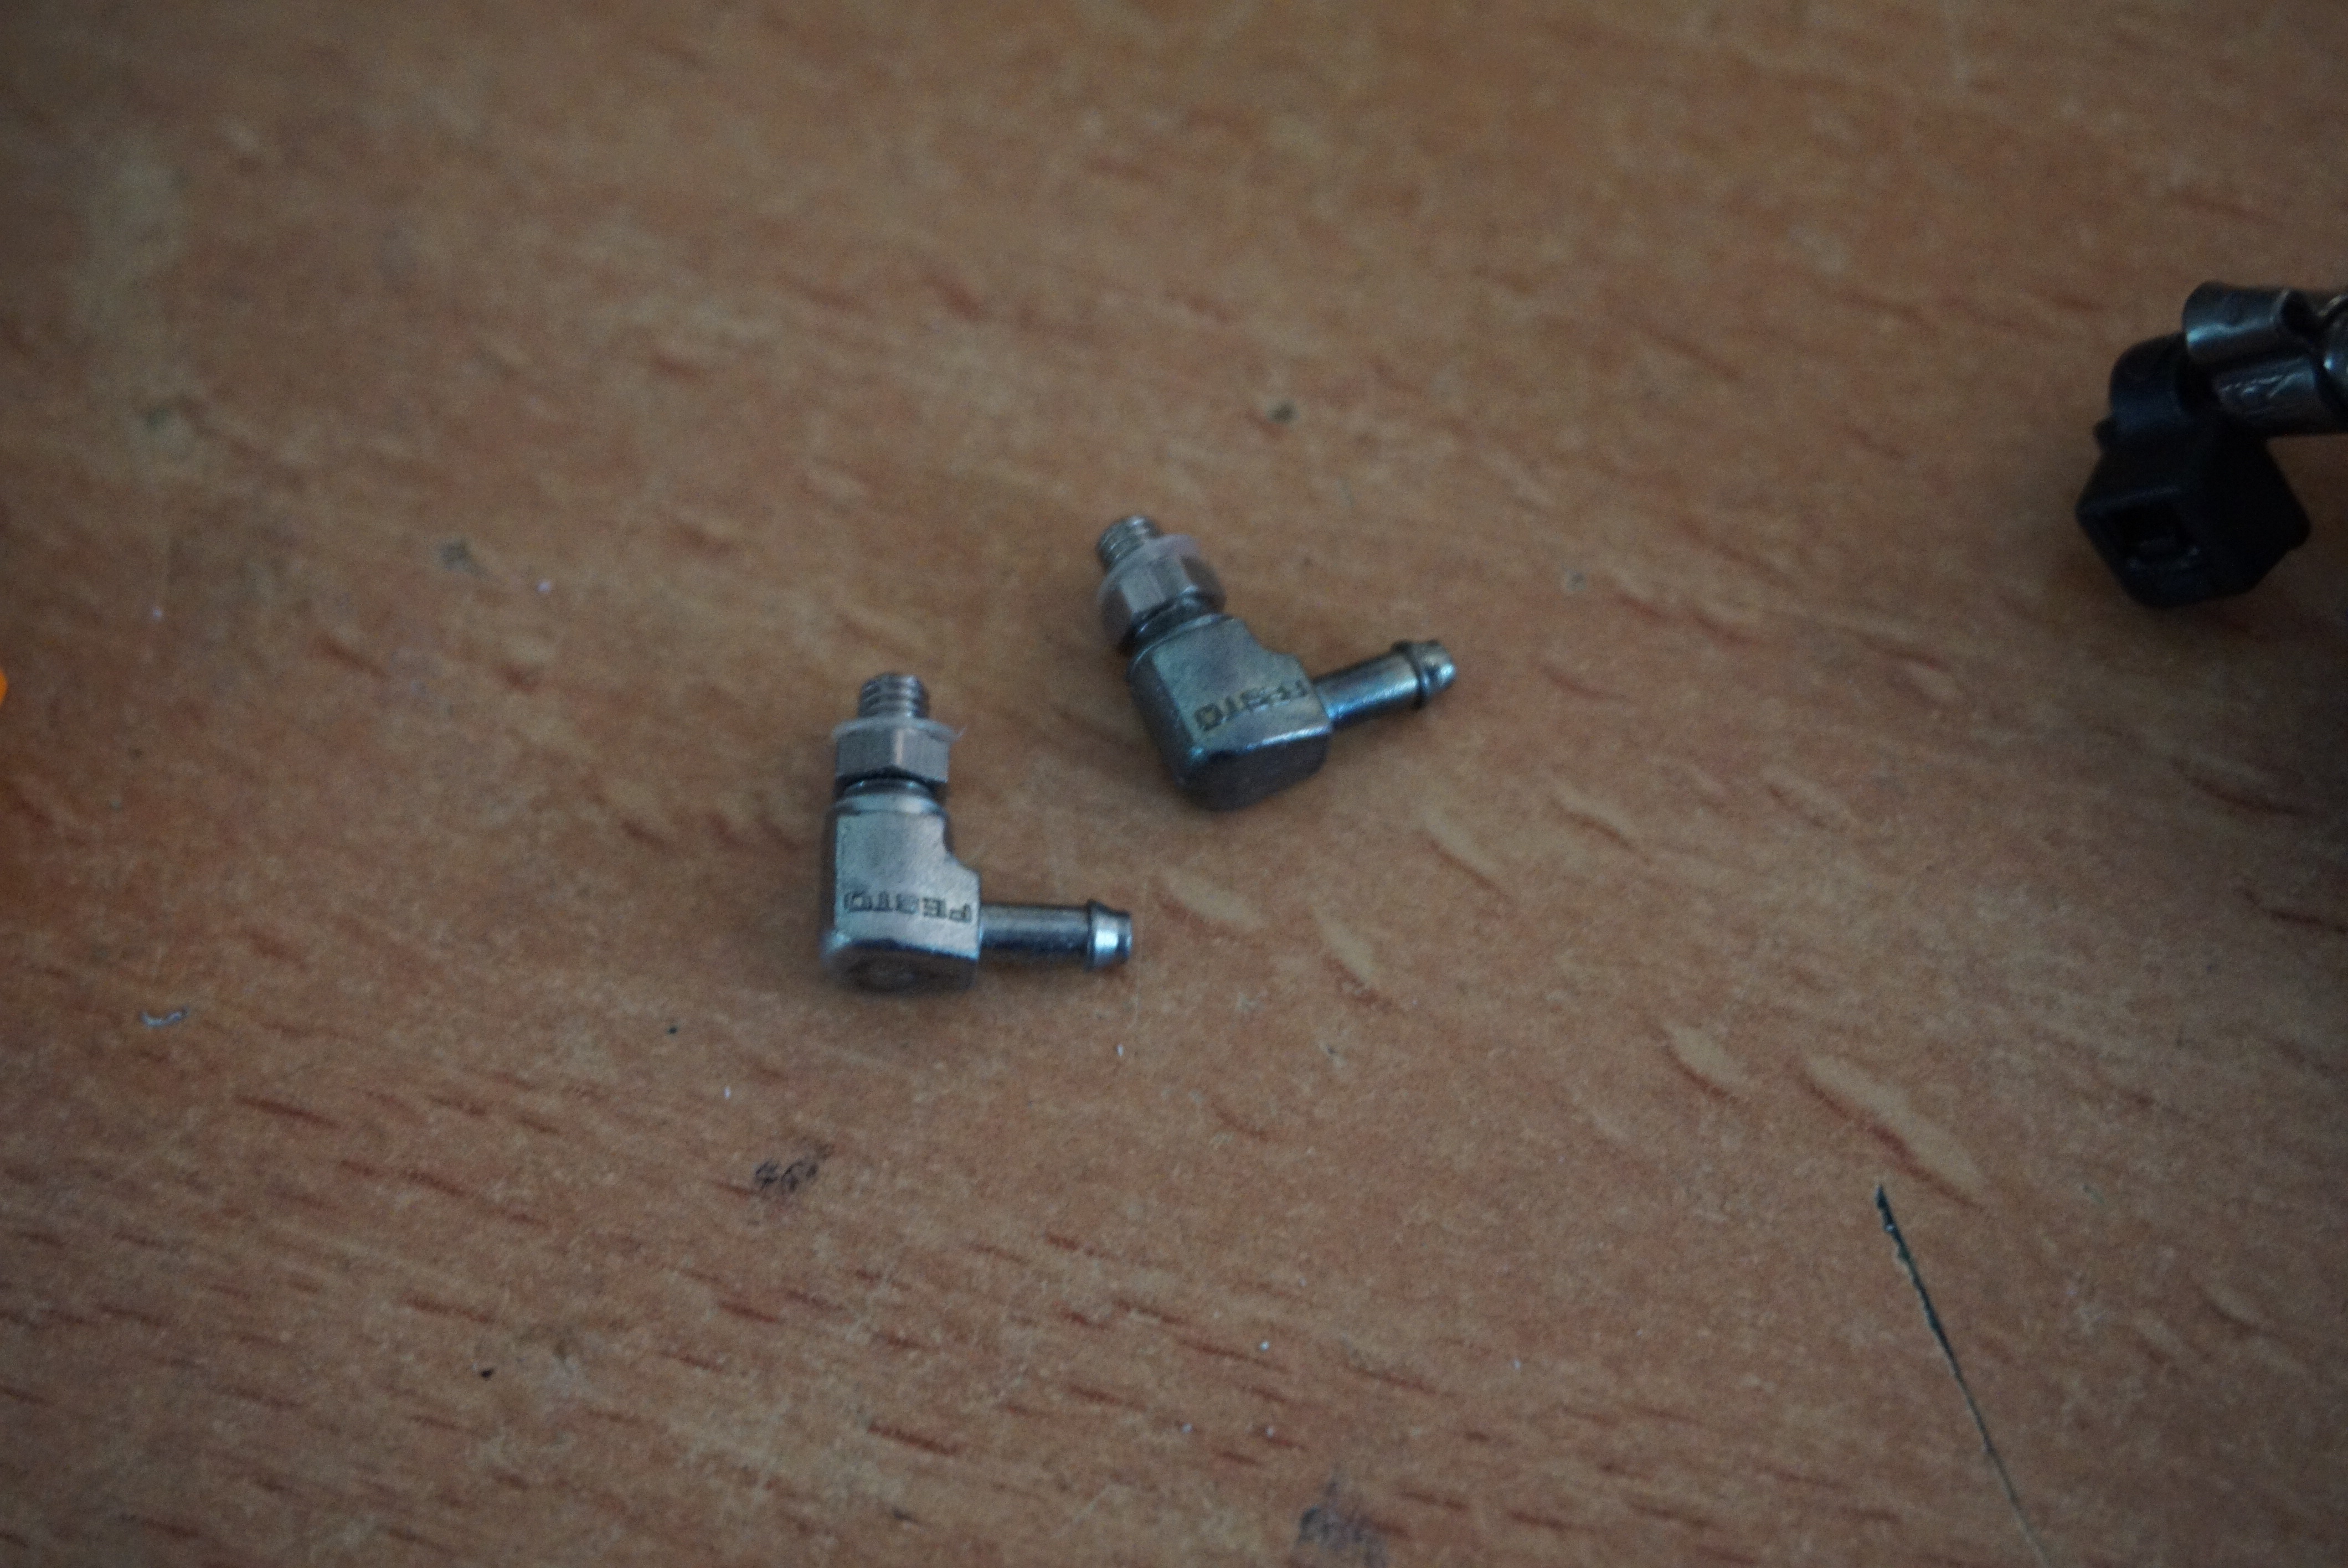
The head I will be using is a Cannon BX-20. I bought BC-20’s but it is all the same. I have also scavenged some barbed fittings from the pneumatic parts junk bin at my work, but any small hose barb will work. A full list of items needed:
- The Cannon BC-20 or BX-20 printhead
- 2x Hose barb fittings
- A drill to match the hose barb
- Some sort of glue (I used CA with activator)
- A syringe
- A tube that fits the hose barb
- Some tape of any kind
- Running water and a sink (it can get messy)
Two things to note here. One, this is my first BX-20 modification. It is more a rough guideline than an actual guide. If I get requests, I might make a real guide. Two, Do this in old clothes or at your own risk. Inkjet ink is incredibly potent and can be diluted 1000 times and still be pitch black. If you get this stuff in your clothes, it will stay there. If you get it on your fingers, it will stay there (for about a day).

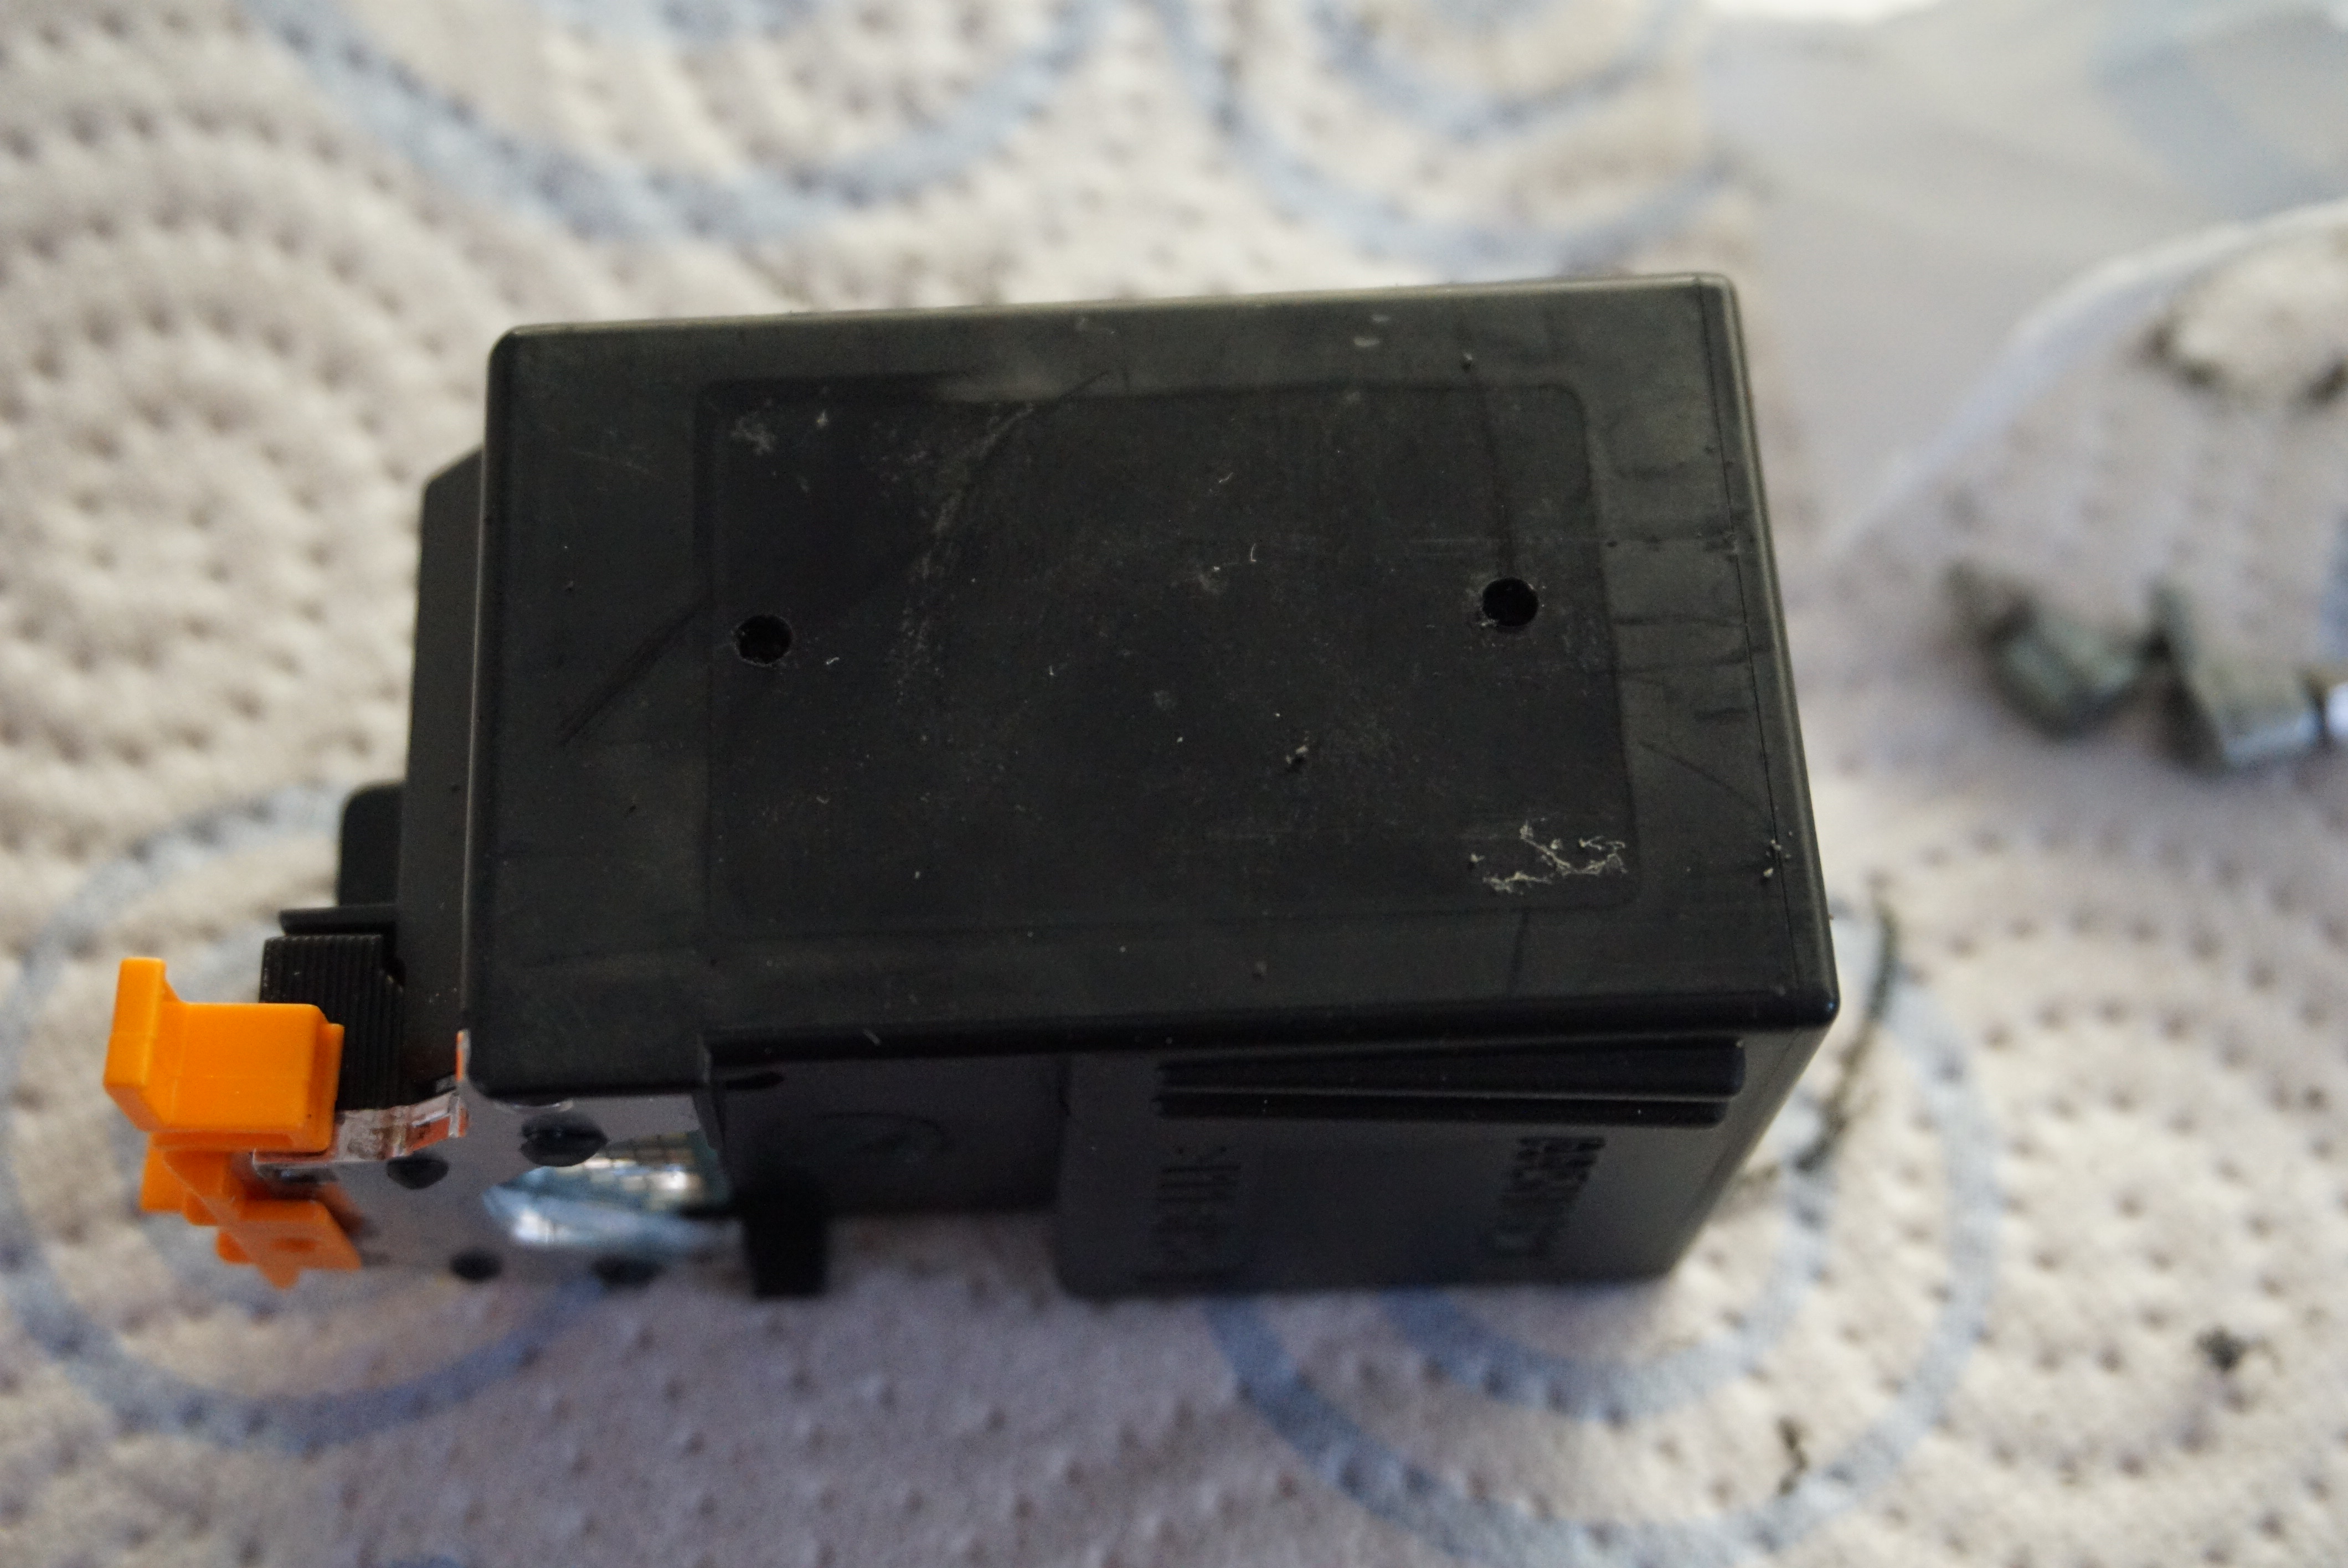
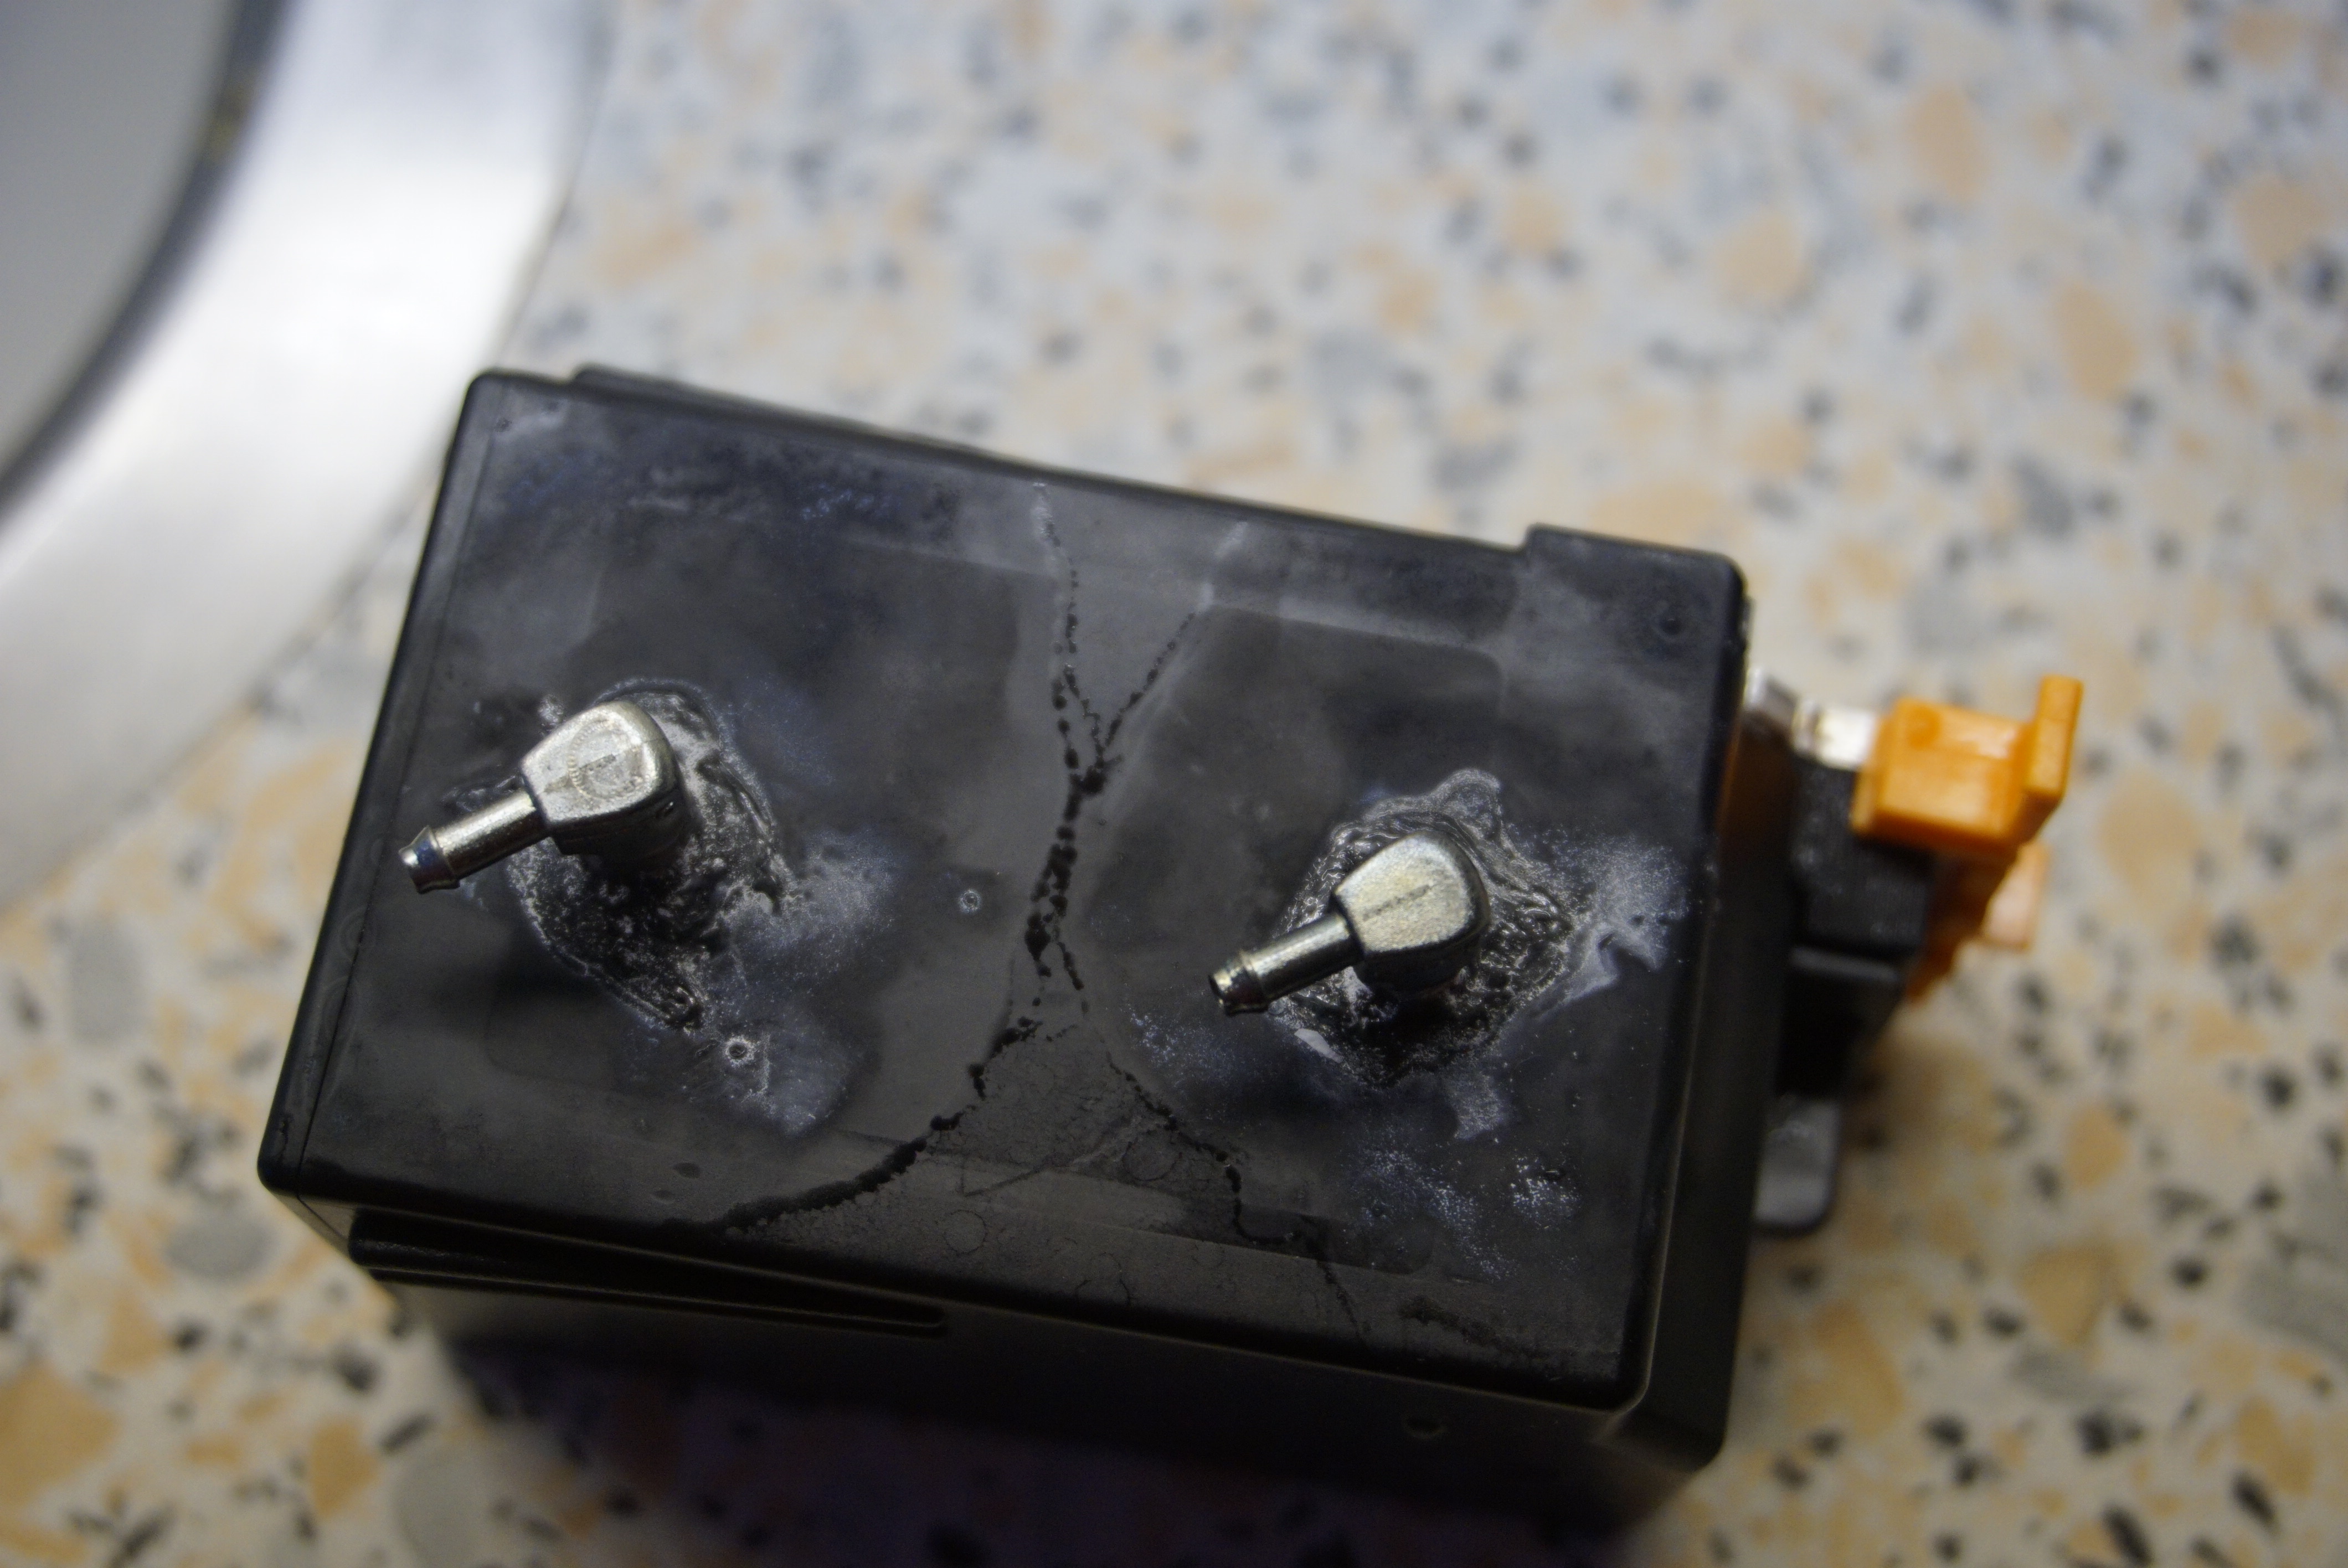
I first started by drilling 2 2,5mm holes in the side of the printhead. One about 1cm from the bottom, and 1 about 1cm from the top. The bottom one is for the supply, the top one for the return.
I then mounted the hose barbs. I use used some CA around the edge of the barbs to make a proper watertight seal around the barbs.
Above a sink with running water, with one of the barbs facing down, I blew air through the other barb to get all of the ink to flow out of the hole. I Filled the head with water using the syringe. I then repeated these steps until the water coming out of the head was clear. Using the same technique as above, I cleared as much water from the head as possible.
Last, an important step not mentioned in any other guide I found. Close the hole at the top. For normal inkjet operation this hole is required, but for CISS, this hole will cause a nice fountain to appear. I simply stuck some tape on the hole to close it.
The printhead was now ready for use in the printer.
With the printheads ready and installed, I can now try and print. Next blog, me trying to print.